Dear Guest,
Please register or login. Content don't create itself!
Thank you
-
 The story of a new Llewellyn frame model with no name Part 1
The story of this new Llewellyn frame model with no name (yet) begins a few years ago.
After many years of making lugless and lugged bikes I had by 2006 switched by design and desire to just lugged frame only production.
I like being creative and designing, seeking solutions to making things, which results in a new part or a new frame model. However I soon get restless and after the last major lug project with Dario Pegoretti which was the Cadenzia lugs set for XL or DOO over size tubes with a level top tube I needed to push on.
https://www.flickr.com/photos/llewel...57650498412866
Towards the end of 2012 I put together the “Voyageur” project which was my flavour on an integrated Randonneur bike, with stainless bespoke racks, clip on bags (straps are errrr) bringing together all the ideas and features I considered useful and with functionality that had accumulated. That was a big project and the most involved bike project I have undertaken due to the complexity and numerous jig and fixture construction. A good Randonneur bike is many levels more complex than a racing bike. The result was most pleasing for me and for the clients who have paid me their hard earned dollars for this Llewellyn model.
https://www.flickr.com/photos/llewel...57634807572631
Meanwhile I do some small casting bike frame design projects but my mind is thinking of the next project and as Nick Cave says
“Most people wait for the muse to turn up. That’s terribly unreliable. I have to sit down and pursue the muse by attempting to work”
An idea of going back to a lugless frame and construction was forming in my mind for some time.
I like lugs, they work superbly, functional and to my and others eyes they have a pleasing aesthetic.
So if I do a lugless frame set, what could it offer that my current model range does not offer or do.
This went circulating around my cranium for some time. Big tubes, funky shapes just for the sake of fashion grates on me somewhat. During spells when I had a slow intermittent cut job on the lathe I would ponder and sketch.
I concluded that the path I would take is big tubes, very big for steel and also some other features and details that compliment the frame set. I am not a believer that stiffer is faster, less power absorbed from the pedal pressure on its way to twisting the rear hub. If it was so, we could easily make frames as stiff as a block of granite.
However some clients desire or have a strong fetish for STIFF. The ideas sat on a side shelf in my cranium, not at the front but visible and within reach and I would kick it every now and then.
Then late 2015 comes a phone call from Dr Brian McLean. Brian and I have known each other for 30 years and worked together on numerous projects while he worked at the Australian Institute of Sport as a cycling bio-mechanist and I as a team mechanic. I was a bit different than the other mechanics as I interacted a lot with the biomechanics and the physiology lab staff. I worked with Brian considerably during my work stints as a national team mechanic while I lived and worked in Germany and Italy. These days Brian now does a lot work with the New Zealand national team as well as private fit ups of clients, including many of clients.
Brian rings me one day and says, “I want to talk to you about a new project for myself, when can I come over for a chat?”
We arrange a time and we chat while sipping a couple cups of Yorkshire tea.
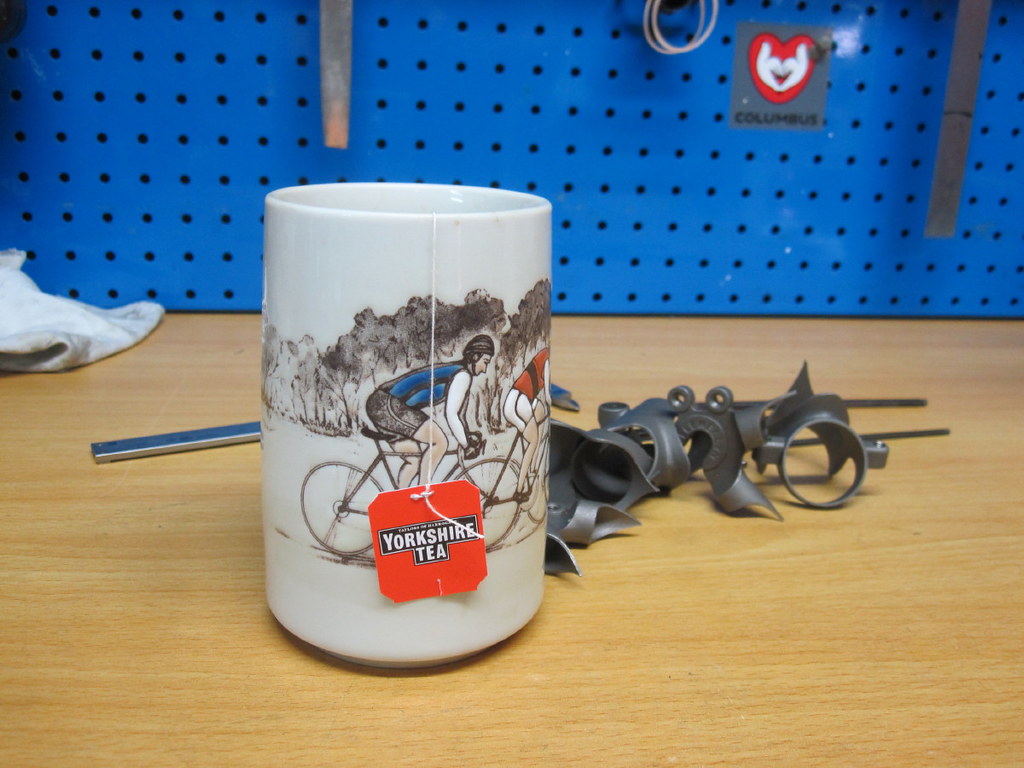
Stay tuned for part 2
-
 The story of a new Llewellyn frame model with no name Part 2
Brian, says , “I like steel, I want a new bike, I am looking at a new aesthetic and super stiff, because I want to give it a go and see what it is like." (Brian has a Llewellyn Crescendo from 10 years ago)
Dazza (that’s me) “I have been pondering this for the last 12 months and I have some draft ideas in my mind.”
Brian, “How about the new Columbus HSS tube set.”
Now I honestly had to check up on the HSS tube set, I have seen many tube shapes from MS to MAX, to Mega and first used them from the Columbus range circa 1991. So this was a few new shapes. A couple were interesting.
Dazza “OK it is a new range of top and down shaped tubes.”
Much chatting, must pondering by me and we settled on the following Columbus tubes to try out on a prototype frame set
1. 1.5” tapered HT . Not light but accommodates the 1.5” Columbus Grammy Carbon fork.
2. Down tube in the HX shape which is formed from a .6/.45/.6mm wall 44mm diameter tube. That is a big tube for a material that is as stiff as steel.
This the HT end of the Down tube
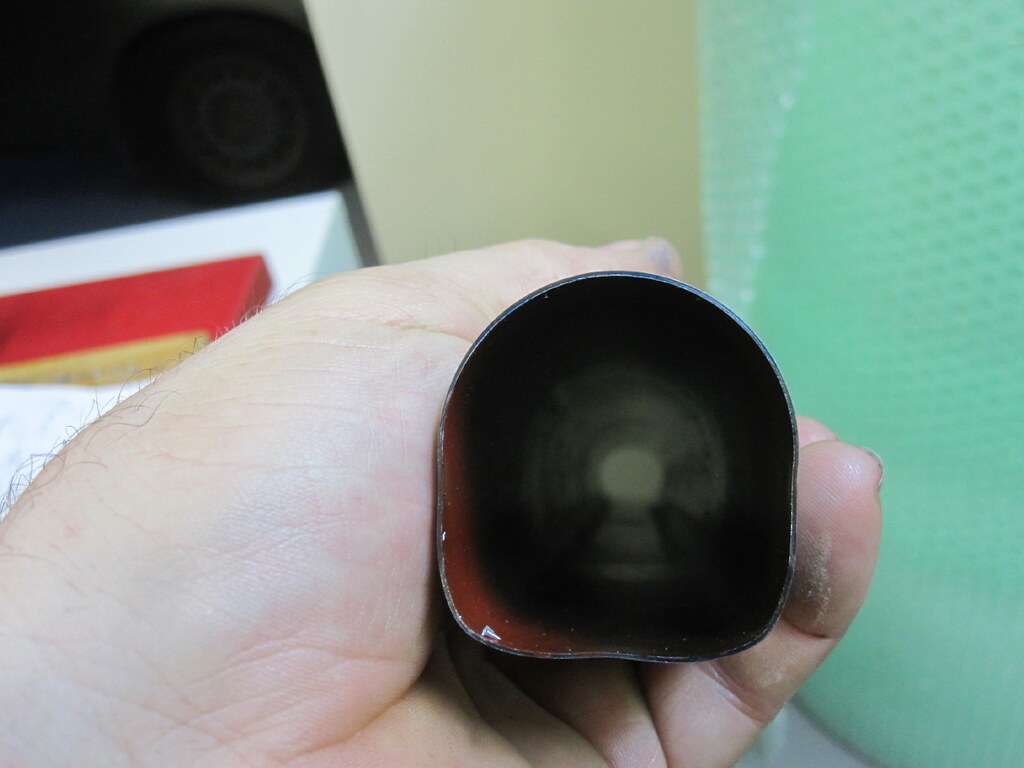
This the BB end of the down tube
3. External butted 32.7mm seat tube that will fit 31.6 seat post and allow for a braze on front derailleur mount. I have recently been involved with the correct redesign of a suitable braze on mount to established tolerances so this new part all works in well.
4. Top tube. We pondered on the AW shape from a 31.7 tube, but a fully round tube is better for torsion and I suggested 35mm round. We settled on .65/.45 35mm round single butted, yes single butted.
5. MAX chainstays. A lot of chainstay with these
6. 18mm (.45mm) diameter seat stays. I have these from a special production run Columbus have done.
7. Columbus 1.5” Grammy fork.
Other features decided on was internal rear brake cable through the top tube.
But I will never do internal gear wires. Dead straight cable runs is the only way for ensuring the minimum amount of lost motion in the cables for crisp gear changing. Di2 set up is easy if desired, however Brian is going to use the 9000 series DuraAce mechanical which I consider the best working mechanical groupset ever known to mankind, but the aesthetics of the grey etc, well I am bored with the contemporary fashion of grey on cars, bikes and every new apartment, town house or home currently being built in Australia.
I will not use a clip for the top of the seat tube binder, it is cheap and faster for production but I believe quality bespoke frames deserve better than that. In the past I machined M6 bosses from raw material and brazed them on, this is the simplest and cheapest solution but this time it needed to be a step up from that. Better function and aesthetics and facilitate construction of the frame.
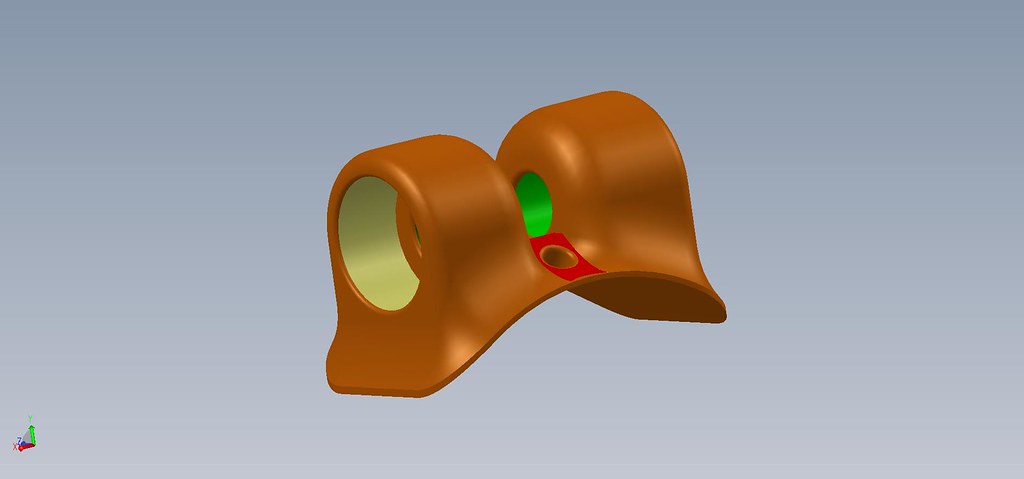
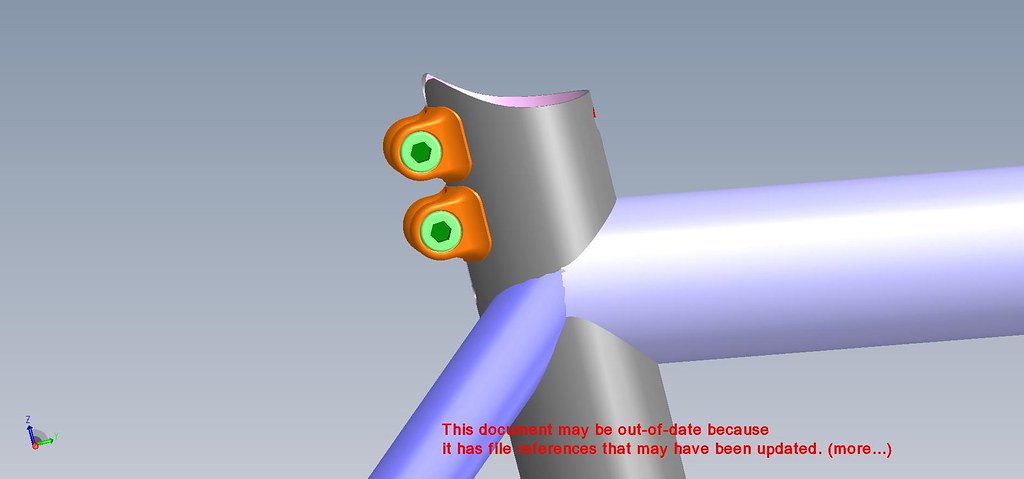
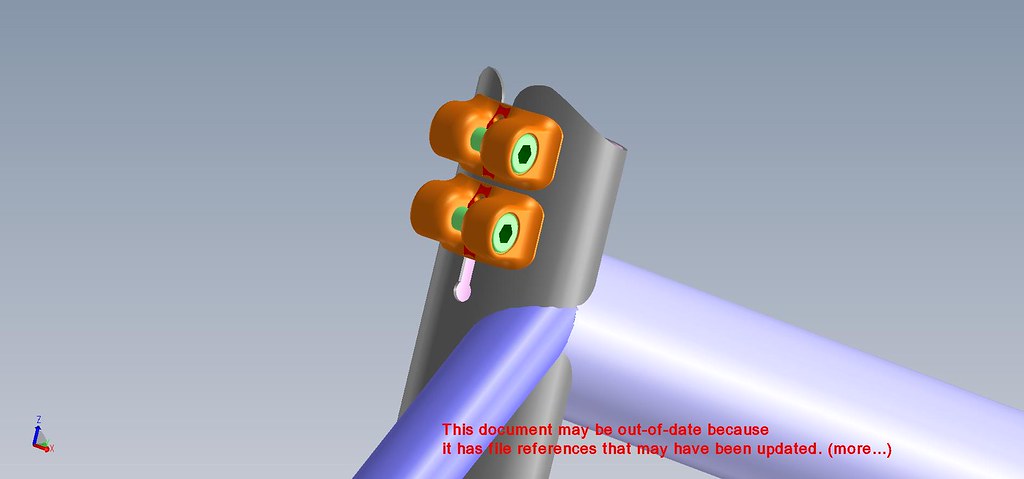
I sat down at the key board and worked up a 3D CAD model of the M5 braze on boss. The boss has frame builder friendly features such as location pin and braze entry hole which will be removed when the key hole slot is cut. Two of these M5 bosses will be used together to give a secure but gentle fastening of the carbon seat post.
Pictures of the 3D boss and how they will look on the frame in a draft 3D assembly.

Stay tuned for part 3
-
 Re: The story of a new Llewellyn frame model with no name Part 3
Seat post masts were discounted due to the availability of the correct seat tube to fit the criteria and also it achieves little but for an aesthetic and creates many other problems.
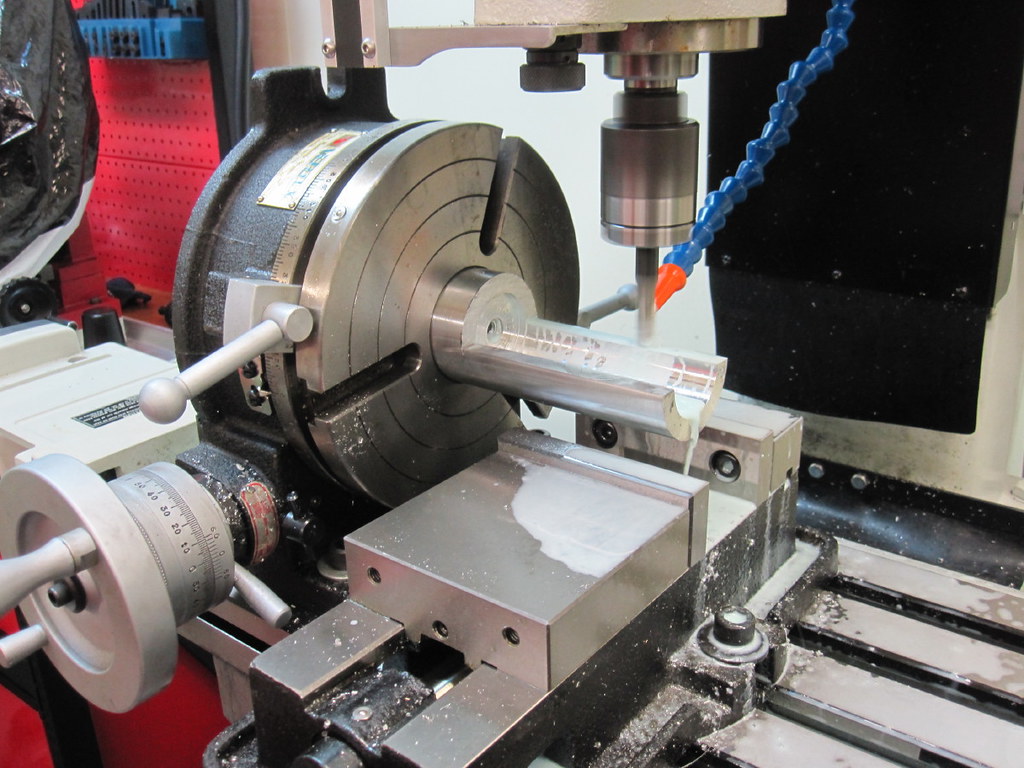
The big task ahead was tooling up to make these frames. Many new jig fittings and tube holding blocks to mitre the tubes is required and the big one was the HX shaped DT and the cone shaped head tube mitre.
I figured on a cone shape abrasive set up that needed to fit my existing tool and machine set up.
Many sketches and head scratching, many CAD drawings.

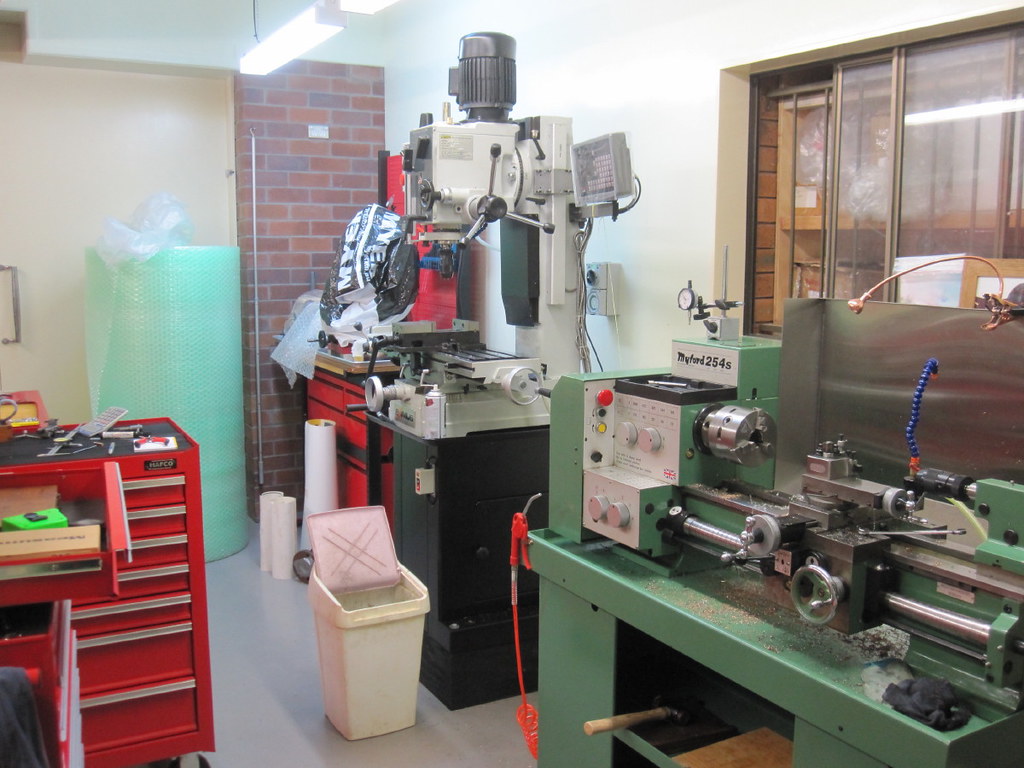
Then to the Red Room workshop to make a pile of swarf.
Made up a fixture to machine the wheel bite facets for much better accuracy on the prototype’s chosen dropouts that fit the MAX chainstay’s bigger tips.
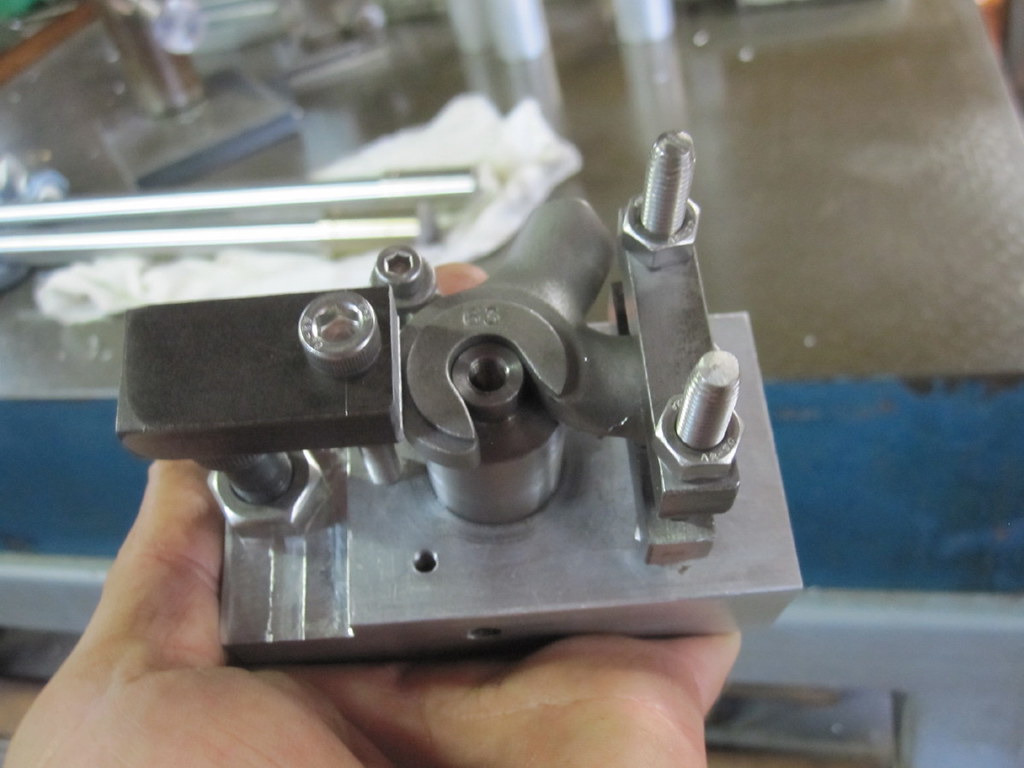
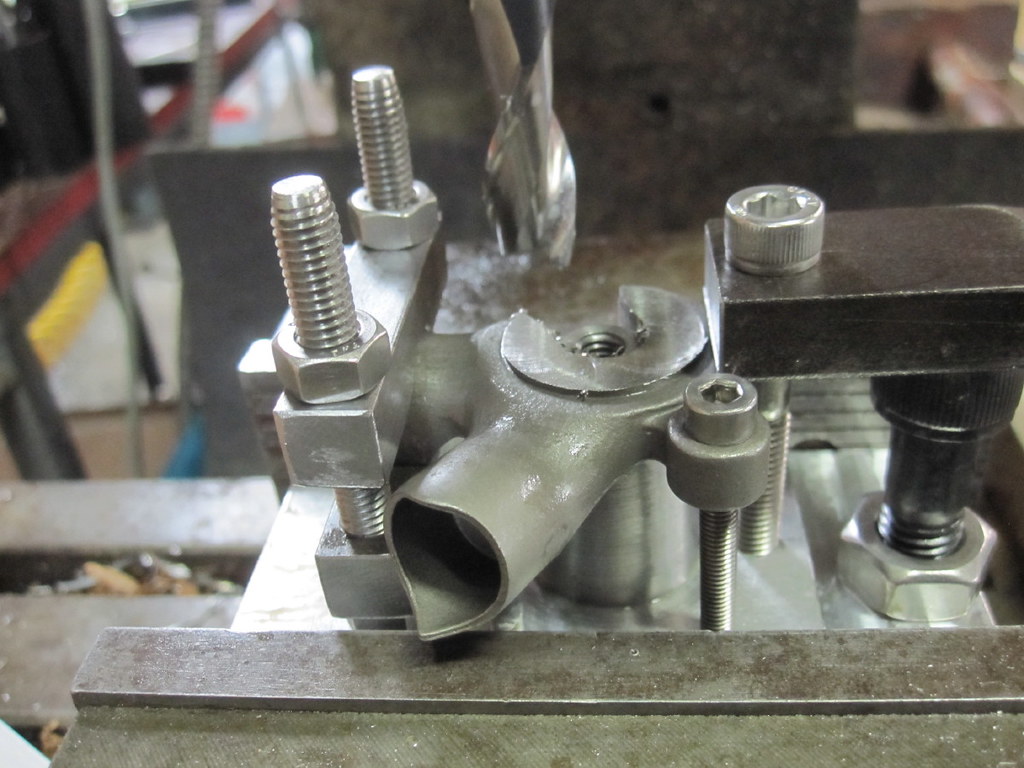
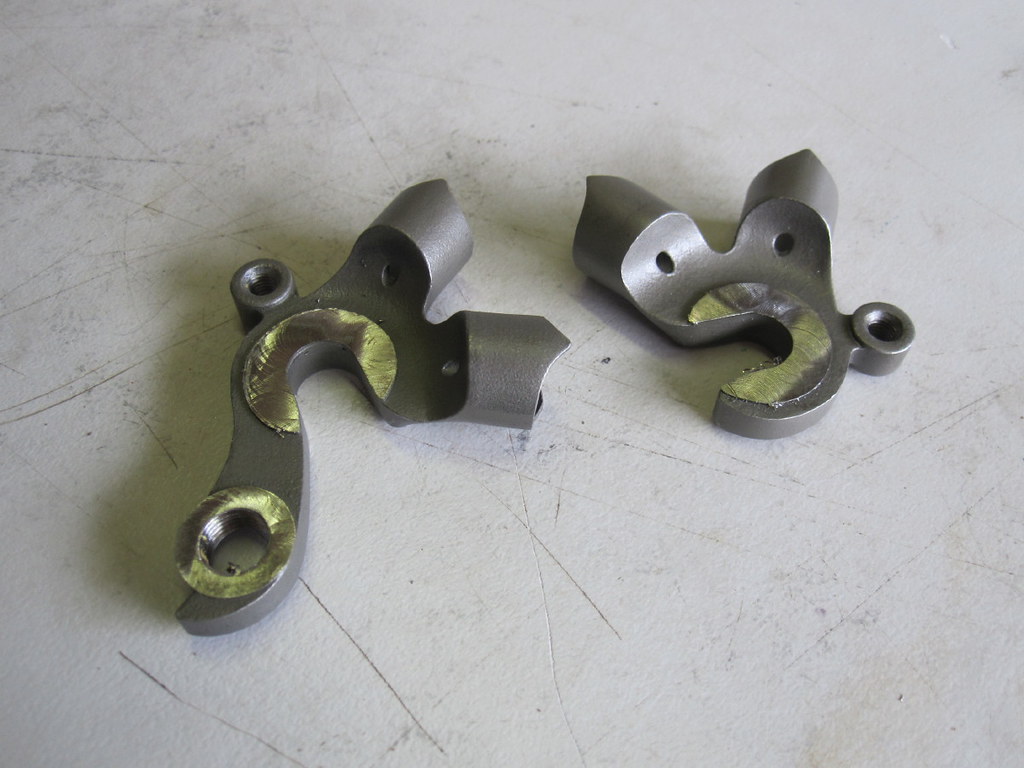
New alignment tools for the inspection table. I actually chased .005mm tolerances for kicks and giggles and I did win.
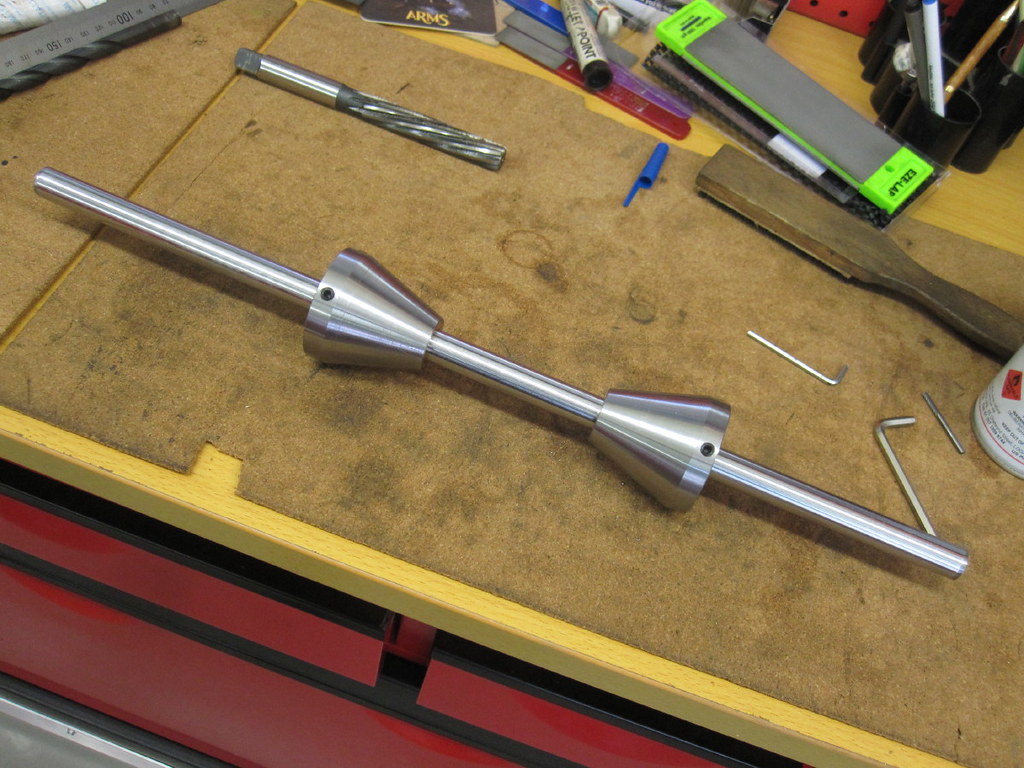
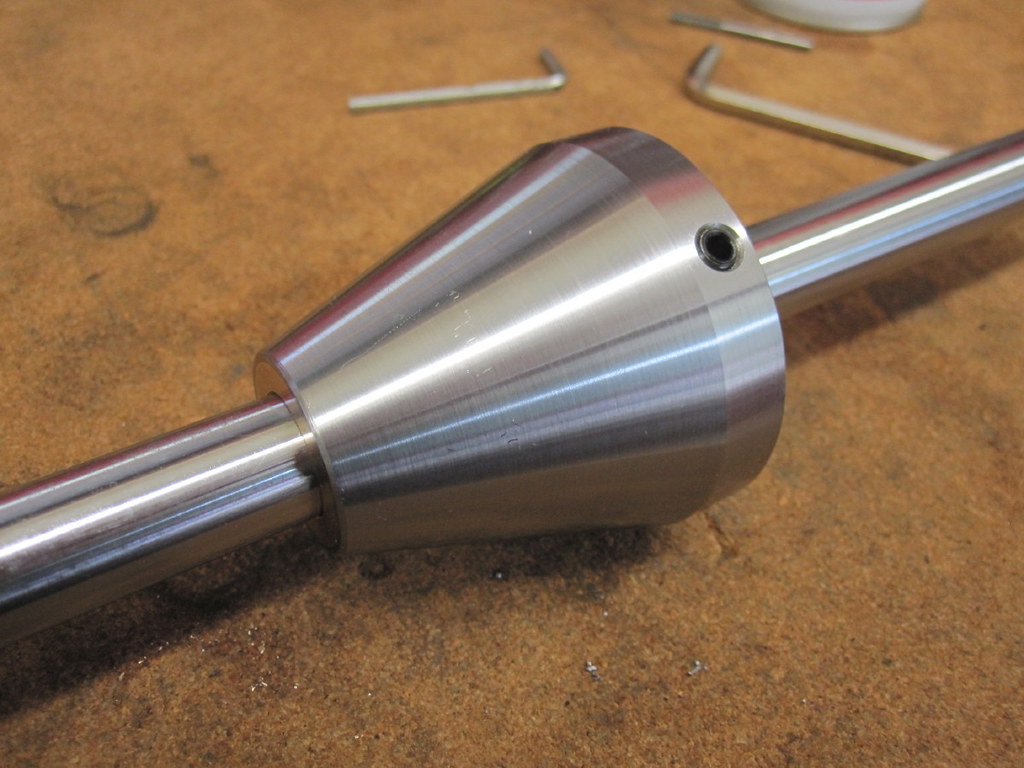
The processes of the new tools took 5 – 6 weeks of long days and into the evenings but all worked out as intended. Meanwhile the Rapid Proto types arrived for the new seat binder boss
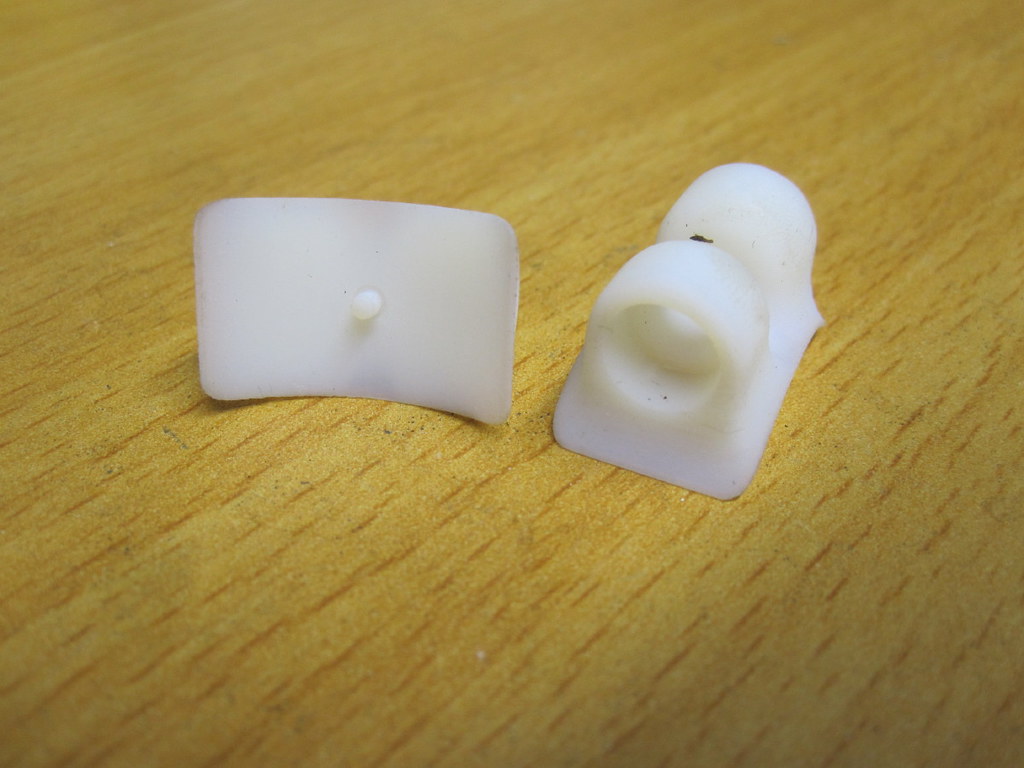
A few tweaks on the drawings and the green go button was pressed to get the tool made to shoot the wax for this lost wax casting part. When production commences I will like all my other castings make these available for other frame builders to obtain and use via my UK and European agent Framebuilding Bicycles. Tubing, Parts, and Tools
and in the US via Llewellyn Frame Parts :: Nova Cycles Supply Inc.
The samples bosses in stainless steel and normal steel are being made as I type.
-
 Re: The story of a new Llewellyn frame model with no name Part 2
I'll keep an eye on this space, is well worth to wait, and see Elegance in a frame with tapered headtube 
"Caron, non ti crucciare:
vuolsi così colà dove si puote
ciò che si vuole, e più non dimandare"
-
 Re: The story of a new Llewellyn frame model with no name Part 4
Onto the prototype creation.
Brian supplied me his position data and we confirmed the frame design to fit under him.
Then to the workbench
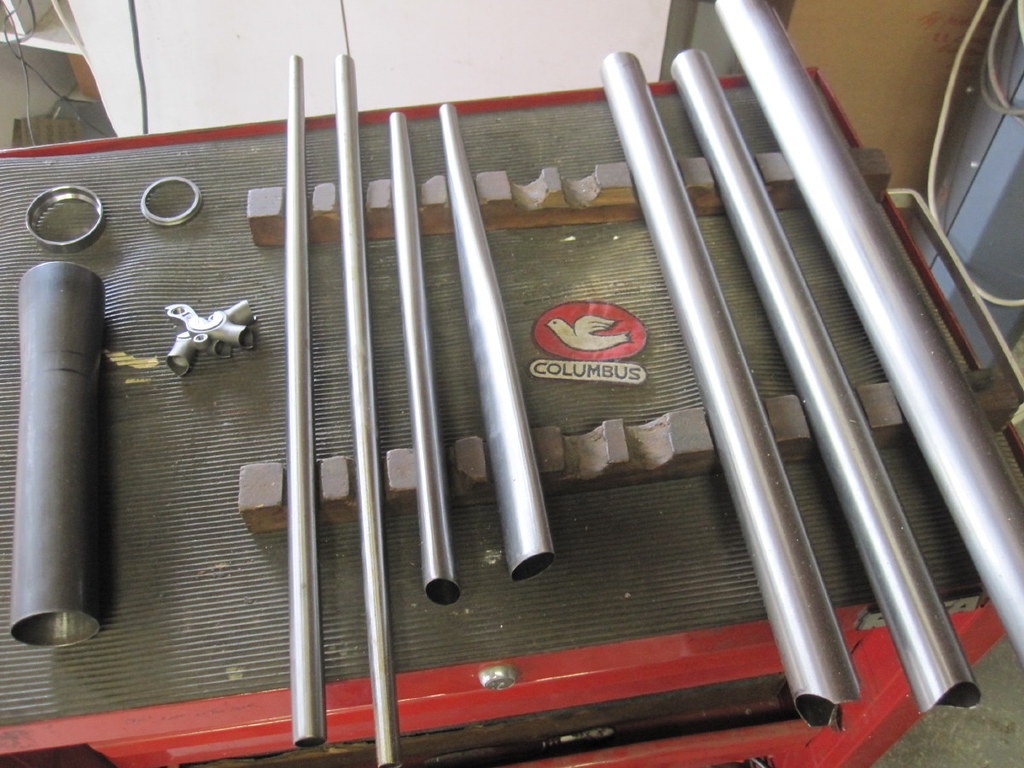
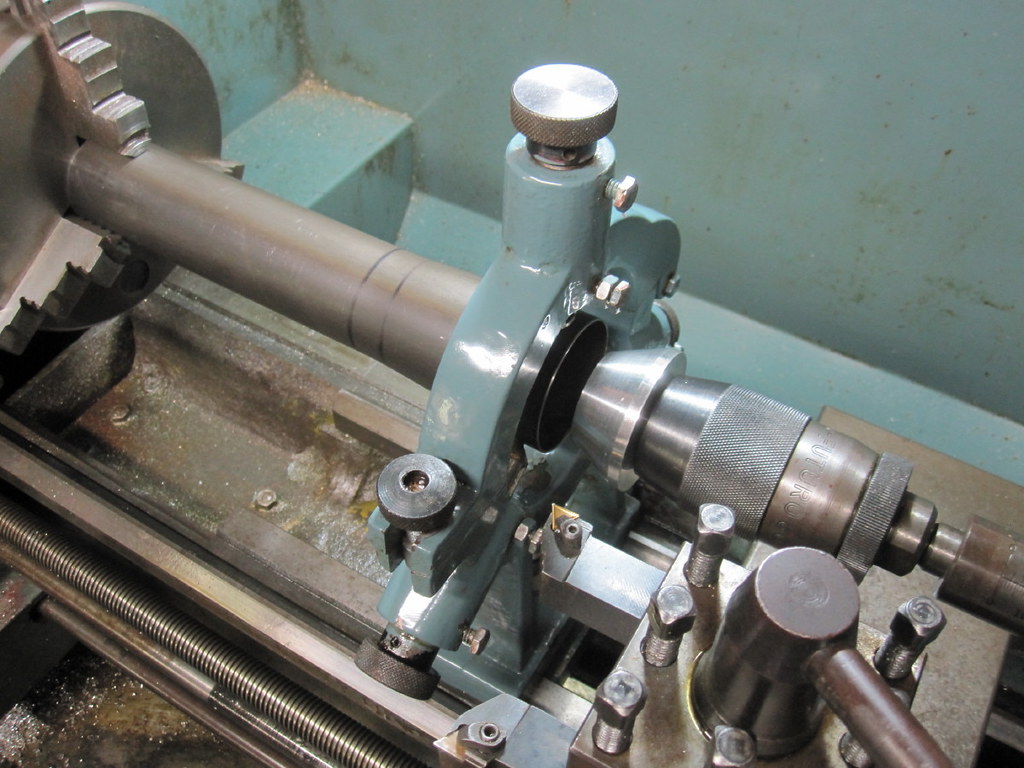
Forming up and cutting tubes, taking notes and sorting out details in the workshop is under way and so far it is all smooth but slow as I find little things to adjust and the process order is sorted.
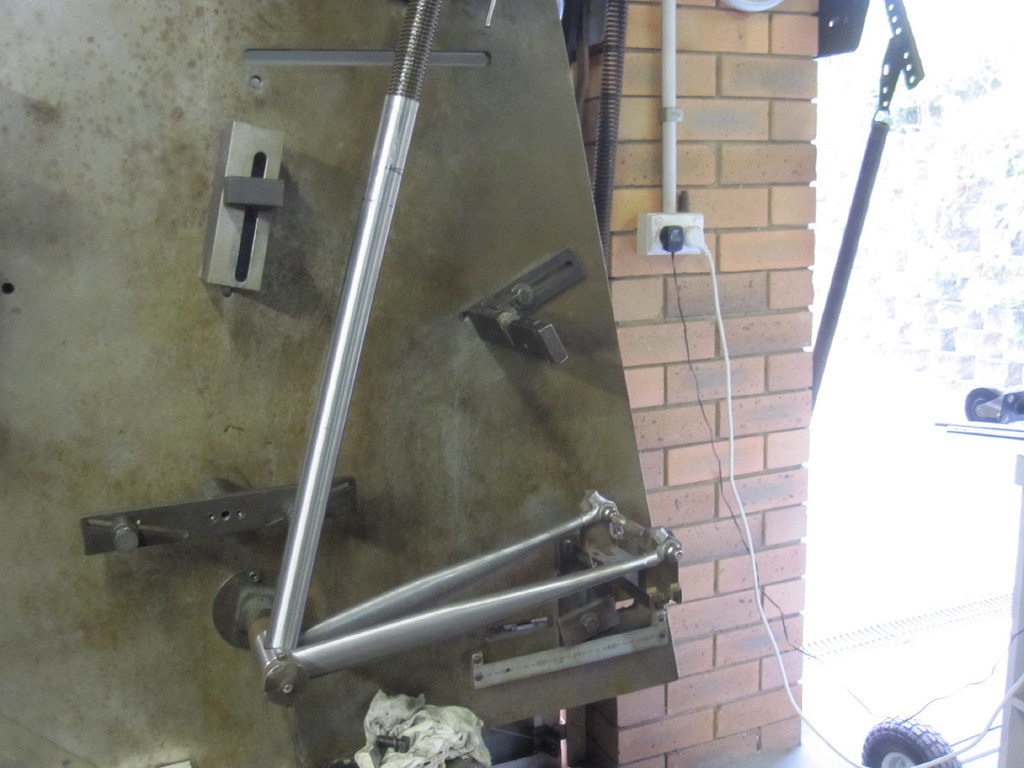
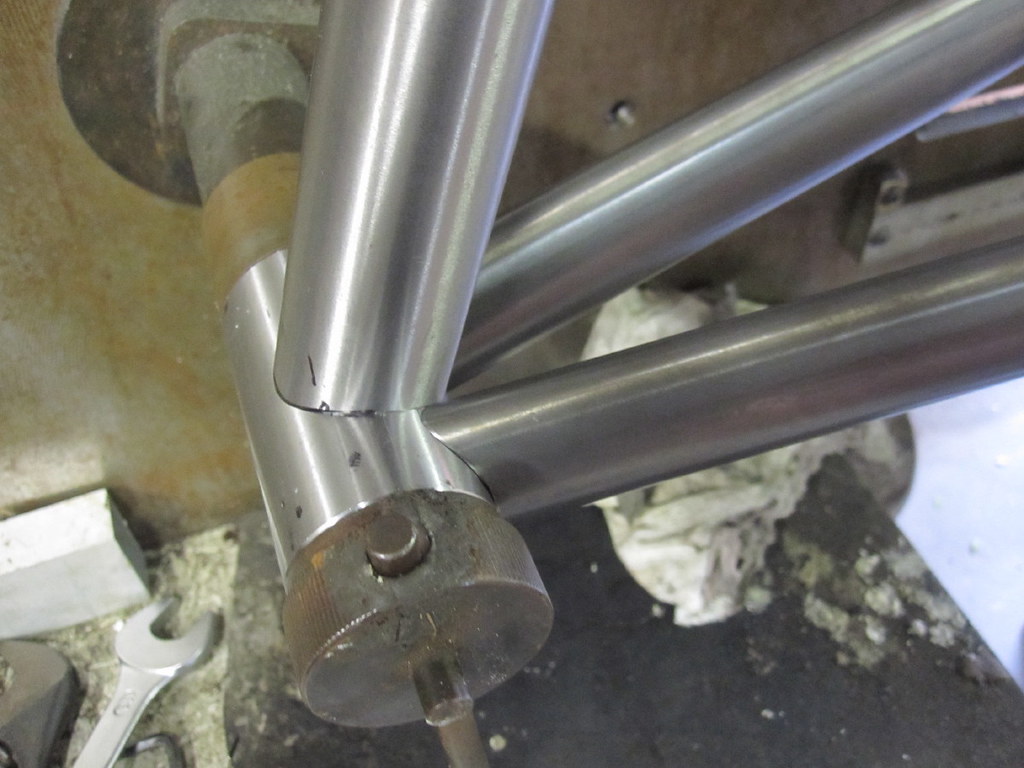
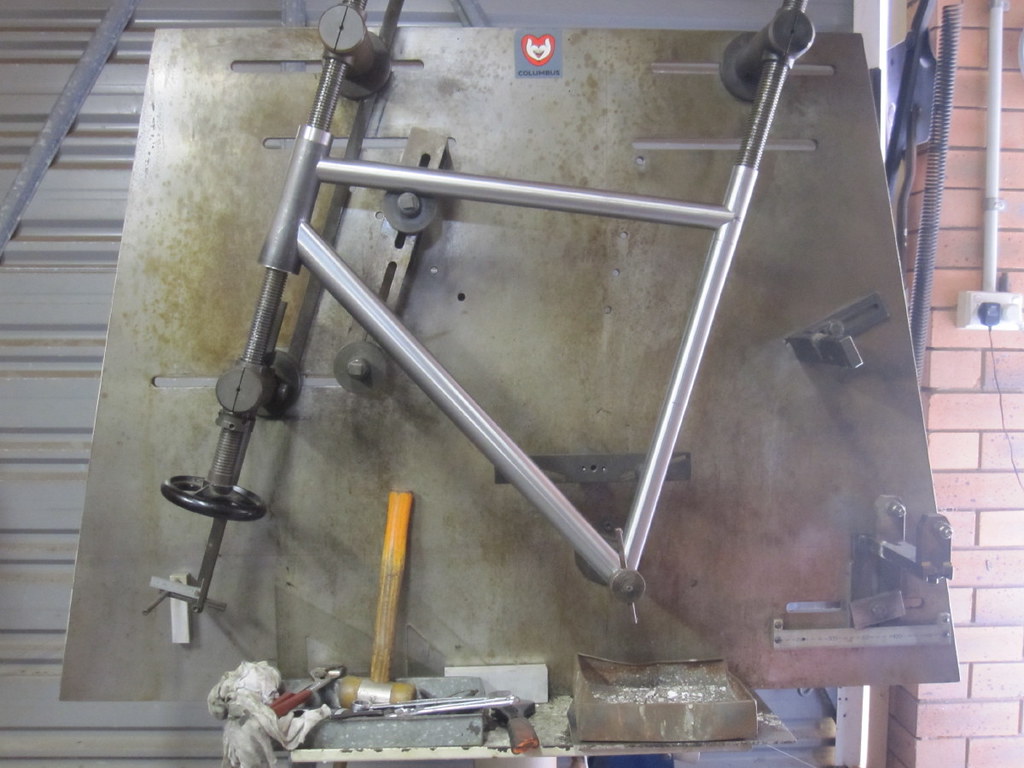
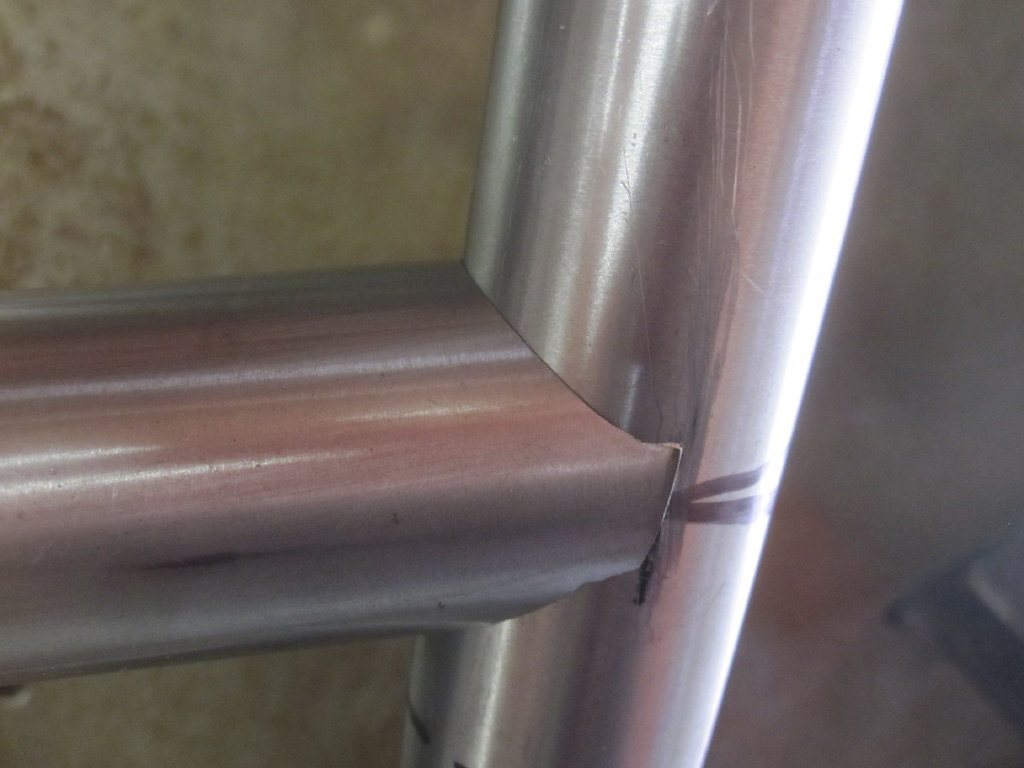
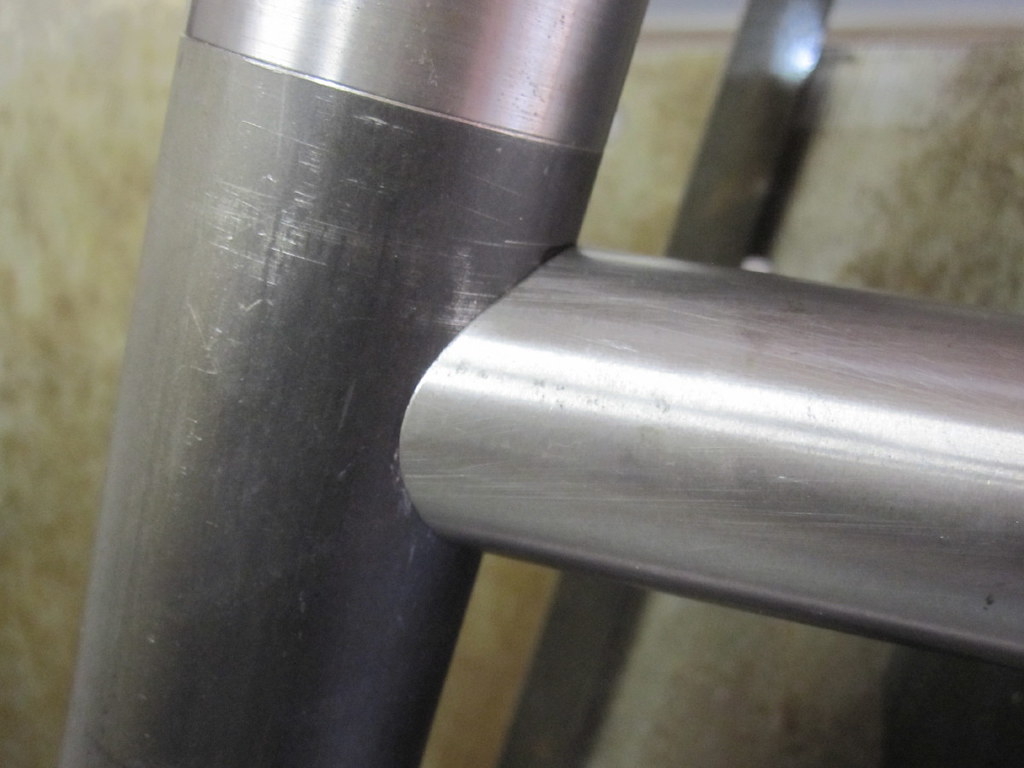
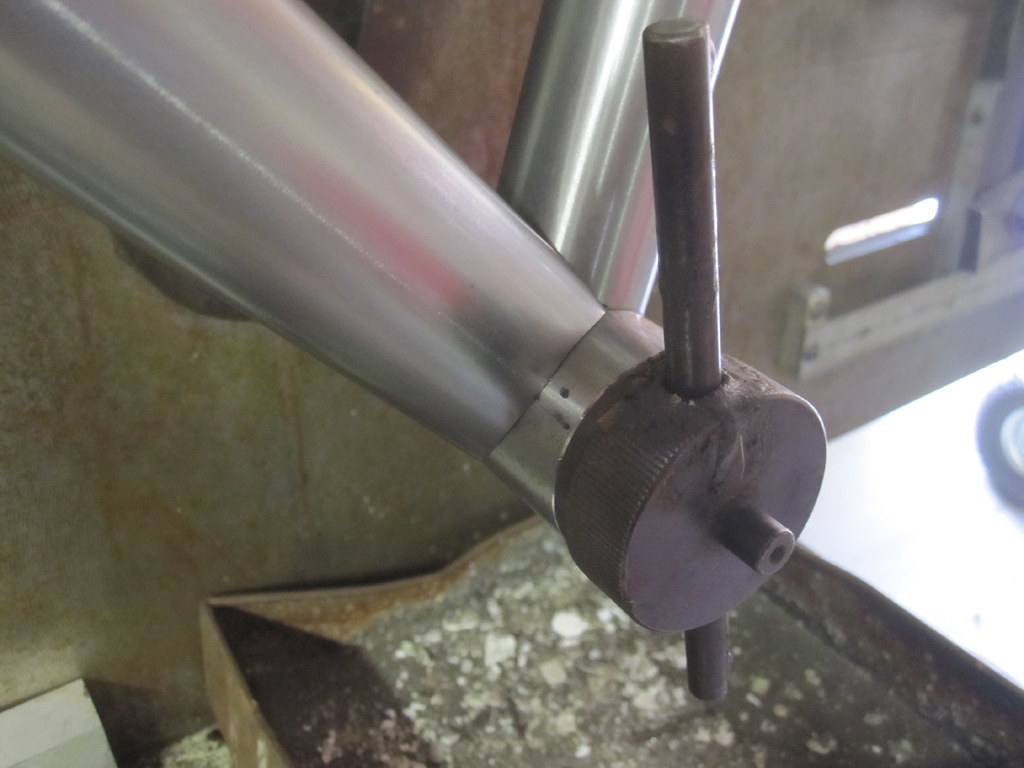
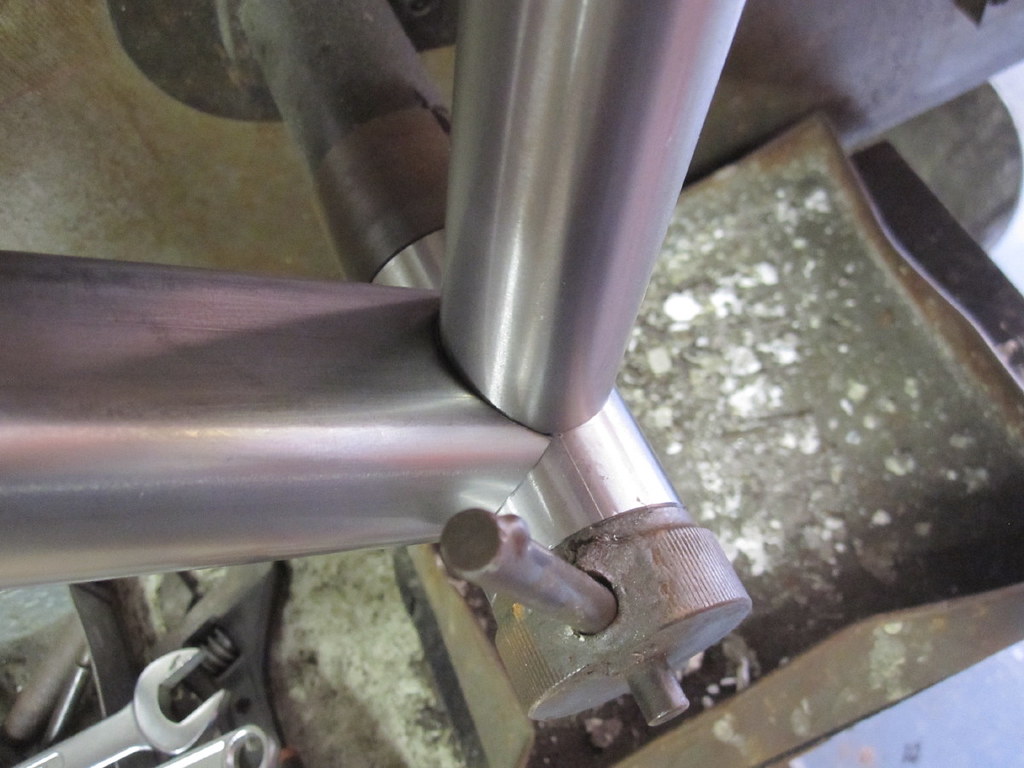

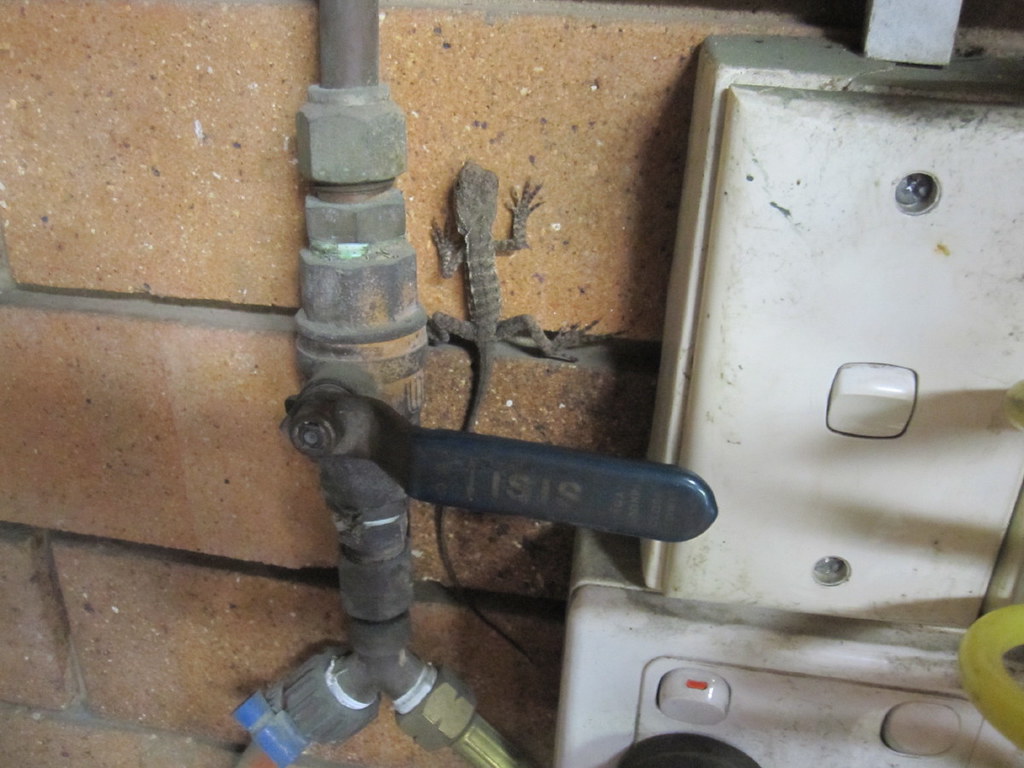
It is the time of the year the little girls and fellas are hatching.

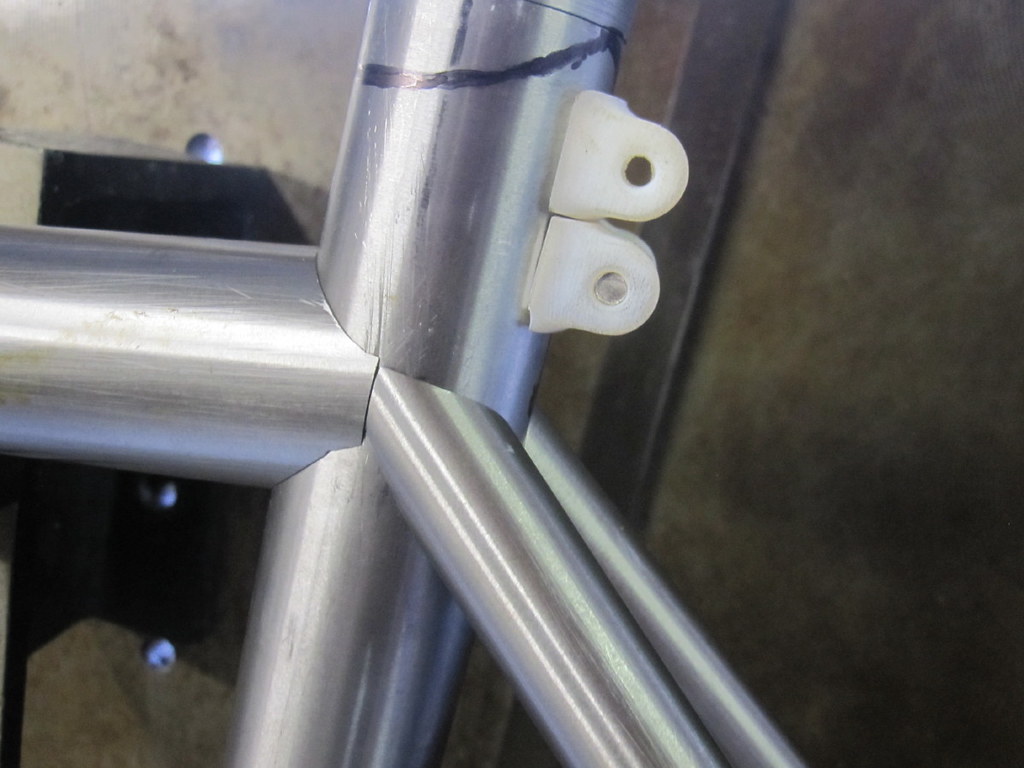
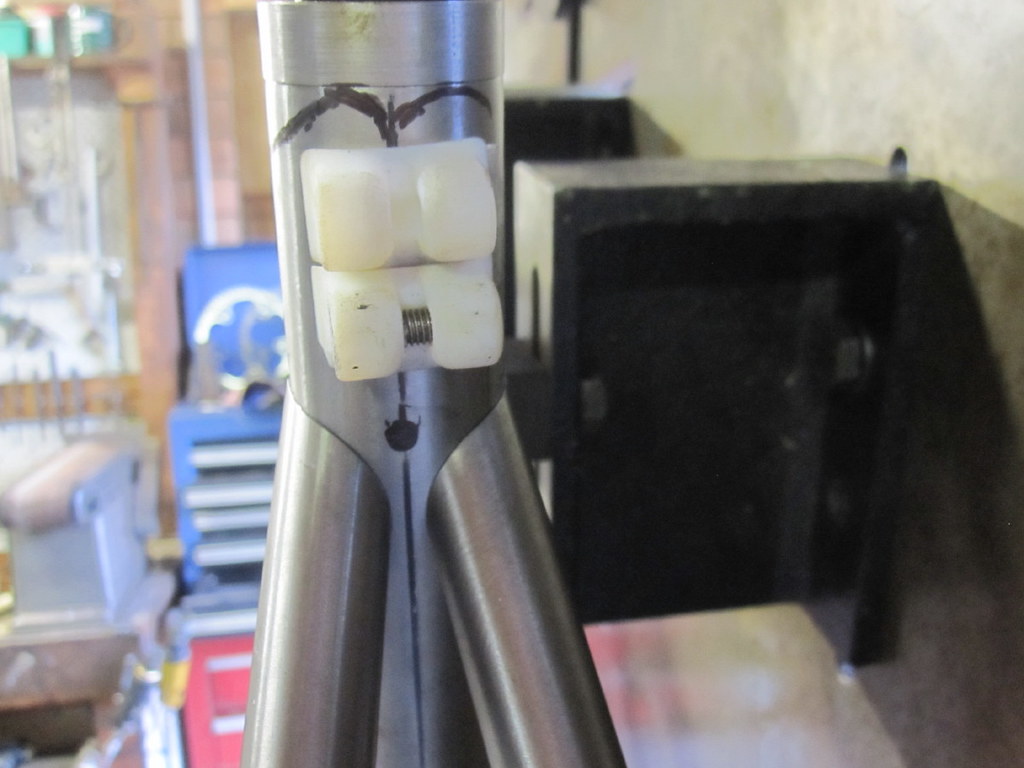
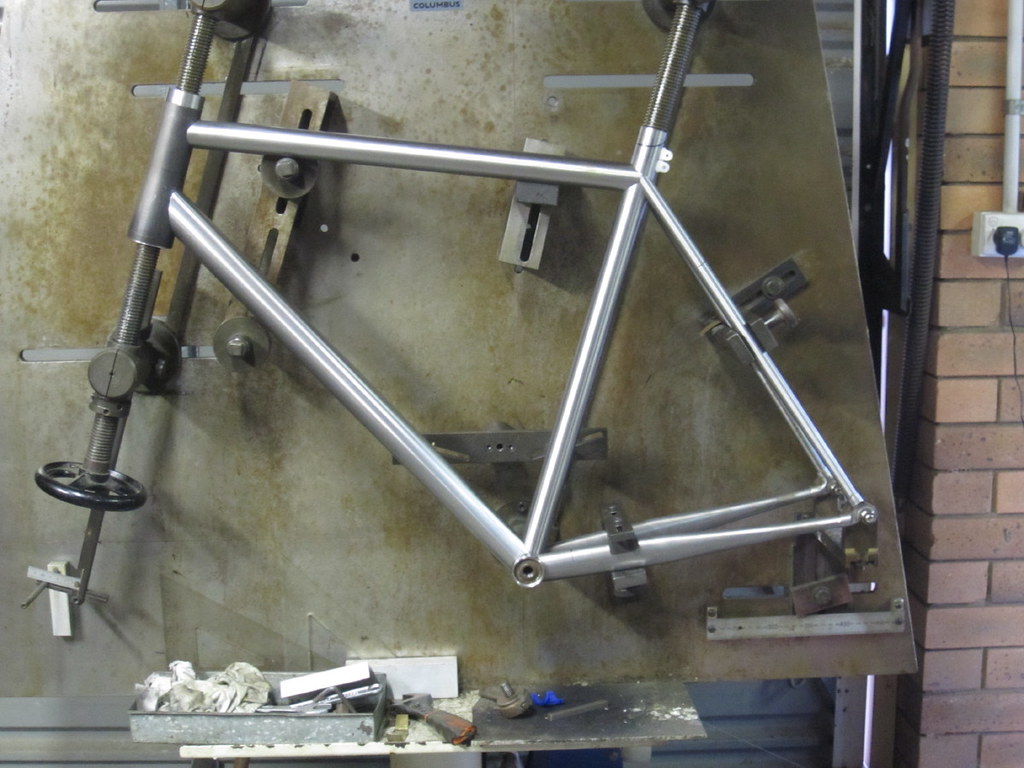
That is where I am up today, more next week.
-
 Re: The story of a new Llewellyn frame model with no name Part 4
Besides no name for this new model yet
perhaps
Colossus ??
no graphics either
but first the metal work then I ponder the rest
Any ideas out there ?
-
 Re: The story of a new Llewellyn frame model with no name Part 4
Ive seen this in person this week. I am excited for Dazza he is pushing ahead with the project. The little things he has shown me I know this frame will be very well thought out and made.
-
 Re: The story of a new Llewellyn frame model with no name Part 4
Really nice looking proportions considering the big, big tubes. Odds on to be the first steel bike with a tapered headtube that I like the look of...
-
 Re: The story of a new Llewellyn frame model with no name Part 4
i'm already blown away.
cannot wait to see the post binder.
-Dustin
-
 Re: The story of a new Llewellyn frame model with no name Part 4
That looks amazing. The word "dreadnought" comes to mind - something nigh unstoppable. Can't wait to see it finished.
-
 Re: The story of a new Llewellyn frame model with no name Part 4
The backstory adds so much to this beyond the picfest post.
great development, frame looks great.
Matt Moore
-
 Re: The story of a new Llewellyn frame model with no name Part 5
19th Feb 2016
Preparations of tubes and other tasks are done.
Vent holes and some material removal is completed.
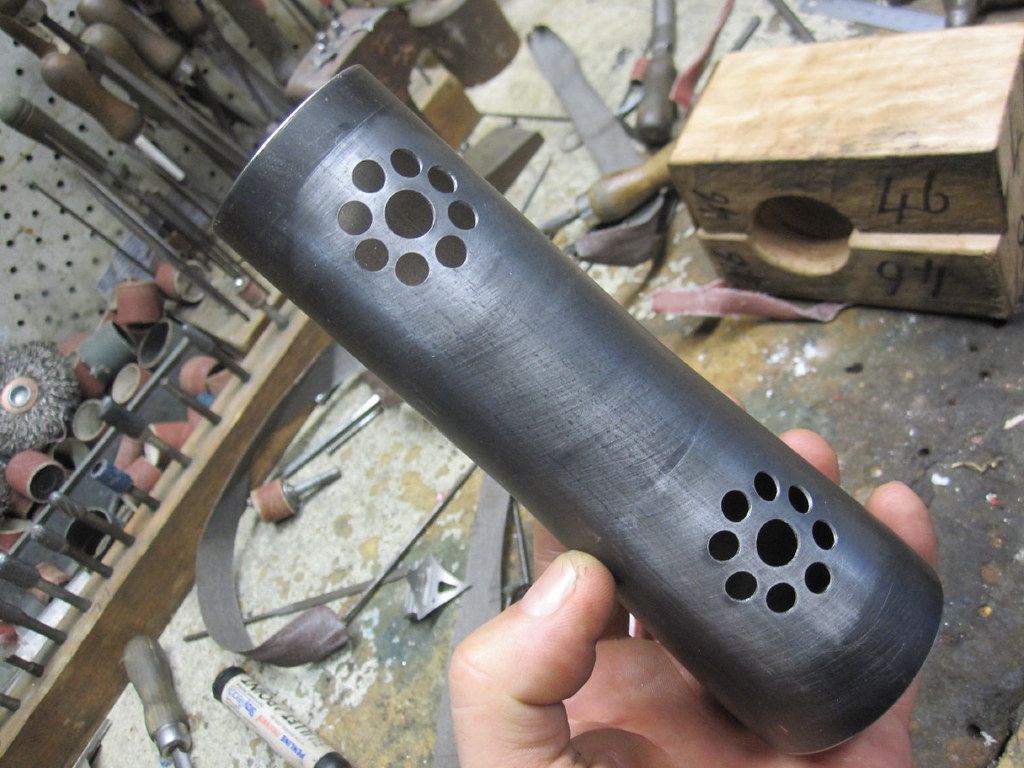
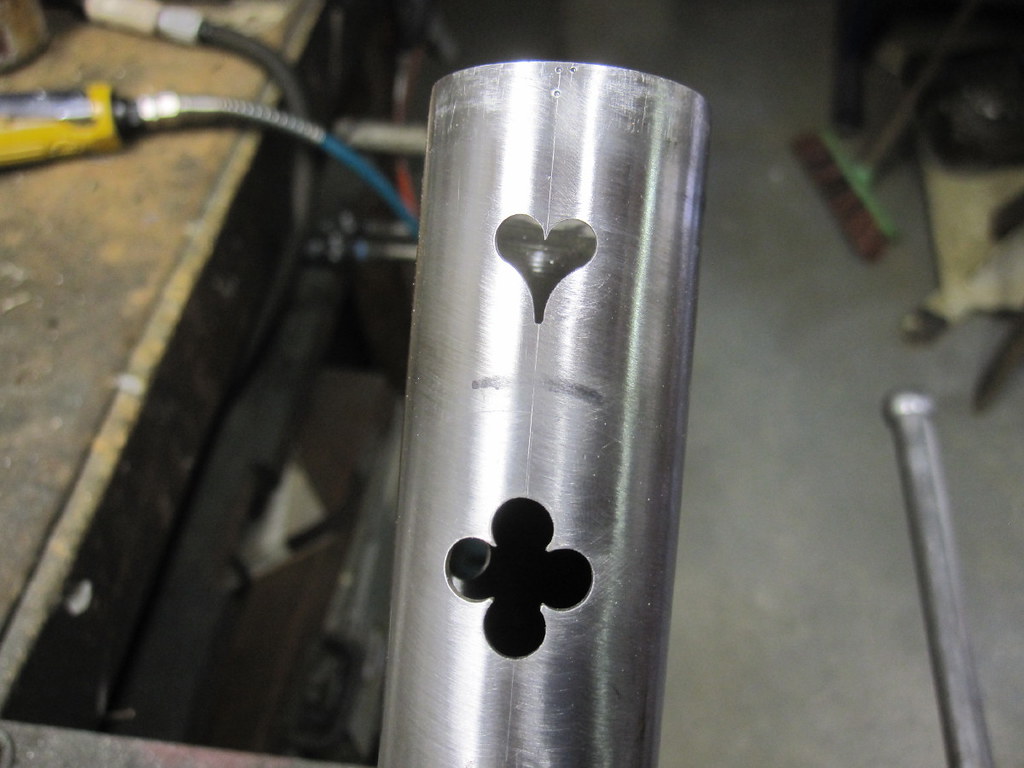
The cosmetic detail in the seat tube is drilled and filed.
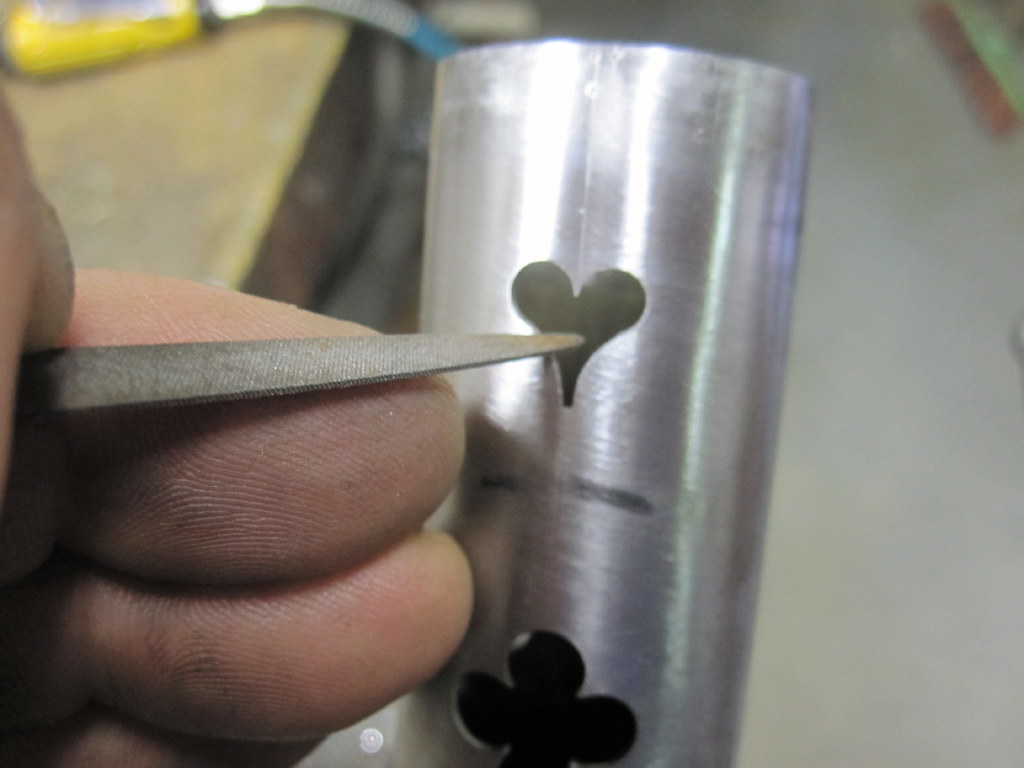
The seat tube to top tube receives the usual elaboration just for kicks. A bit better than just a drilled hole and it does not take long.
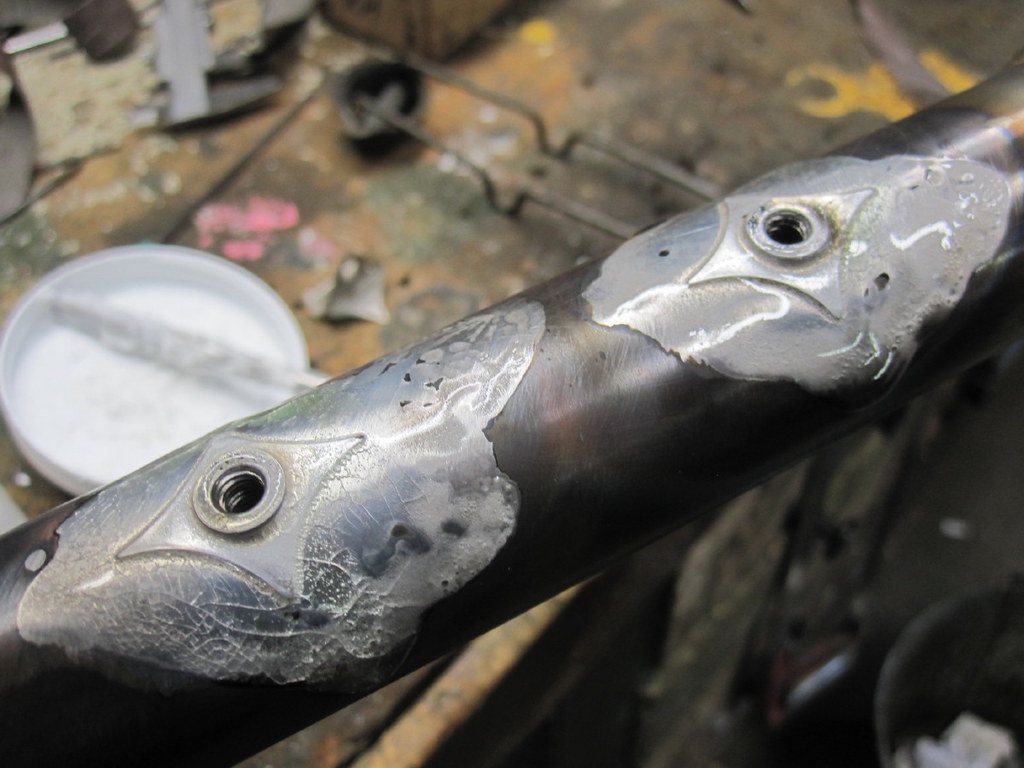
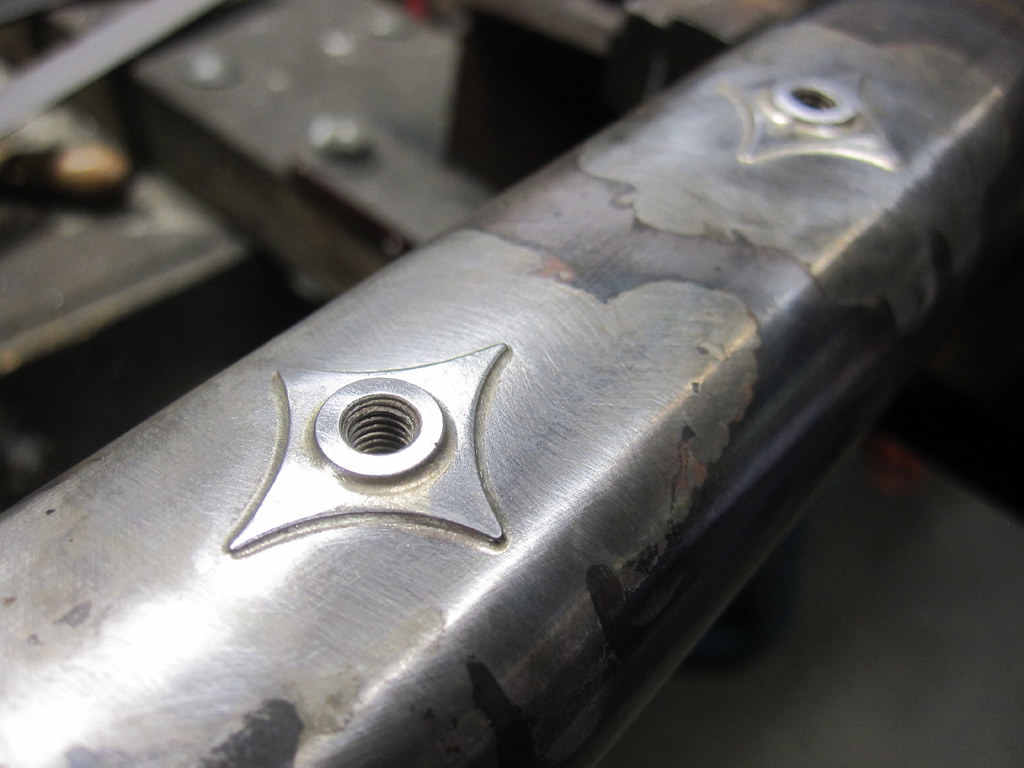
I believe that bottle mount reinforcements are a good thing. Considering the tube wall is only .45mm and also a large tube which flexes as the 800 grams of bottle wobbles about and bottle cage are prone to being clobbered in crashes then the chances of torn or cracked tubes is reduced. I know many will argue that there is no need, but I have seen many frames from other makers have this problem. It takes a bit of extra time to do but it is a detail that I think has merit.
More vents and material removal , this time the BB shell.
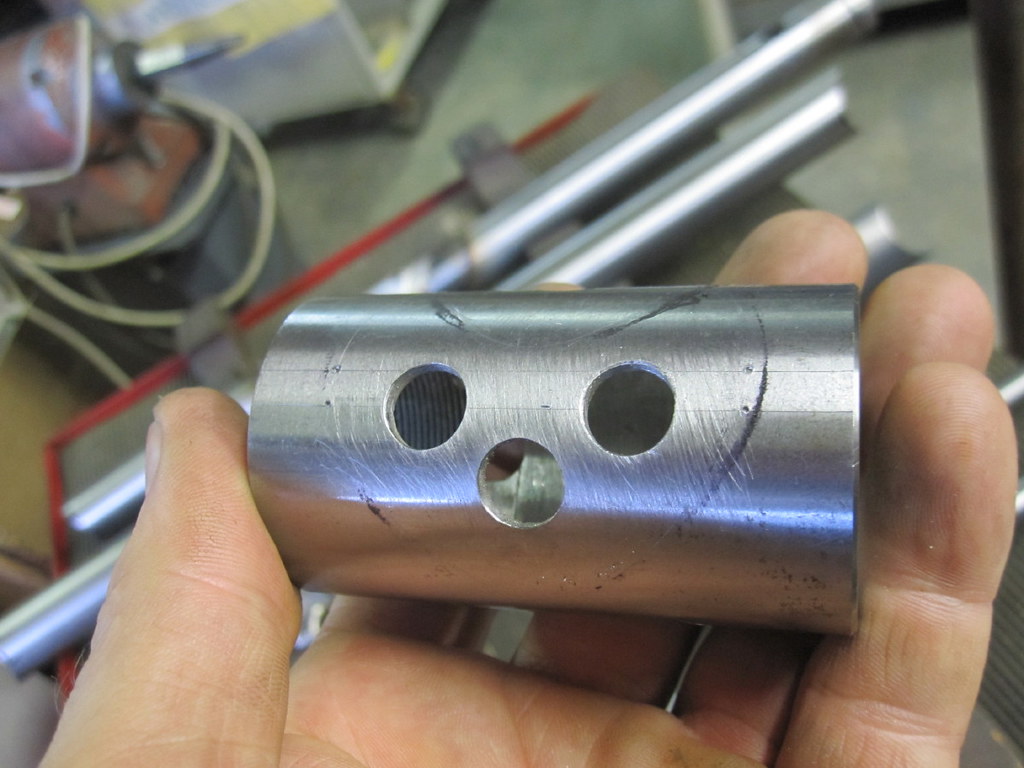
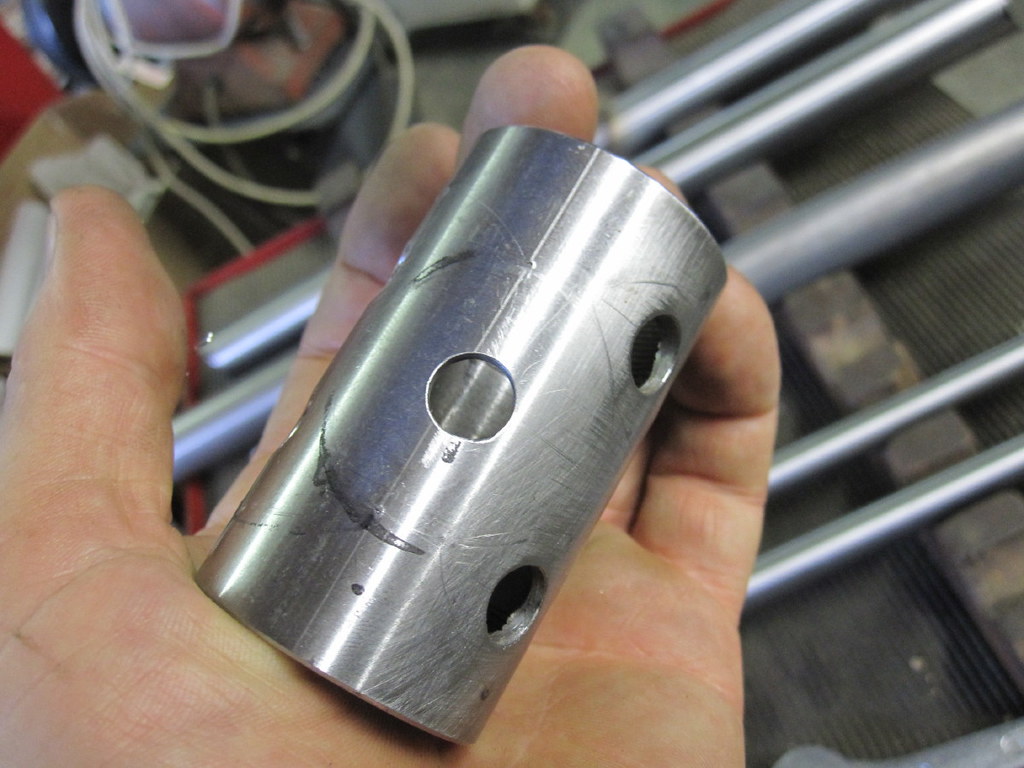
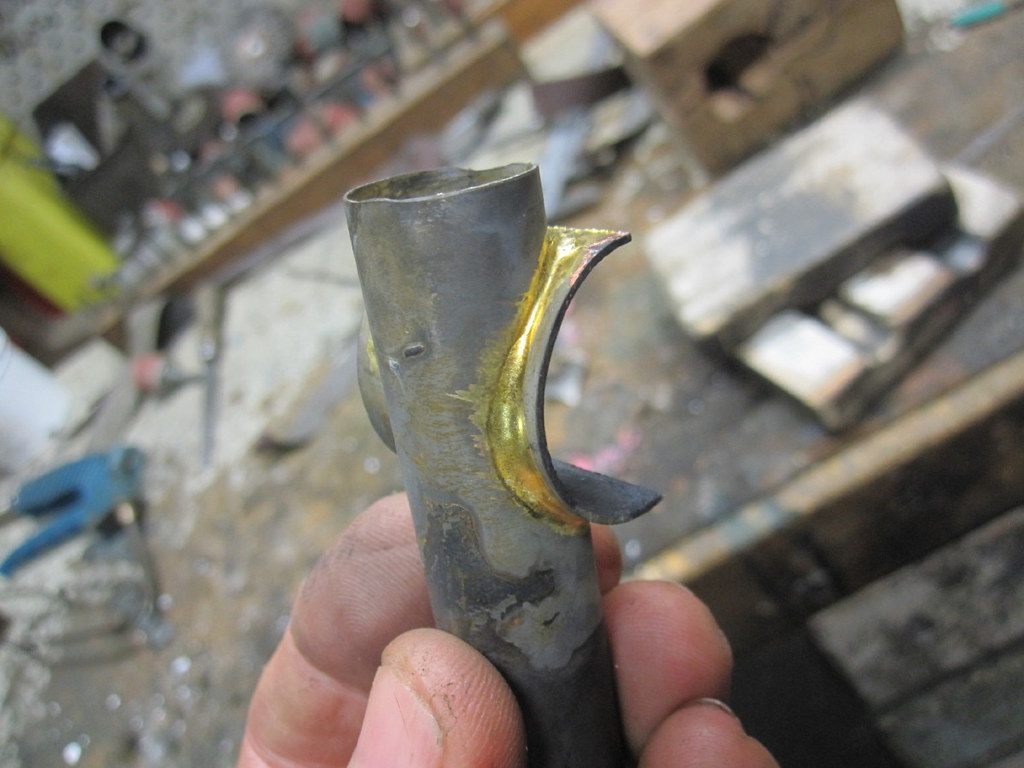
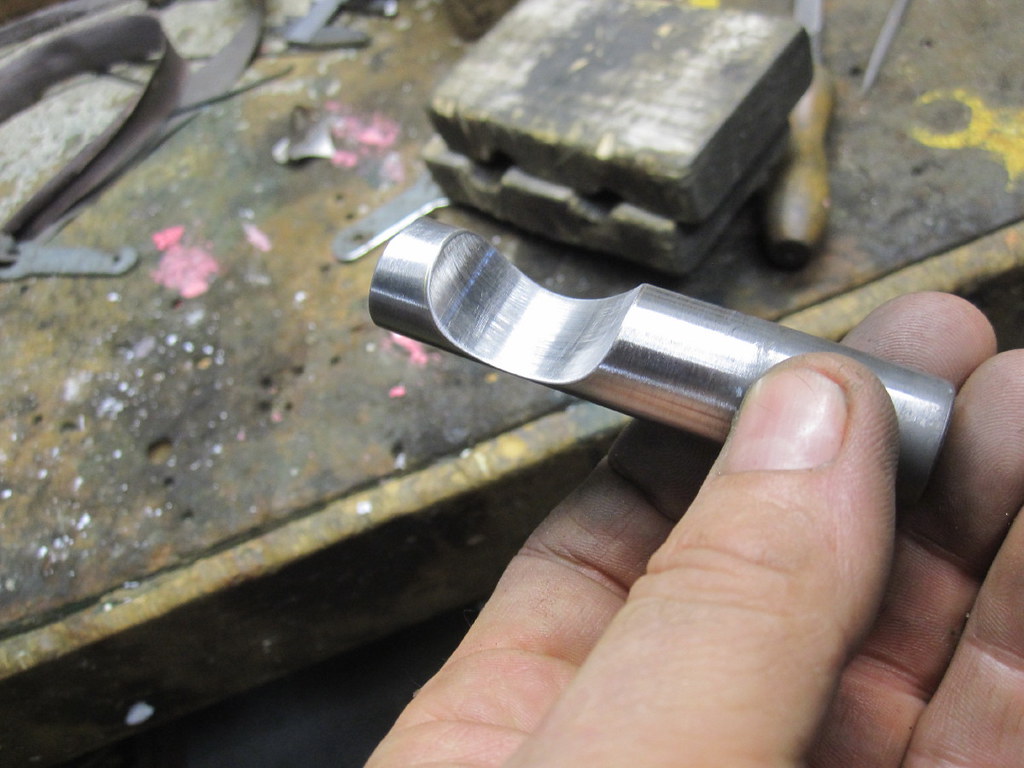
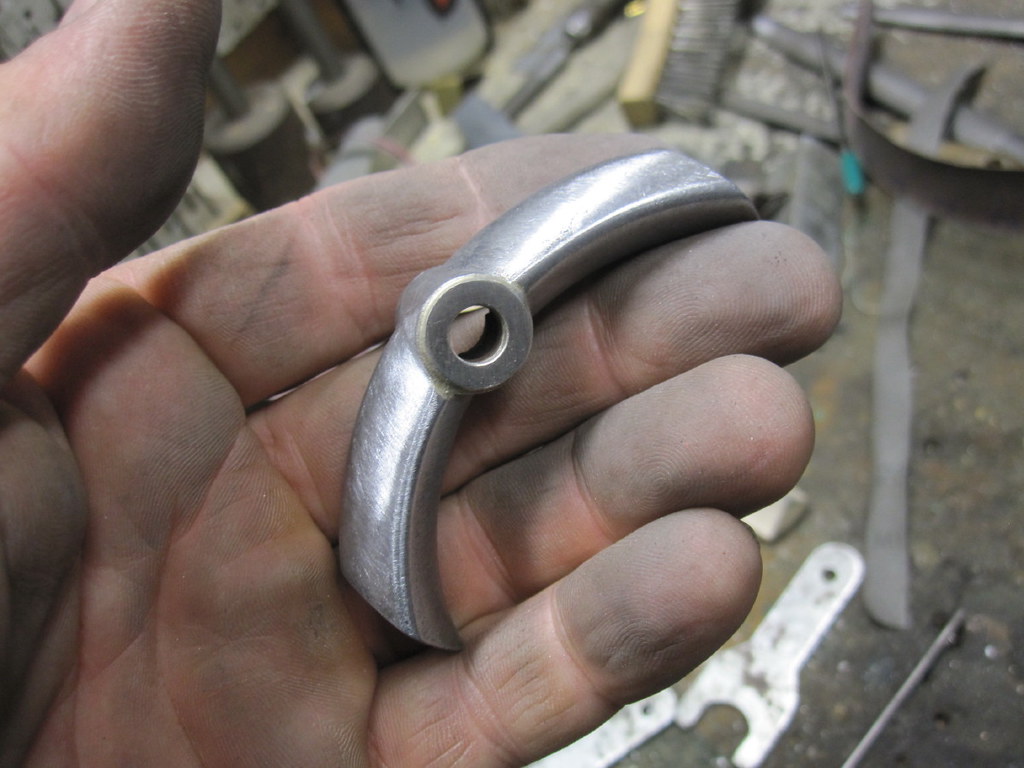
I fabricate the chainstay bridge now so it is ready later. Many cast BB shells come with a small bridge between extended chainstay ports. This bridge is usually about 10mm from the BB shell and is totally useless but for punter perception. It is much better to fit a bridge as far away as possible from the BB shell towards the dropouts to have any real lateral bracing effect. I fabricate my bridges from .5mm wall 18mm diameter tube and then it is cut with a curved relief is which is a bit of tube offcut brazed into place. The relief allows one to fit the bridge considerably further down the chainstays. Actually 351 to 353mm from the rear axle but still facilitate easy wheel removal with 25 or 28mm tyres.
It takes more time to do things like this, but I am not trying to drum down the labour/time costs in each frame set. The frame set must have the details and methods I desire, the price has to reflect this. I could do less detail and thus a lower $ price would follow but I believe a quality bespoke frame set should set the bar level high. Let the metal work and ride quality speak, rather than graphics coupled with over whelming marketing dross. A sole builder has to do it all, emails, marketing, paper work, sweep the floor, clean the machines, fix worn out bearings in the bench sander, and speak to their clients and make the product and pack for despatch and fix and sort the long overdue updates on the website. The time and resources it takes to create a new frame set is exactly the same for a production of 10 frame sets or 100 -200 each year. Many tasks of the frame making gig take the same amount of time and resources for the sole proprietor as it takes the big corporations with the factory. That makes it difficult for a timely breakeven point and back into profit, coupled with the real need to make a living wage. I could write some marketing spiel and pretend it is all just pure gloss, however, stuff all that nonsense, I will admit it is tiring and wearing after many decades, and maybe I aim too high for my own good and some things are let slide such as blogs, forum and website updates, glossy bike pictures for the forums, because there is the next order to complete for a patiently waiting customer and then the phone rings and I am nursing a sore twisted ankle ………………... Making bicycle frames is my chosen path of professional expression. It is not my hobby! I want to knock off and do other things. However when I go belly up when my mortal term is done, I would like to think that the onlookers will speak about my good work rather than look at the shortcuts. I want to be a craftsman.
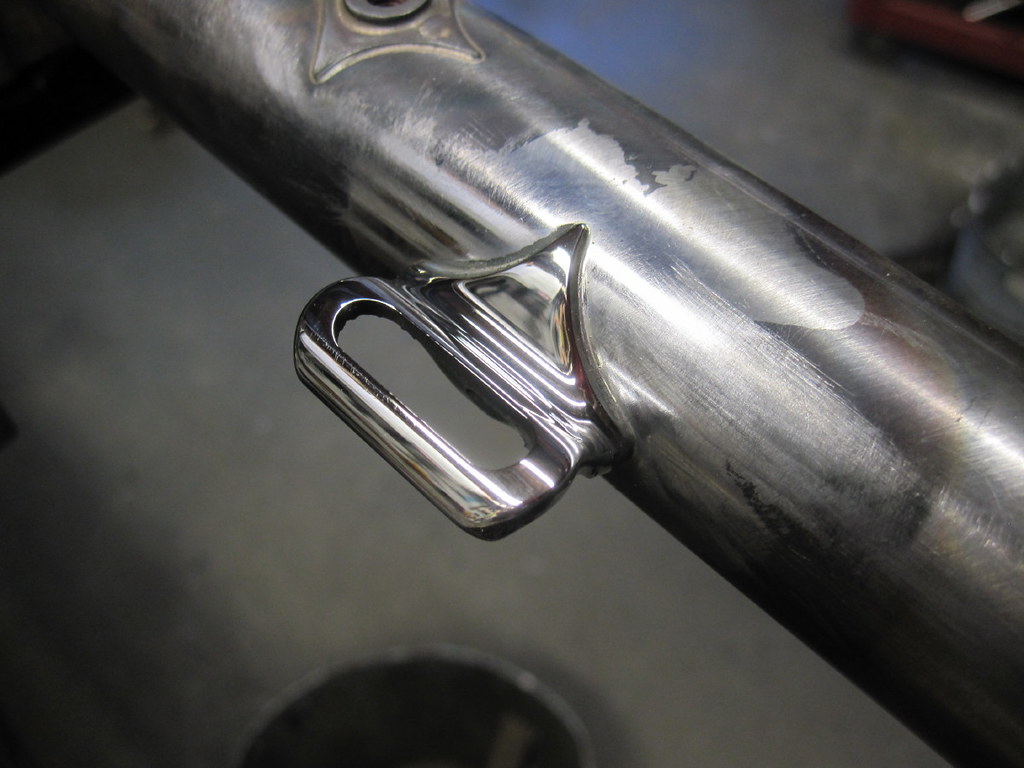
A new correctly dimensioned front derailleur boss is on the market now organised by a frame material supplier in Europe. Those with grey hairs will recognise it is very similar in appearance to the Suntour boss from the late 1980’s. I tuned up a bar of steel to use as a former to open the fit a wee bit from 31.8mm to 32.7mm for the Columbus external butted seat tubes I am using.
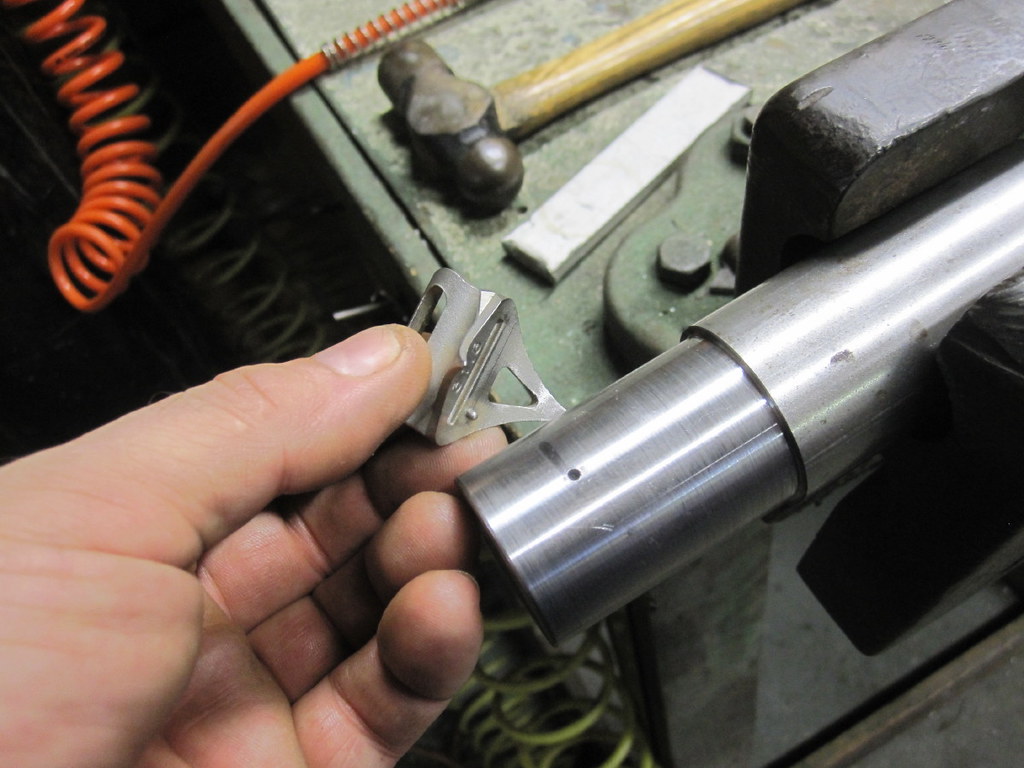
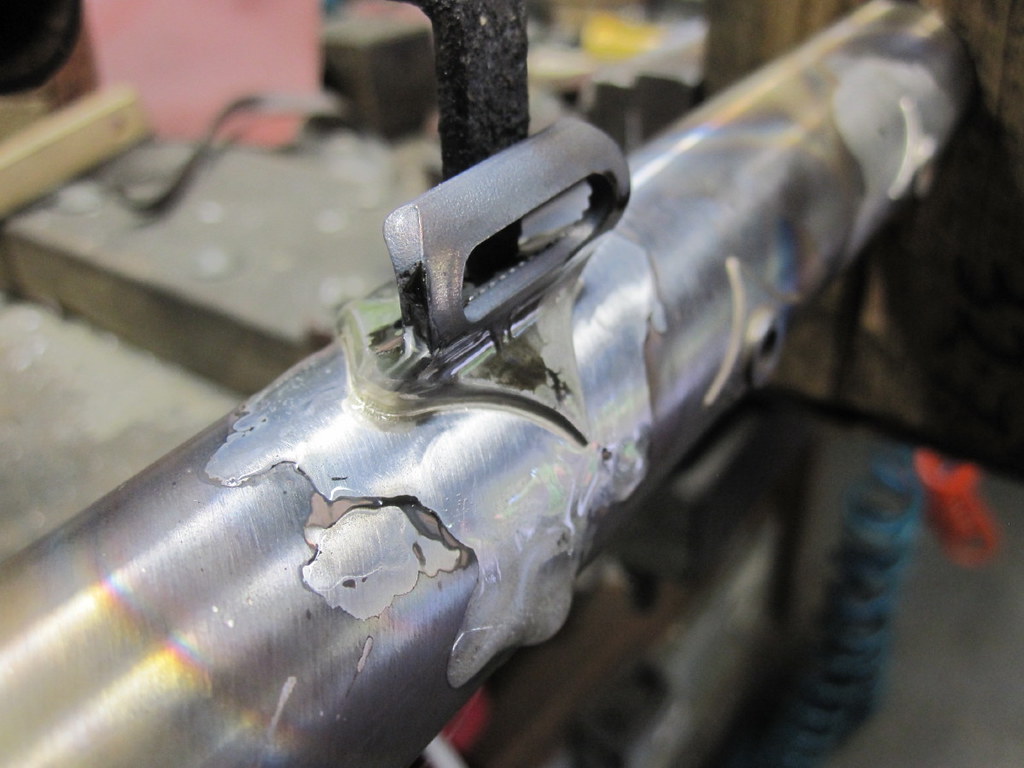
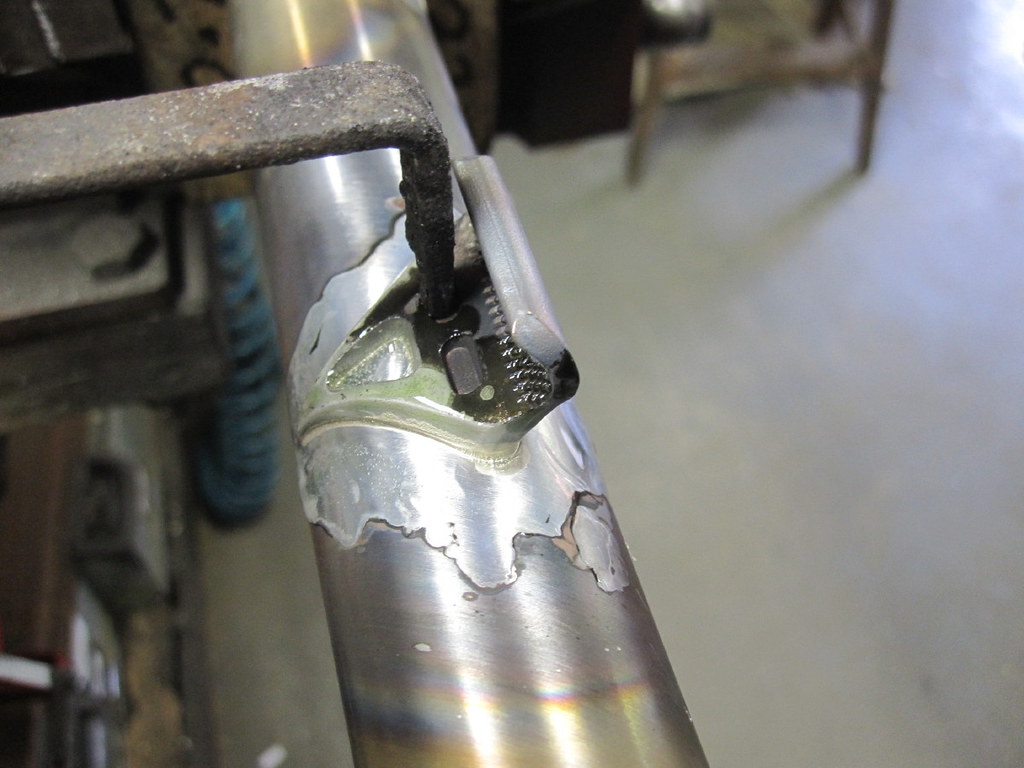
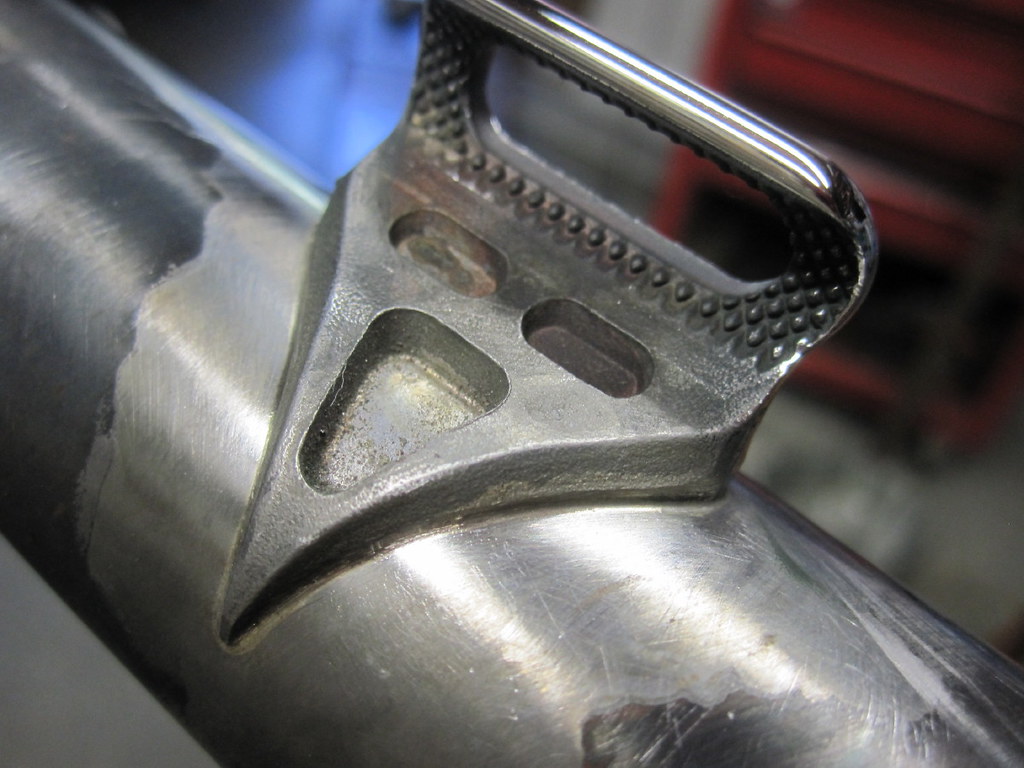
Off course for me it is stainless steel so the derailleur mount bolt does not mar the paint. Neat and tidy is what I desire, but it must work properly.
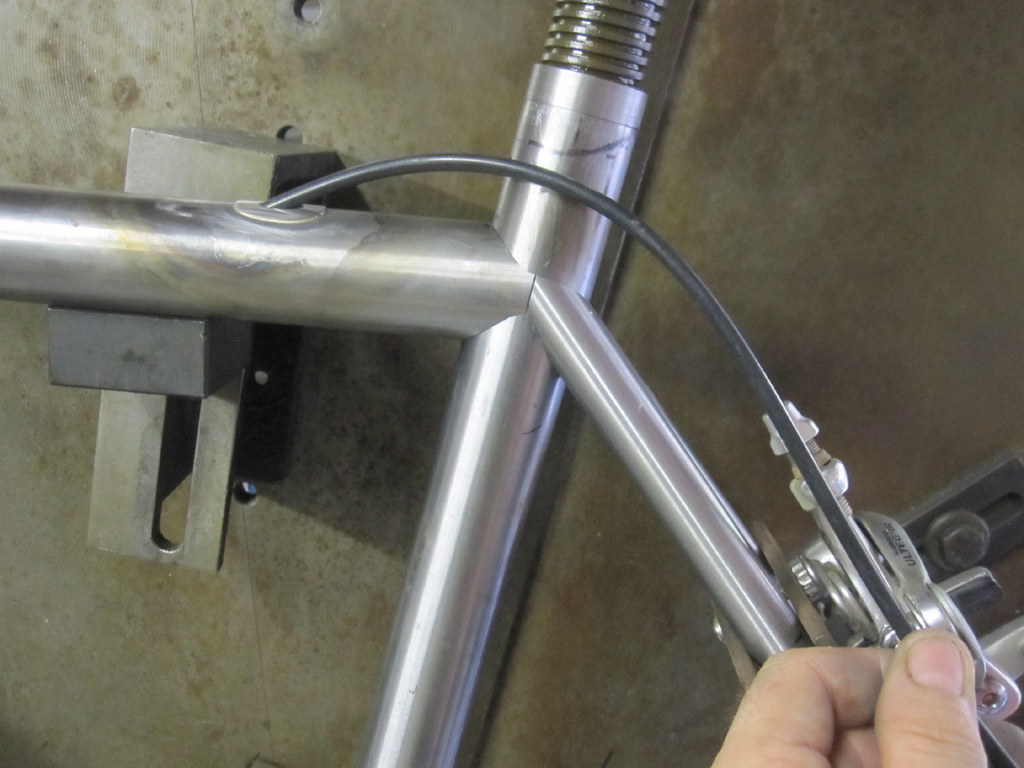
Another complication is how I do the internal rear brake cable routing. I see many builders drilling holes and poking a brass tube through and just brazing it and a wee bit of filing to finish it off. Again I have seen many other builder’s frames fail using this method. One such problem I saw last year was an almost new imported frame that had a tube fail from the quick fit tube braze over. The tube piercing creates a huge weak spot and stress riser thus I will only do internal brake routing in top tubes with an external steel reinforcement brazed over the assembly. Otherwise it is fraught with peril.
I machine the parts out of stainless steel, annealed brass tube connection, stainless steel cover reinforcement plate is shaped and filed to fit snugly into place and all is silver brazed.
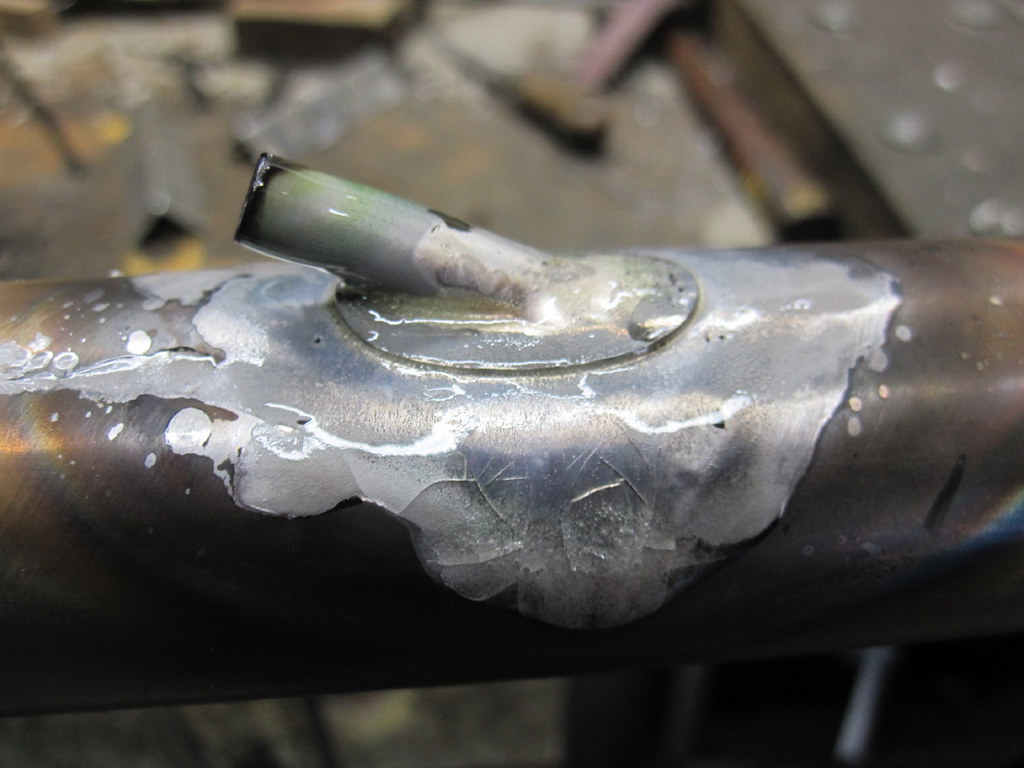
The cable casing terminates at each end, much better for Campy single pivot brakes as there is no cable casing creep to pull the caliper over. Also no rattles!
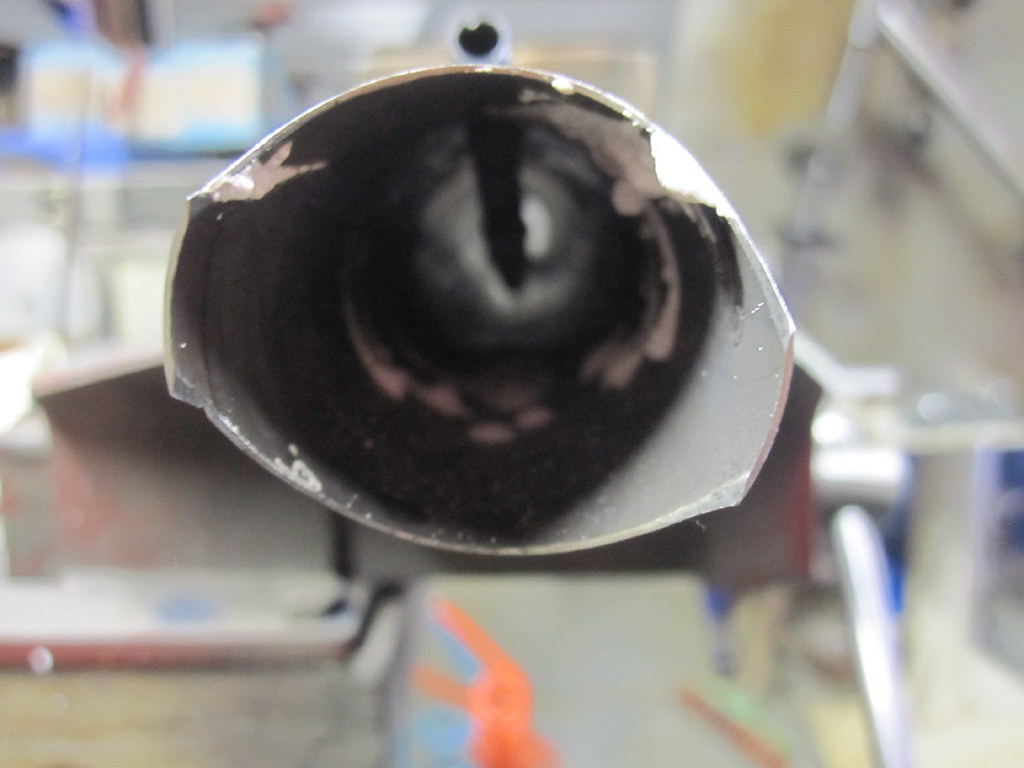
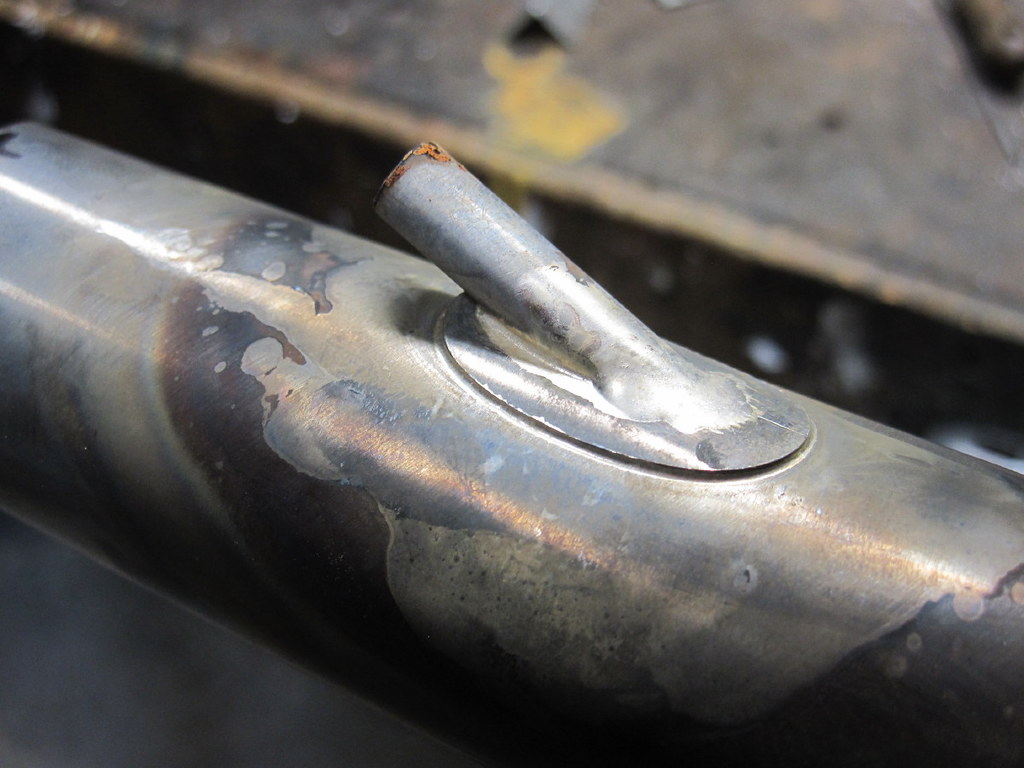
Later I will give it the full polish treatment.
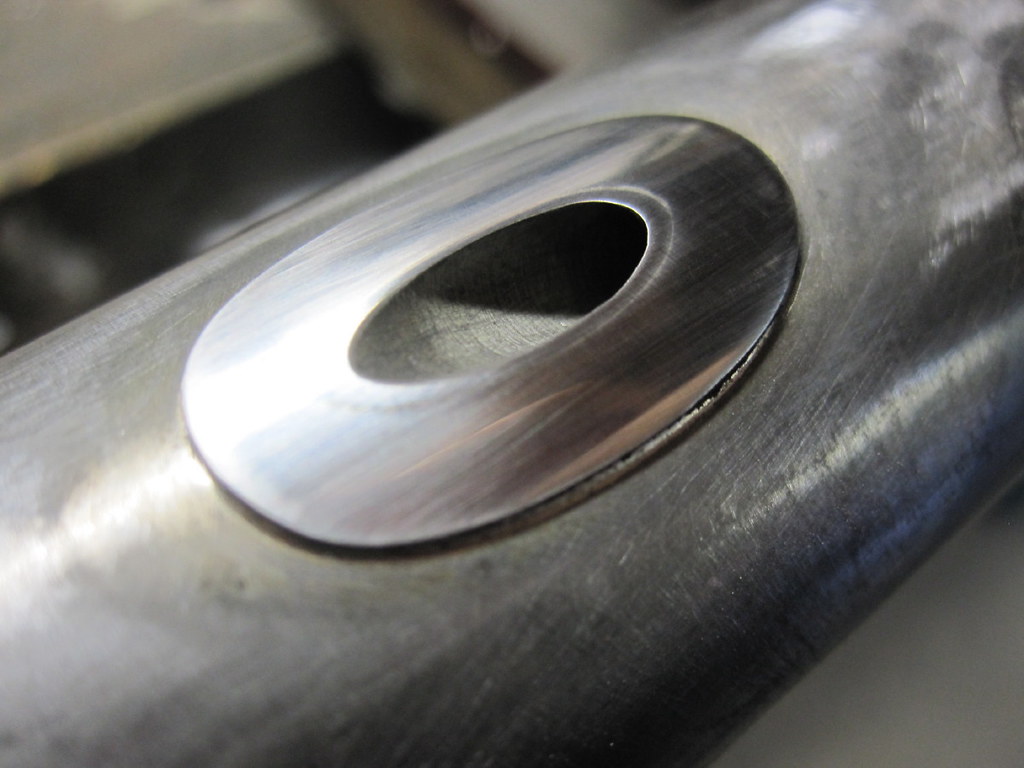
I rig everything up and plot the curves and entry points to ensure all is graceful and works well.
I prepare the rear bridge, the curved design matches the shape of the frame. I braze a stainless washer on the brake mount face, just for neatness of paint and I mill/skim the mount surface to ensure all is square. I break the edges and sand it all over to ensure a good paint finish due to the cast surface.
As I type a package of the special silver braze rod I used 10-15 years ago for filleting has arrived. 1 kg of this 55% silver content rod costs $1700 aud!
That is all for this week, I had many interruptions and I am a few weeks behind where considering the Bristol show is approaching.
-
 Re: The story of a new Llewellyn frame model with no name Part 5
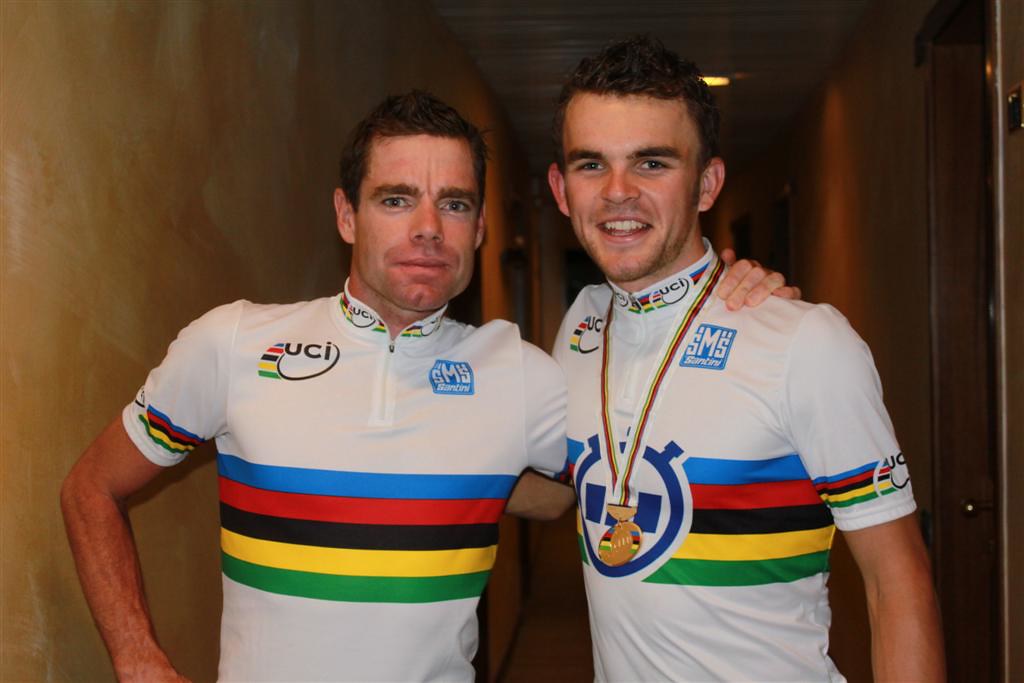
Just came across this pic from 2009. We had a big night in the Aussie team hotel that Sunday. It was my last stint as a mechanico with the Aussie team. Going away for 3 months was too much disruption and I decided that this was never a better time to move on and get deeply involved in other interests. Mostly full size heritage steam railway related.
-
 Re: The story of a new Llewellyn frame model with no name Part 5
Colossus is still in front at this stage.
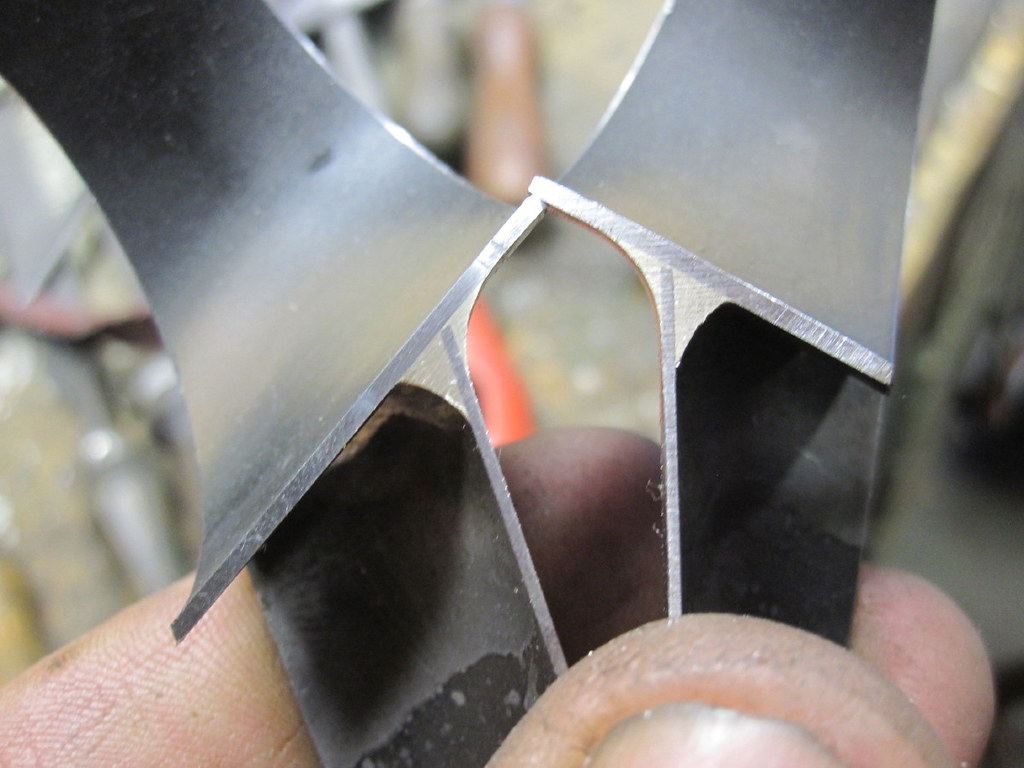
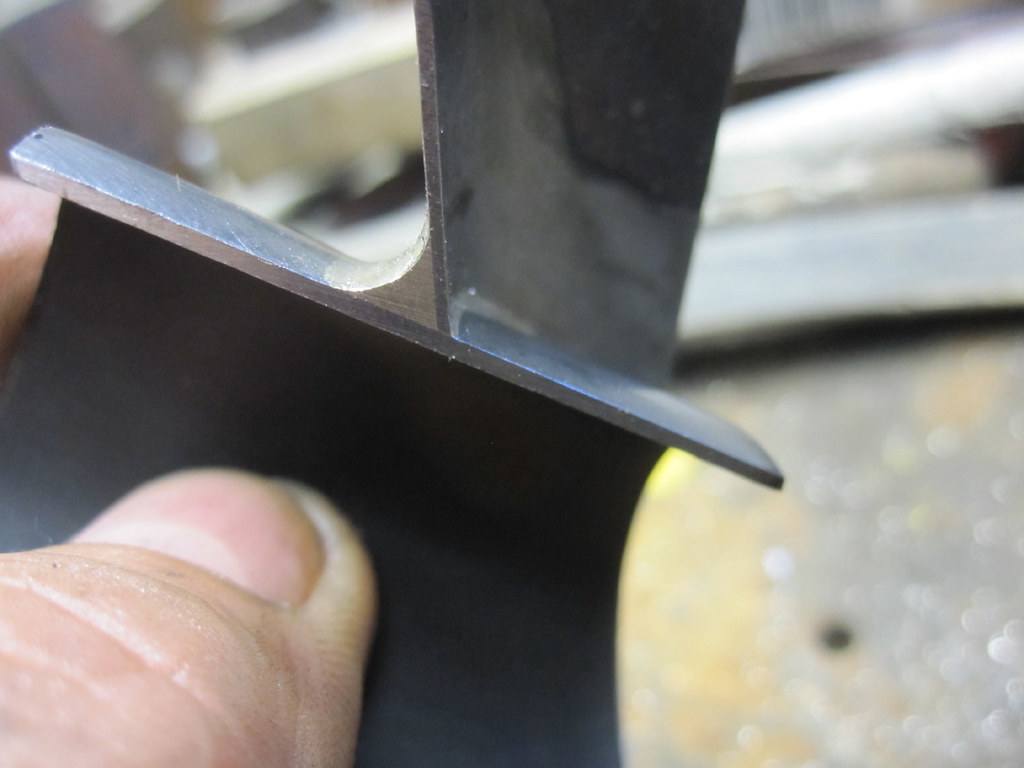
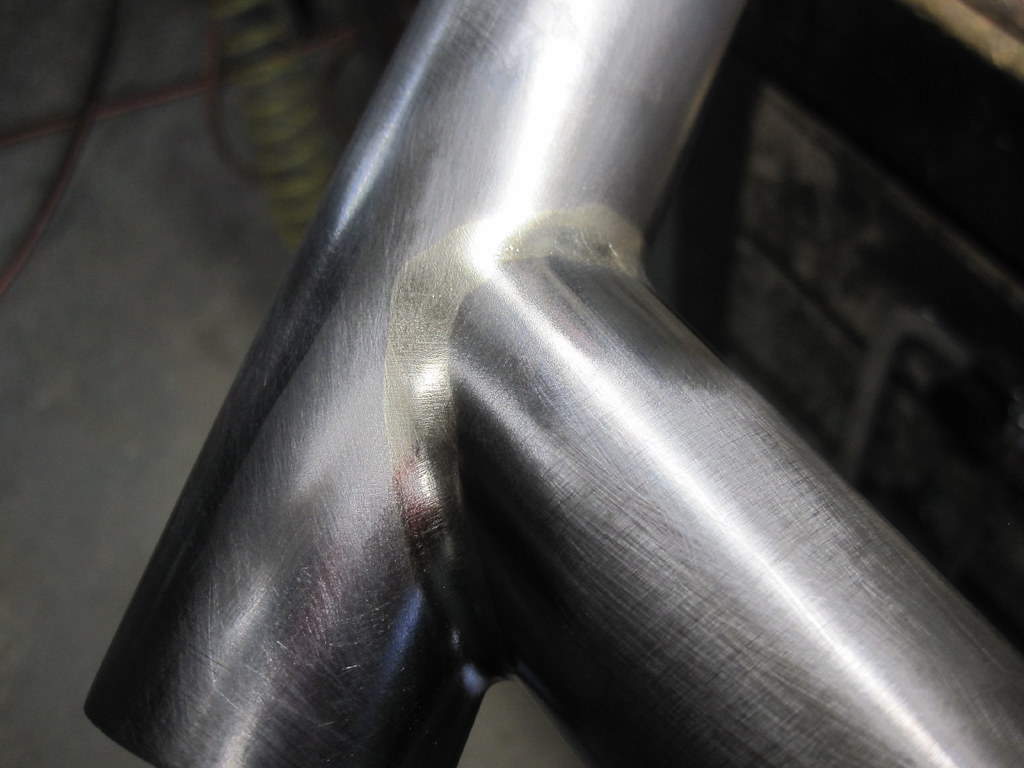
It has been 10 years since I was fillet brazing frames, so when my preferred special brew of silver rods for fillet brazing (Astro 165) arrived I made up a test/practice joint to re-acquaint myself with the technique. I did the full suck in method on half the joint and the outside only fill. I was a wee rusty and I also quickly finished off the joint to get used to the file and sand co-ordination.
-
 Re: The story of a new Llewellyn frame model with no name Part 5
Watching and reading about this build coming together has been awesome. Thanks much for sharing it with us Dazza!
-
 Re: The story of a new Llewellyn frame model with no name Part 5
my pleasure
after the Bristol show I will take orders and then off to make them.
10 of these only each year is the deal and with the Aussie dollar where it is at this time, a bargain 
Dazza plays this sort of stuff
loud when sanding fillets on frames
-
 Re: The story of a new Llewellyn frame model with no name Part 5
Hopefully not wearing a red lycra catsuit? 
"Caron, non ti crucciare:
vuolsi così colà dove si puote
ciò che si vuole, e più non dimandare"
-
-
 Re: The story of a new Llewellyn frame model with no name Part 5
Hi Dazza,
im not a master of the flamed torch, i use the tig but looking at the photos i cant help but become curios.is it correct to say your cut thru test pieces have more filler on the back or inside of the tube ? If so how do you achieve that ?in the future i would love to master the filled brazing technique, for now i shall focus on bettering what im currently doing, one step at the time.
love your work with capital letters ( but without yelling ofcourse ? )
mick, perth wa.
Thank, mick van aar
-
 Re: The story of a new Llewellyn frame model with no name Part 5

Originally Posted by
michäel2

Hi Dazza,
im not a master of the flamed torch, i use the tig but looking at the photos i cant help but become curios.is it correct to say your cut thru test pieces have more filler on the back or inside of the tube ? If so how do you achieve that ?in the future i would love to master the filled brazing technique, for now i shall focus on bettering what im currently doing, one step at the time.
love your work with capital letters ( but without yelling ofcourse ? )
mick, perth wa.
Hi Mick, one plays the torch inside the HT and feeds the rod in from out side. Similar to what I do with the seat stays on the seat lug. You can suck a whole rod into the joint under the tube if desired. Drawing it in with heat. In reality the detail of brazing, the movements are such that I am not able to explain because I have never watched myself or had to write a complete instruction manual for the process. It just happens.
 Posting Permissions
- You may not post new threads
- You may not post replies
- You may not post attachments
- You may not edit your posts
-
Forum Rules


 Likes:


 Reply With Quote


Bookmarks