User Tag List

Page 1 of 8 12345678 LastLast
Results 1 to 20 of 159

Thread: How To: Gluing CX Tubulars / Not tonight honey, I've got a Mastik 1 headache

  1. #1
    Join Date
    Jun 2008
    Location
    Sutton, MA USA
    Posts
    4,548
    Post Thanks / Like
    Mentioned
    1 Post(s)
    Tagged
    0 Thread(s)

    Default How To: Gluing CX Tubulars / Not tonight honey, I've got a Mastik 1 headache

    I’ve huffed enough Mastik over the past few days to kill the other 90% of my brain that we humans thankfully don’t use. I figured I’d pass along how I set things up and my process. I don’t want to debate the tape method or any of techniques as being lazy or not. The methods and materials presented here have never let me down. I go by one maxim, and that is “I’d rather have my fingers bleed trying to get the tubular off the rim after a flat than have a tire roll out on the course”. Now please note. If I only had a set of wheels to do, I’d probably do a few things differently. Doing 12 wheels at one time is different than doing 2. It’s time consuming, so anything that can save me some minutes and aggravation is a bonus.

    The information presented below is for entertainment purposes only. The techniques are based loosely on the techniques in the tech articles at cyclocrossworld.com linked below.
    http://www.cyclocrossworld.com/Tech....ShowDisabled=0
    http://www.cyclocrossworld.com/Tech....ShowDisabled=0

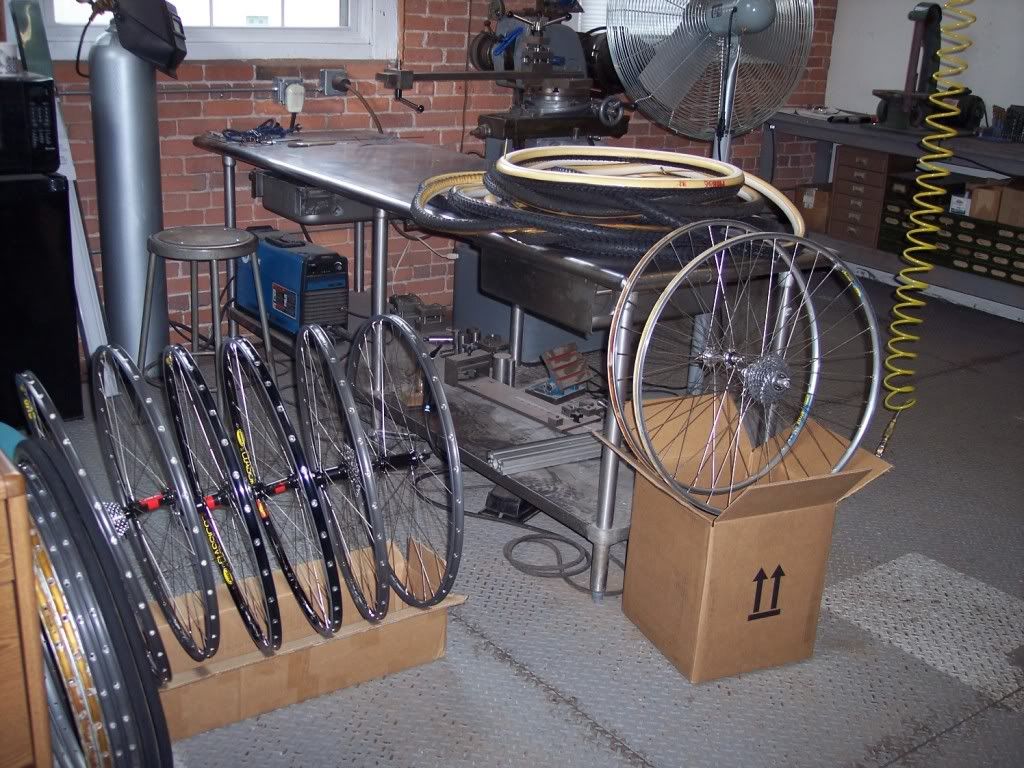
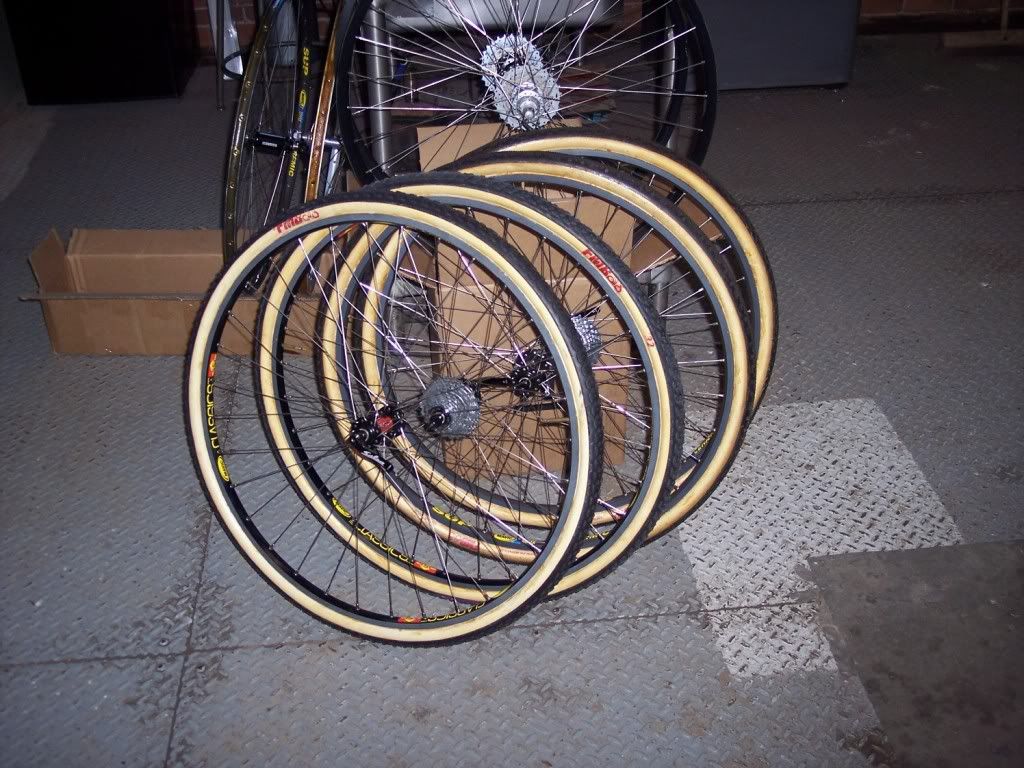
    So let’s get started. The first thing I make sure of is that all of my materials are accounted for. Basically, I start off with a pile of tires and some wheels. These frame tube boxes are great for holding wheels.


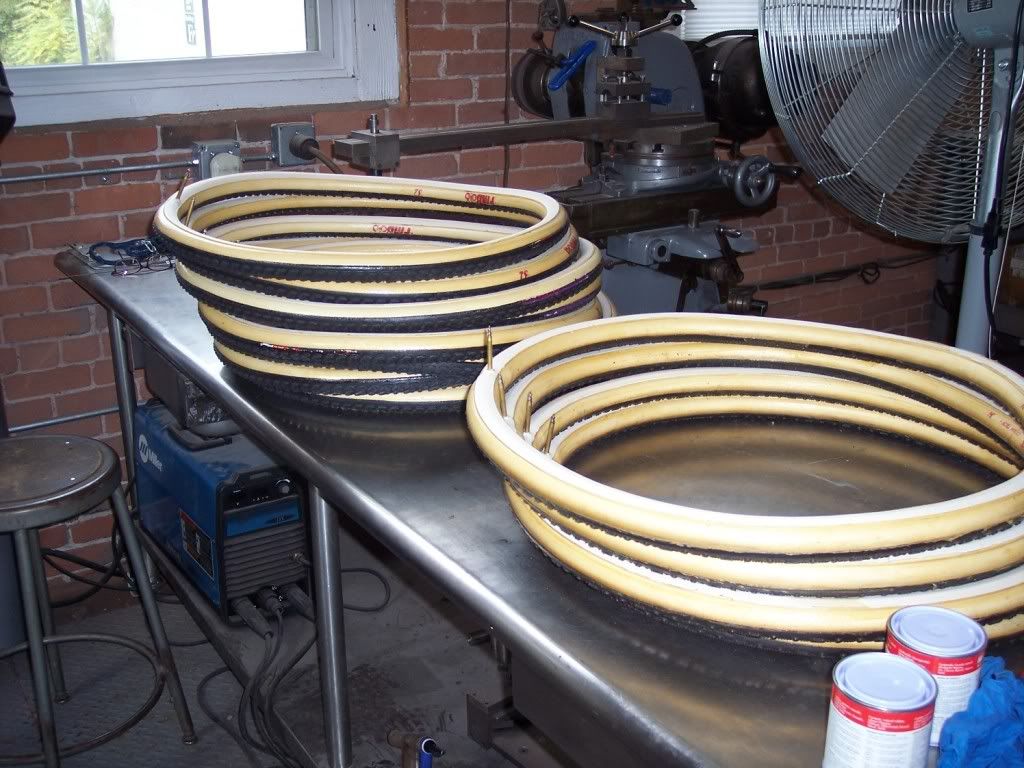
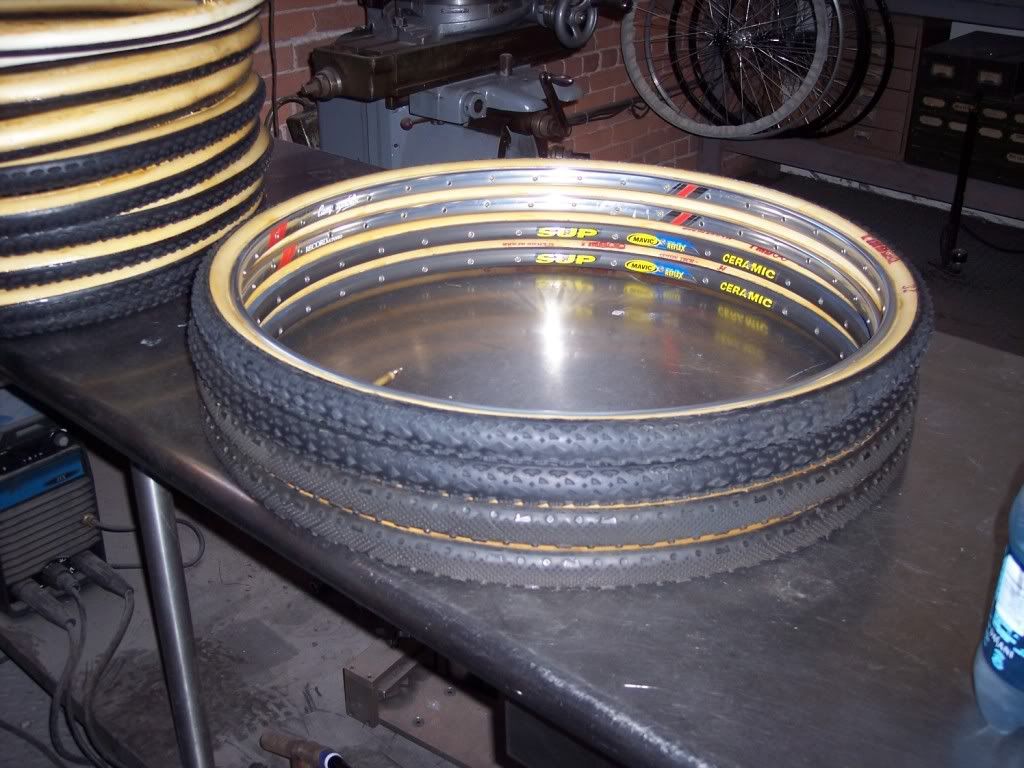
    The tubulars have already been pre-stretched. I put each new tubular on a clean rim and pump them up to about 60 psi for cross tubulars and 100 psi for road tubulars. It’s important to clean your stretching rims before putting a tubular on it. You don’t want any oil, solvent or other contaminants on the tubular’s base tape. I use acetone.

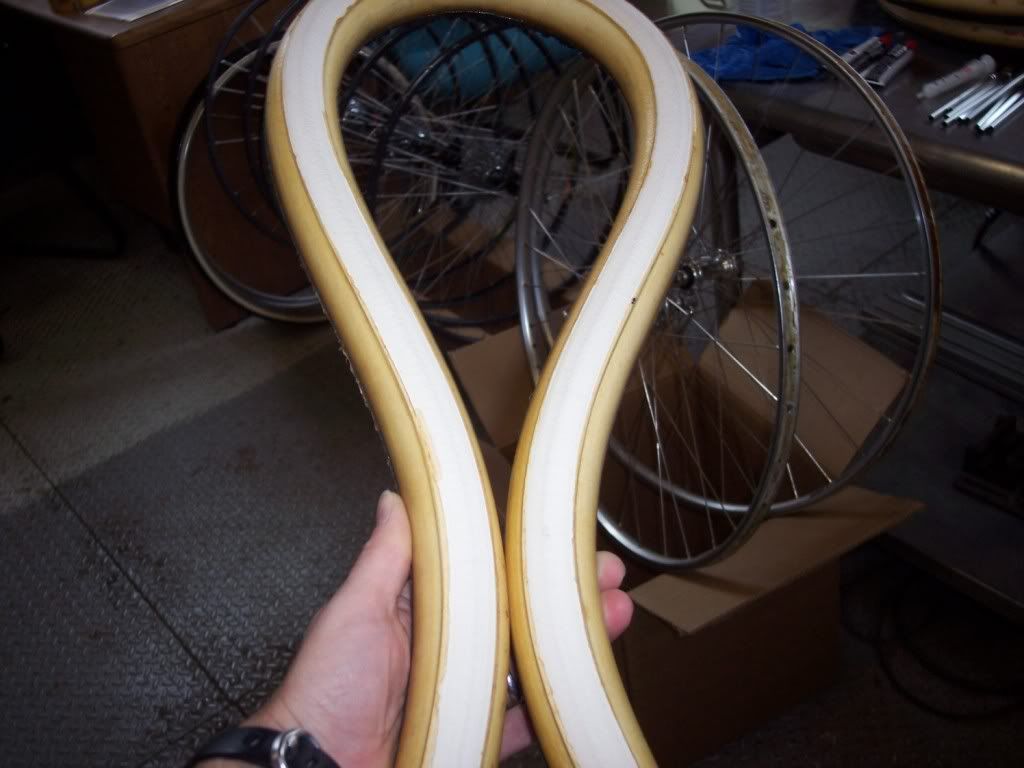
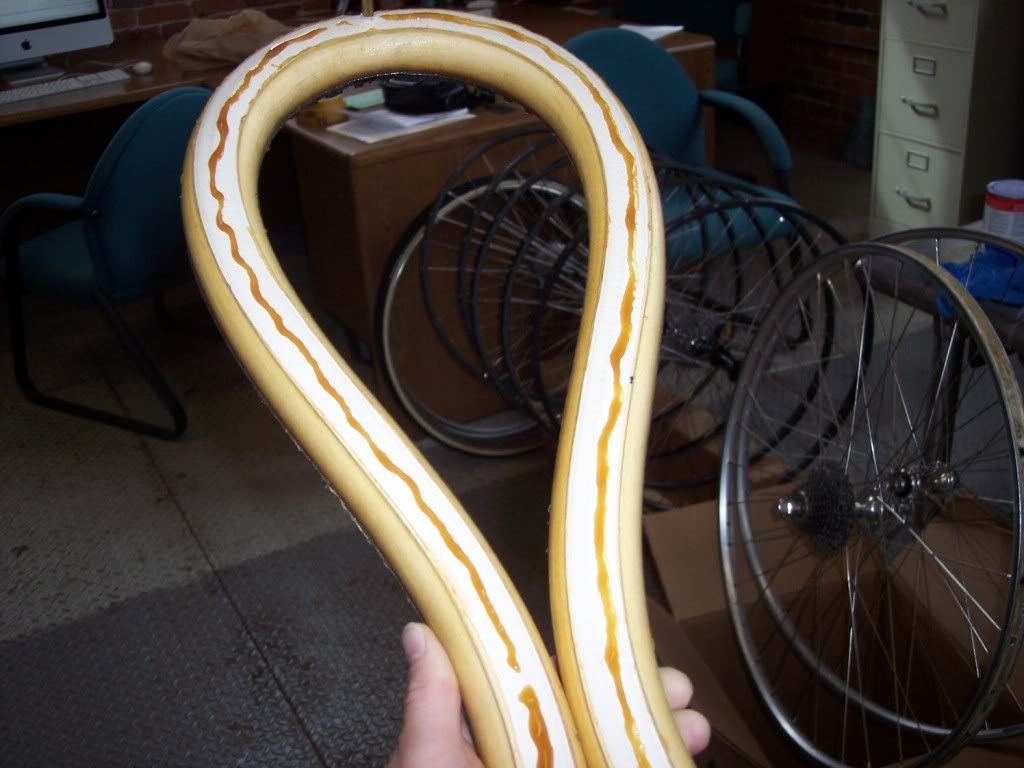
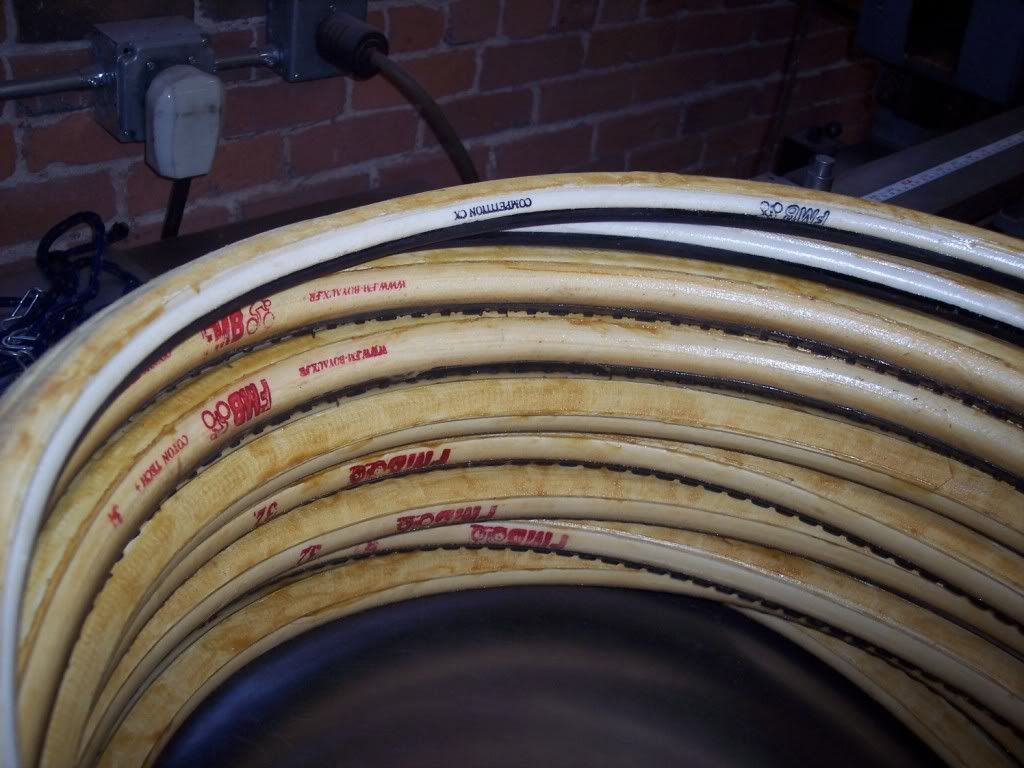
    The tubulars below have been blown up just enough to get the base tape to turn out as shown.


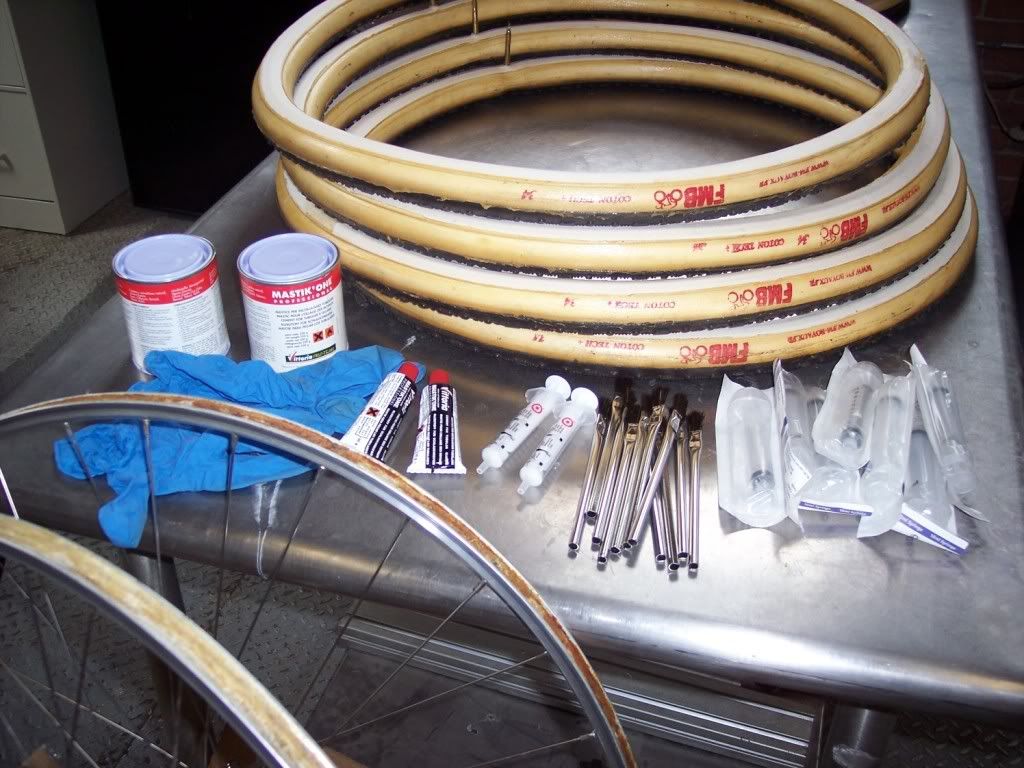
    The other materials are pictured below. I’ve got a couple of cans of Mastik One, a couple of spare tubes of Mastik One that I wanted to use up, some nitrile gloves, acid brushes (I buy them by the box of 100 for spreading flux on brazed joints, but you can get a bag of 12 at your local hardware store), and syringes for dispensing the glue. Not pictured is the Belgian tubular tape, a can of acetone, electrical tape, and coffee. The tubular tape can be purchased at cyclocrossworld.com. If you plan on doing a lot of tubulars, email Stu and ask him for the big roll, which is enough for 10-12 tubulars.
    http://cyclocrossworld.stores.yahoo....bulartape.html


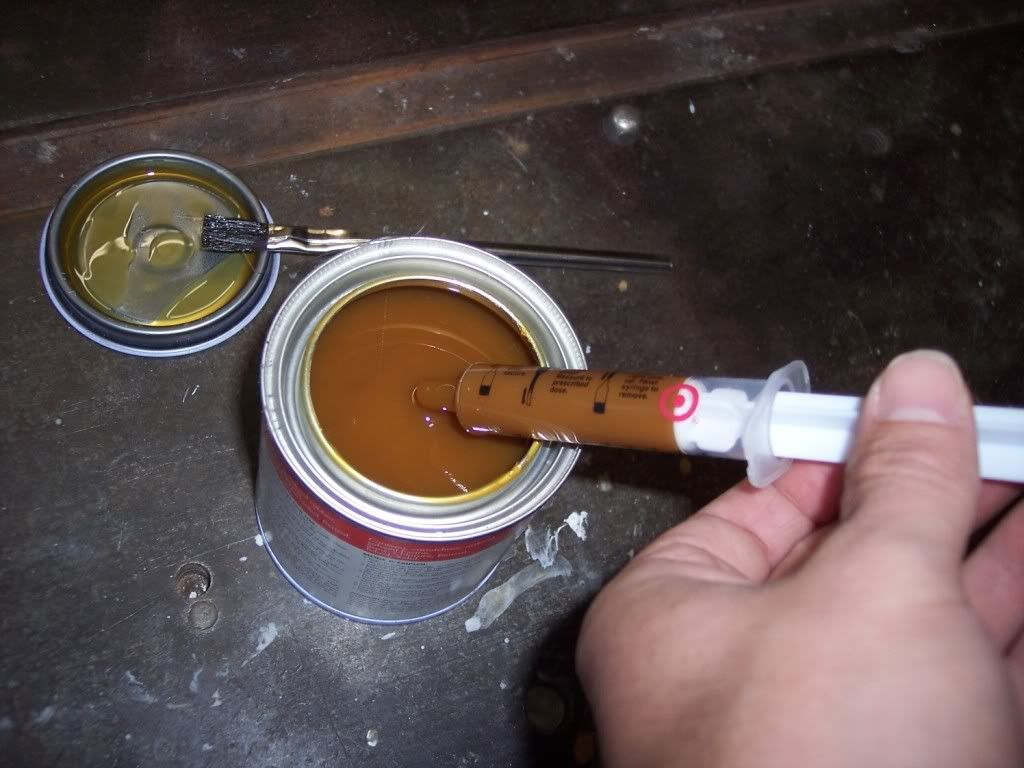
    So, why the syringe? This photo should help you understand. They totally rock for working with cans of glue. I know some pro mechanics just dump the can into a water bottle and then go hog wild. I find this tool ends up with less waste. Glue ain’t cheap. These syringes are 10mL. A 30mL would be better, but these were all the pharmacist at Target had at the time.
    Mike Zanconato
    Web
    | Instagram | Twitter | Facebook | Flickr | Tumblr

  2. #2
    Join Date
    Jun 2008
    Location
    Sutton, MA USA
    Posts
    4,548
    Post Thanks / Like
    Mentioned
    1 Post(s)
    Tagged
    0 Thread(s)

    Default

    This is the cool way to hold a tubular for glue application.


    Suck out about 15mL of glue from the can and put a nice bead around the base tape. If you have a 10mL syringe, you’ll have to double dip. You can either spread what you got from the first draw and then go back to the can, or suck out a bit more, lay the bead and spread the whole thing at once.


    This is how it looks after spreading it out. A nice even layer covering the whole base tape is what you are after.


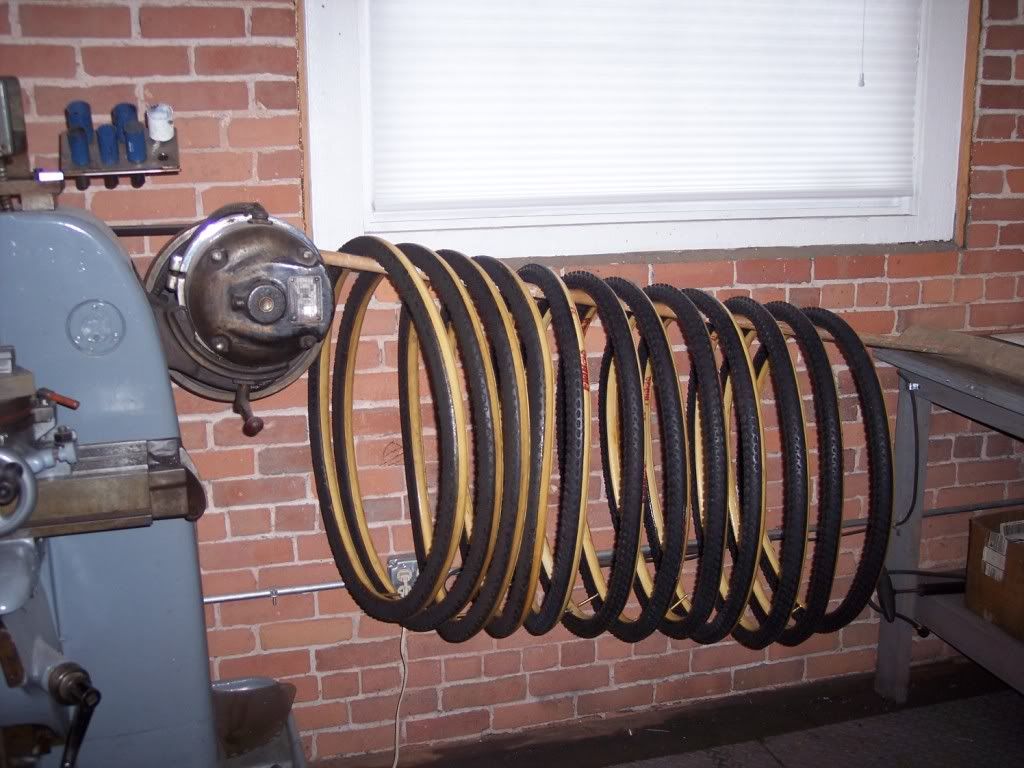
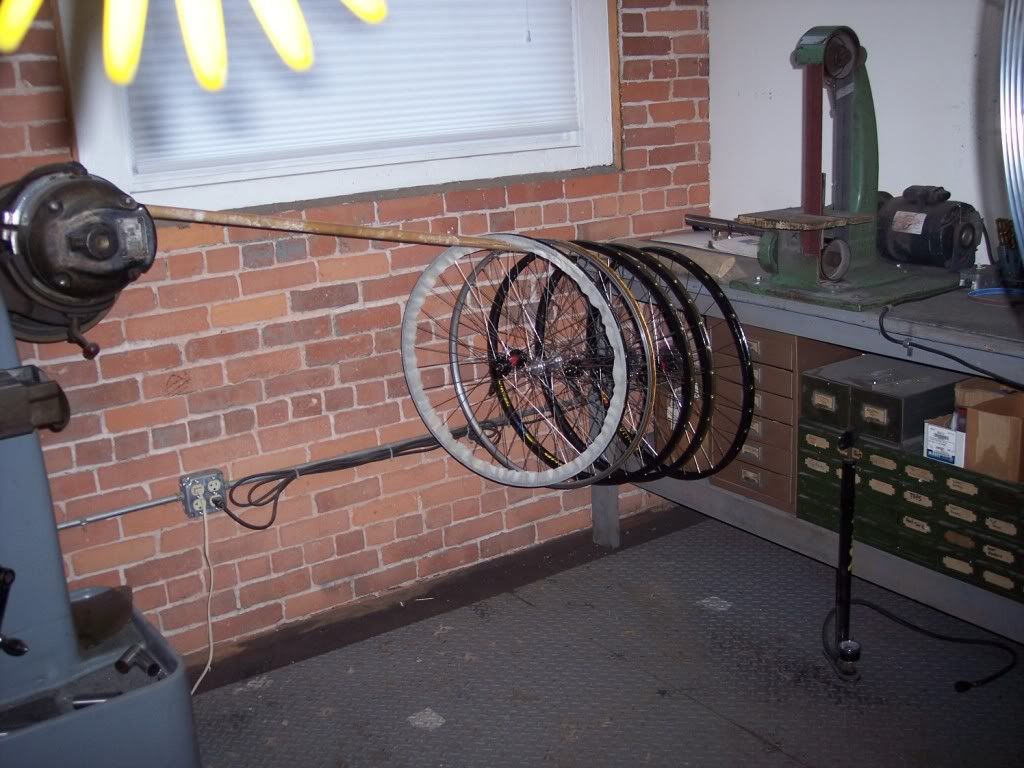
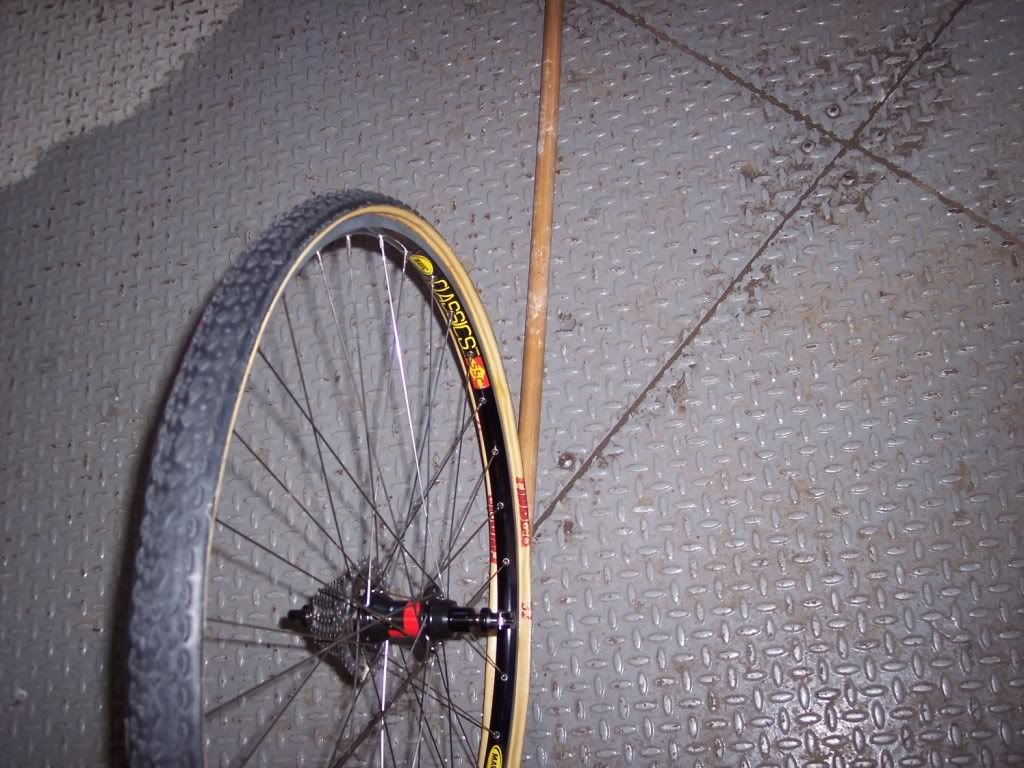
    So what do you do with 12 tubulars all with wet glue on them? This is what you do. Note that the tire is resting on the side of the casing and not the base tape. Clean and no fuss. Please note that you DO NOT need a horizontal milling machine to hold up the other side of the broom. You could use a Bridgeport, or even a floor stand drill press. It’s up to you.

    Mike Zanconato
    Web
    | Instagram | Twitter | Facebook | Flickr | Tumblr

  3. #3
    Join Date
    Jun 2008
    Location
    Sutton, MA USA
    Posts
    4,548
    Post Thanks / Like
    Mentioned
    1 Post(s)
    Tagged
    0 Thread(s)

    Default

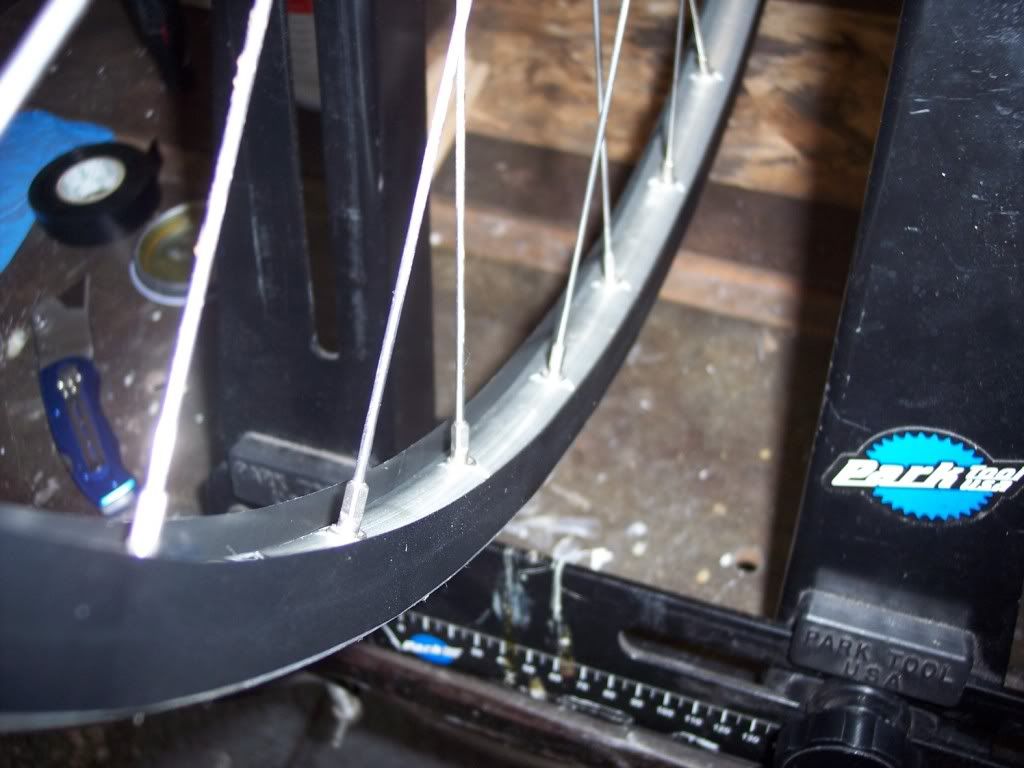
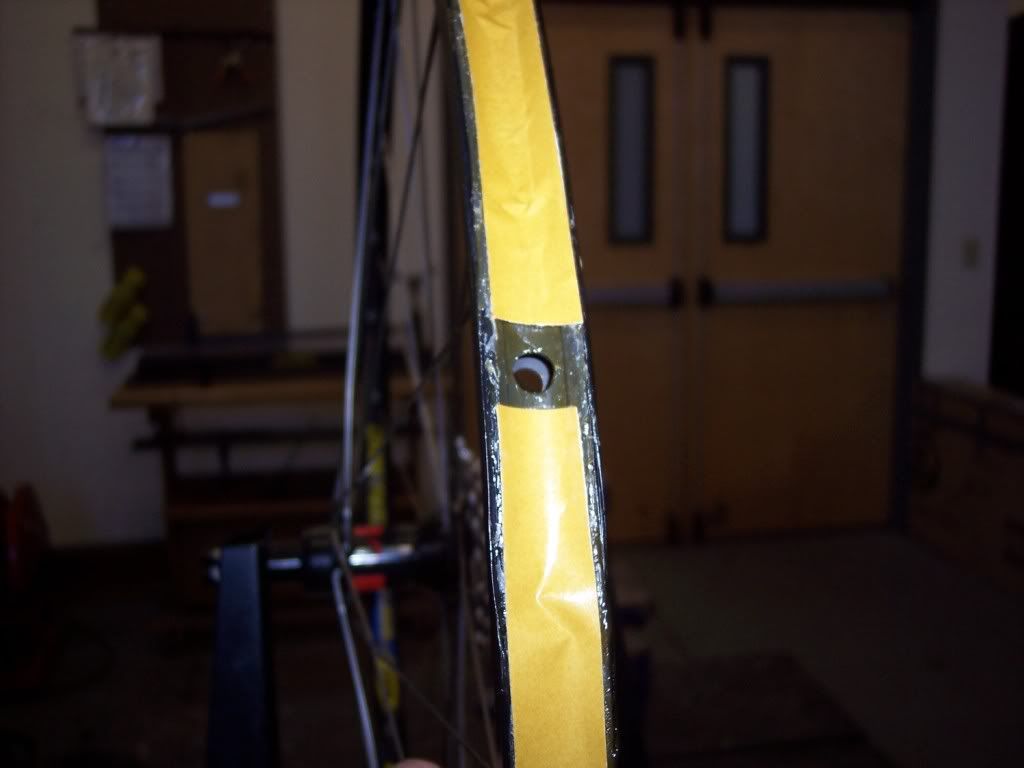
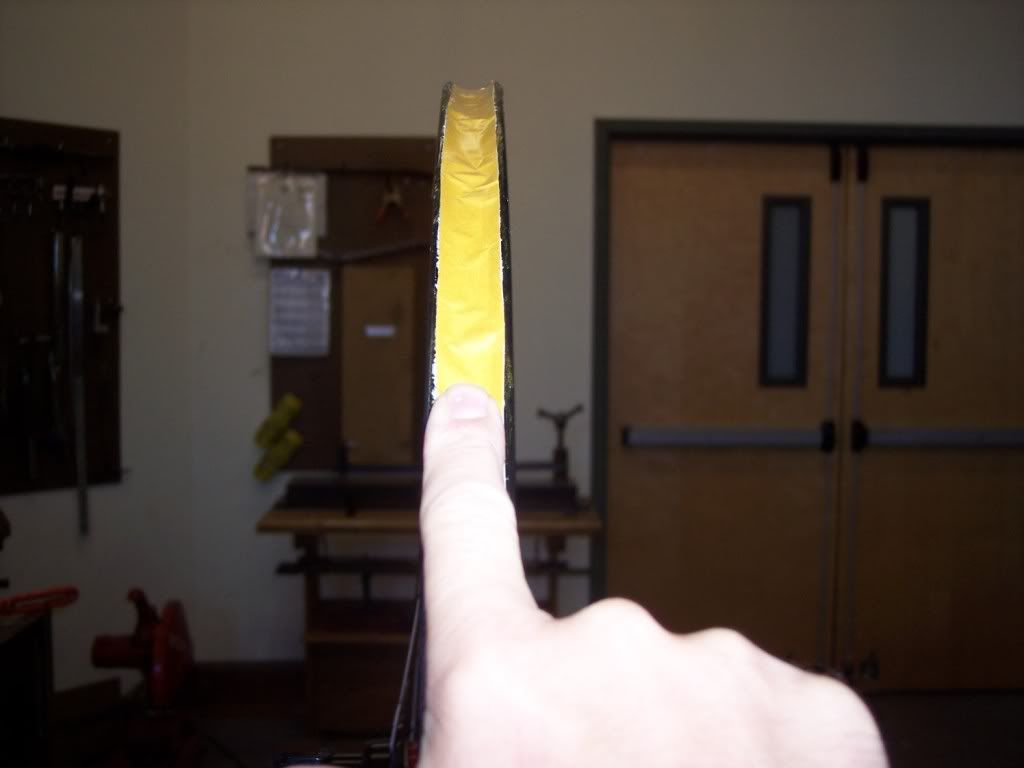
    Put your wheel in your handy, cheap, truing stand. It’s helpful to place rags under where the wheel is. Clean the rim with acetone and let it dry. Now, put a layer of electrical tape along the entire sidewall as shown in the 2 pictures below. Huh? Yup, that’s right. Put a layer of electrical tape on the entire sidewall of the rim. This will help make your glue job look nice, save you time trying to remove glue from sidewalls later and leave a perfect brake track. Do not try to use a paper-based masking tape for this. Trust me.


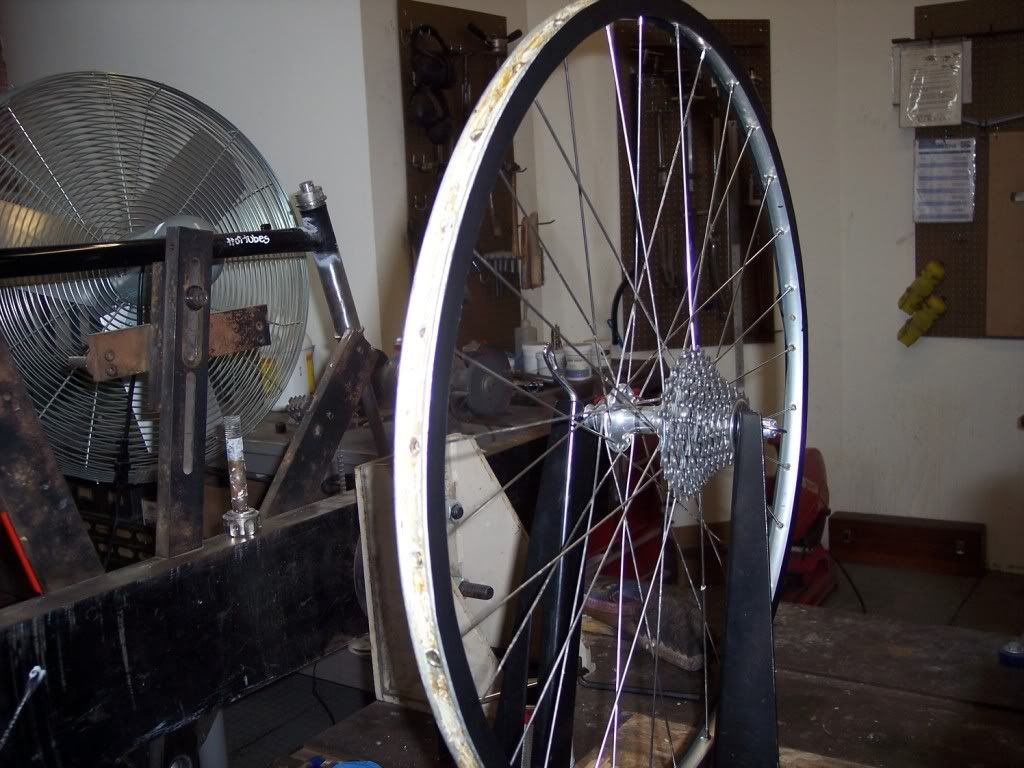
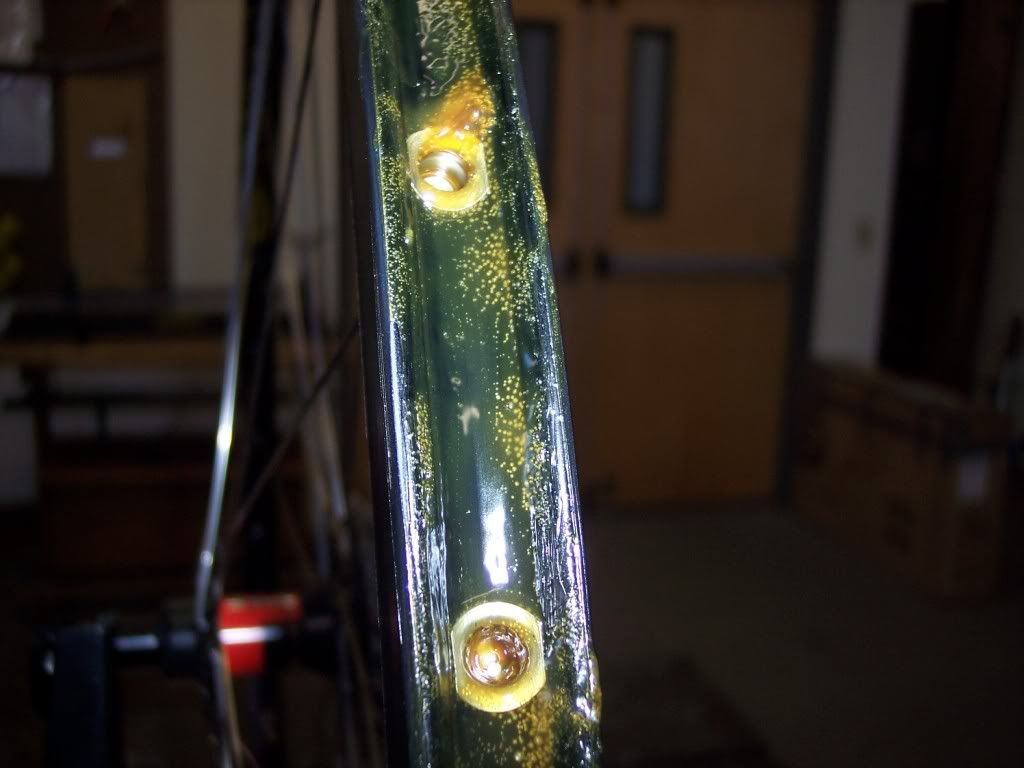
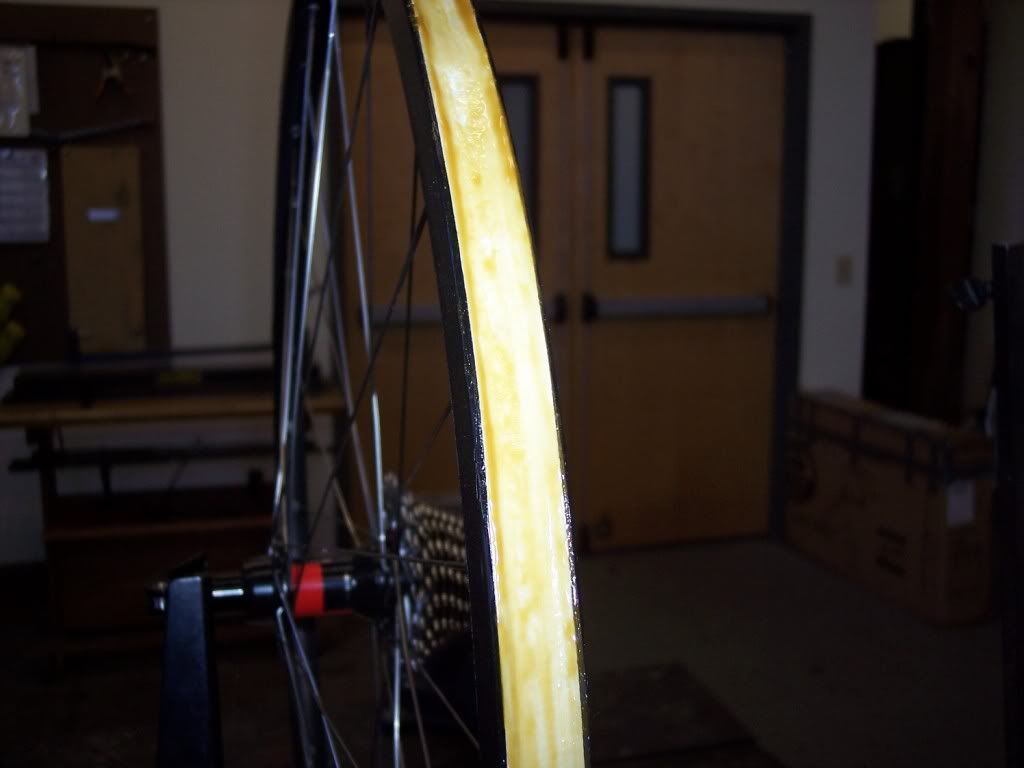
    Suck about the same amount of glue from the can as you used for the base tape prep. I start at the valve hole and put a nice bead in the center of the rim channel. I go about a quarter of the way around the wheel before spreading it out. This is about how much glue I like to have. Go all the way to the edge of the rim. Don’t worry about being too sloppy. You put the tape on the sidewall, remember? Please note that this is a photo of the glue after it has dried. But you can imagine what that amount of glue looks like when it is wet.


    Hang the wheels up to dry. Do as I say and not as I do. Don’t use masking tape. I ran out of electrical tape and threw that on there because I was in the zone. I ripped that off straight away and then re-taped with electrical tape after I went to the store to pick up more. Plan ahead. I should have. It sucks running out of anything half way through a job.

    Mike Zanconato
    Web
    | Instagram | Twitter | Facebook | Flickr | Tumblr

  4. #4
    Join Date
    Jun 2008
    Location
    Sutton, MA USA
    Posts
    4,548
    Post Thanks / Like
    Mentioned
    1 Post(s)
    Tagged
    0 Thread(s)

    Default

    After the tubulars have dried to the touch, I throw them back on the clean rims and pump ‘em up. The glue shrinks as it dries. This can present challenges when trying to mount it later. This final stretch helps make the mounting process a bit easier.


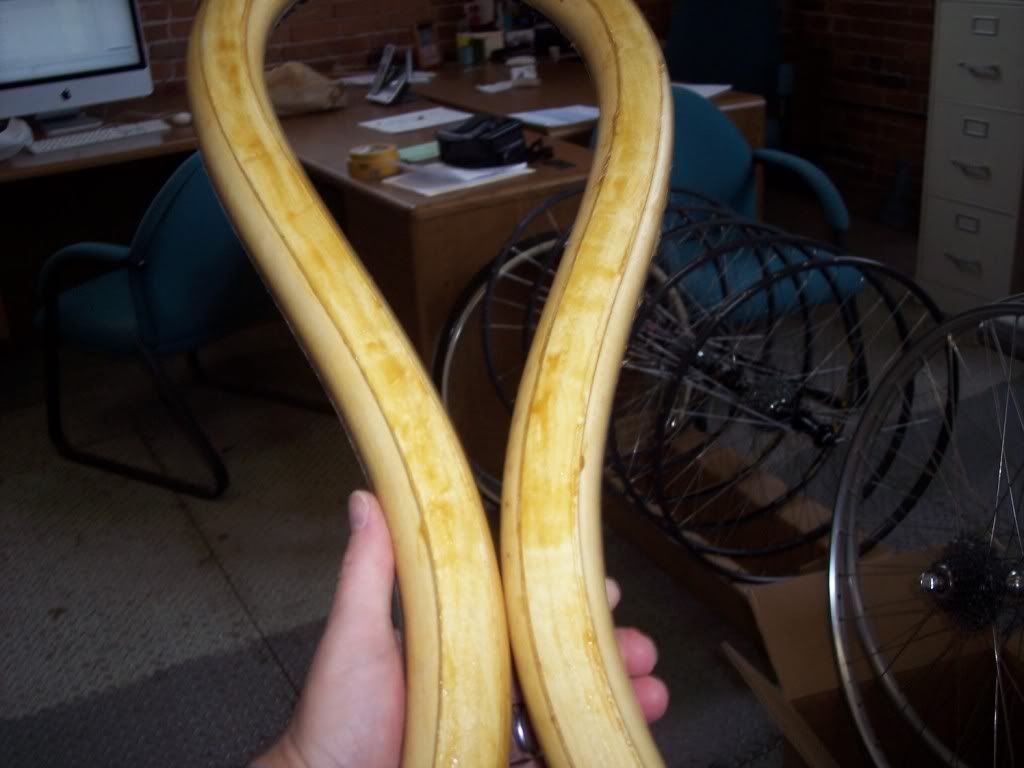
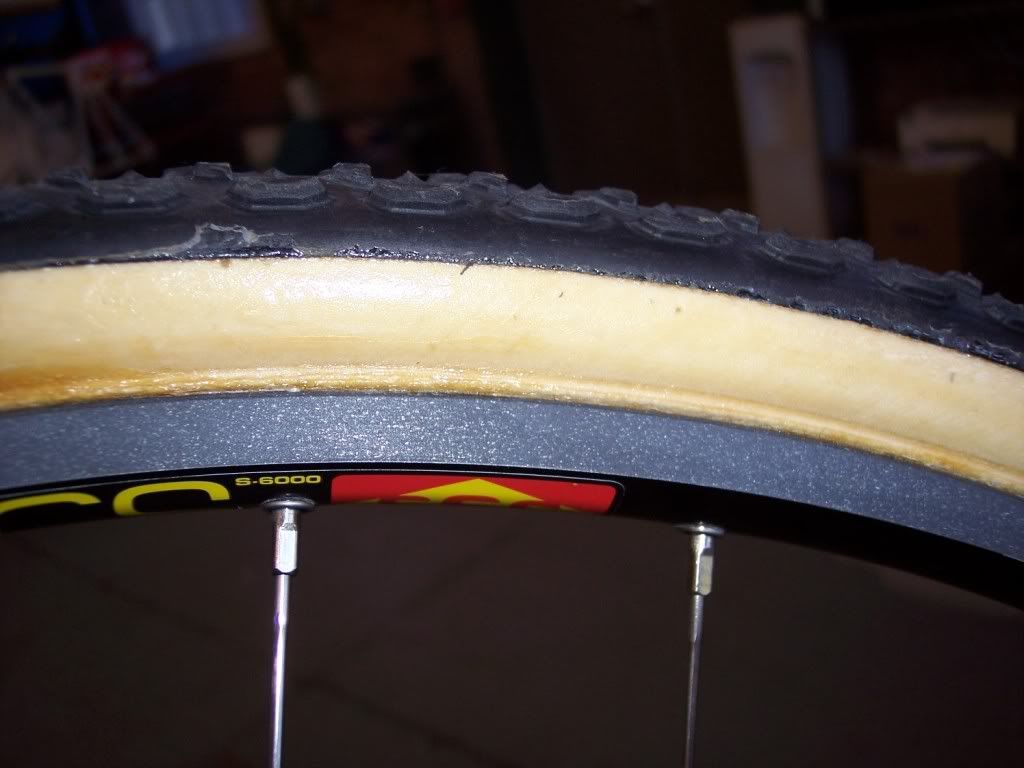
    This is what the tubulars look like with a layer of glue on them.


    Mike Zanconato
    Web
    | Instagram | Twitter | Facebook | Flickr | Tumblr

  5. #5
    Join Date
    Jun 2008
    Location
    Sutton, MA USA
    Posts
    4,548
    Post Thanks / Like
    Mentioned
    1 Post(s)
    Tagged
    0 Thread(s)

    Default

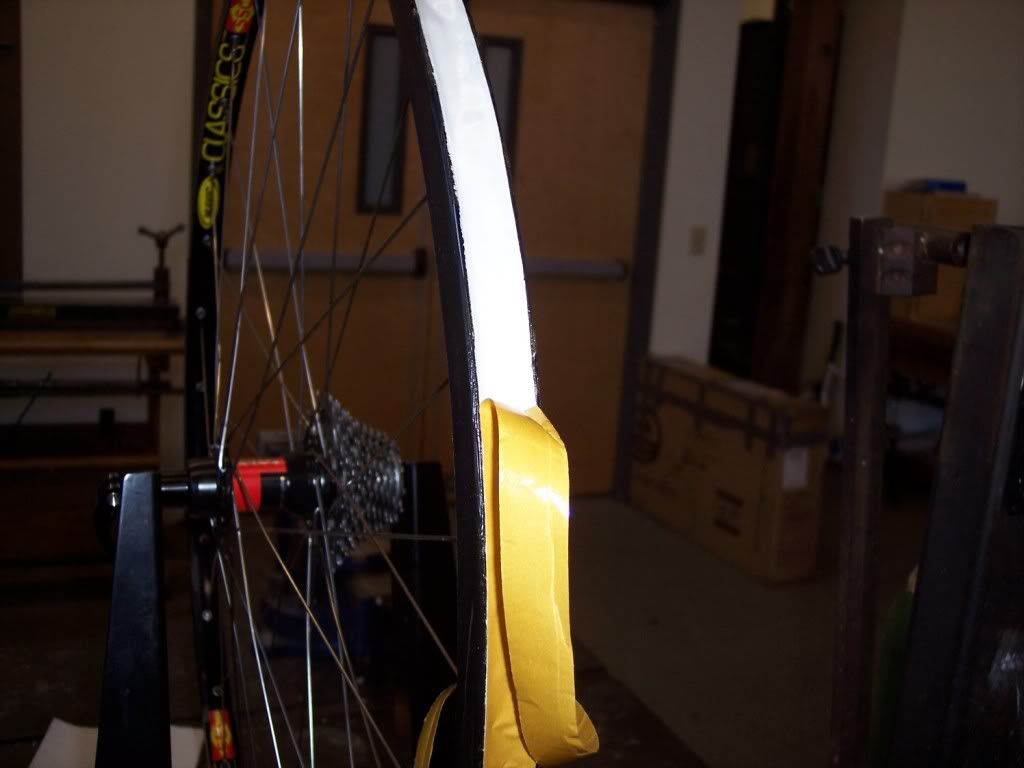
    When I am working with new tubulars and wheels, I do the first layer of glue on the tubulars in batches and the first layer of glue on the wheels in batches. In other words, I do all of the tubulars and then I do all of the wheels. I find it more efficient that way. After that though, I work with one wheel and tubular set at a time until the tubular is mounted. I get my wheel and tubular. I add a layer of glue to the tire and one to the wheel in the same fashion as above in that order. Note that you might not need quite as much glue as you did in the first layer. The base tape soaks up a good bit of glue during the first coat. Next step is to add the tape. This IS NOT Tufo tape. It’s the tape from cyclocrossworld.com. It works. Don’t use Tufo tape. I start at the valve hole and go around leaving a gap at the valve. It’s just cleaner this way.


    I smoosh the tape into the wet glue on the rim with my finger...


    peel away the tape’s backing...


    and add a very thin layer of glue to the top of the tape after removing the backing.


    Mike Zanconato
    Web
    | Instagram | Twitter | Facebook | Flickr | Tumblr

  6. #6
    Join Date
    Jun 2008
    Location
    Sutton, MA USA
    Posts
    4,548
    Post Thanks / Like
    Mentioned
    1 Post(s)
    Tagged
    0 Thread(s)

    Default

    And now it’s time to fire on your tubular. Deflate the tire. Put the wheel on a clean, hard floor. It’s best to use a floor that you won’t mind getting a little glue on. Orient the valve hole up. Insert the valve into the hole paying attention to the tire direction. Start stretching the tubular at the very top by pushing down on it as you make your way around the wheel. If you pre-stretched the tubular and started pushing on it from the top, you shouldn’t have much trouble getting the last bit of the tire over the top of the rim.

    Next, I go around each side of the tire and check to see if the base tape is roughly in the middle of the rim bed. There should be equal amounts of base tape showing on each side. Work quickly. Things get really sticky in a hurry. I then give the tire a quick shot of air and a spin to see how centered the tread is. The tread is not always on center with the base tape, so you may need to deflate the tubular and make some adjustments. At this point, it will be pretty tough to move the tubular. Work quickly.

    When I am satisfied with how straight the tread is, I deflate the tire and push hard on the top of the tread into the rim. I am trying to get all of that gluey goodness to make contact in the middle of the rim bed. Then, I lay a broomstick down on the floor and roll the wheel on it while pushing down. Again, this is done to try to push the base tape into the center of the rim bed.


    I then pump up a cross tubular to about 60 psi and a road tubular to about 100 psi and let it sit overnight. Now is a good time to remove the electrical tape. If you are planning on putting a layer of Aquaseal on the sidewall, you can leave the tape on for that. You should Aquaseal any cotton casing tubular. You can marvel at how wonderful your rim sidewalls look.


    Wait 24 hours and then enjoy.


    I hope you’ve enjoyed this little journey. The remaining 10% of my brain wishes you well on your own tubular tire gluing adventures.
    Mike Zanconato
    Web
    | Instagram | Twitter | Facebook | Flickr | Tumblr

  7. #7
    Join Date
    May 2008
    Posts
    7,157
    Post Thanks / Like
    Mentioned
    1 Post(s)
    Tagged
    0 Thread(s)

    Default

    where do you buy your aquaseal. Do local stores carry the stuff?

  8. #8
    Join Date
    Jun 2008
    Location
    Sutton, MA USA
    Posts
    4,548
    Post Thanks / Like
    Mentioned
    1 Post(s)
    Tagged
    0 Thread(s)

    Default

    Quote Originally Posted by Jonathan View Post
    where do you buy your aquaseal. Do local stores carry the stuff?
    I get it here. I buy the big 8 oz tube.

    http://www.scuba.com/scuba-gear-166/...d-Sealant.html
    Mike Zanconato
    Web
    | Instagram | Twitter | Facebook | Flickr | Tumblr

  9. #9
    Join Date
    Mar 2009
    Location
    Nc
    Posts
    516
    Post Thanks / Like
    Mentioned
    0 Post(s)
    Tagged
    0 Thread(s)

    Default

    Quote Originally Posted by Jonathan View Post
    where do you buy your aquaseal. Do local stores carry the stuff?
    You can usually find aquaseal at a paddling/kayak shop or gear/outdoor shop that sells McNett products (like Seam Sealer, etc.).

  10. #10
    Join Date
    May 2008
    Posts
    1,816
    Post Thanks / Like
    Mentioned
    0 Post(s)
    Tagged
    0 Thread(s)

    Default

    You can get it from Cabela's, too.

  11. #11
    Join Date
    Jun 2008
    Location
    Sutton, MA USA
    Posts
    4,548
    Post Thanks / Like
    Mentioned
    1 Post(s)
    Tagged
    0 Thread(s)

    Default

    From above....

    "I don’t want to debate the tape method or any of techniques as being lazy or not. The methods and materials presented here have never let me down. I go by one maxim, and that is “I’d rather have my fingers bleed trying to get the tubular off the rim after a flat than have a tire roll out on the course”."
    .........

    "The information presented below is for entertainment purposes only."

    EDIT:
    ok, ok, I won't be so grumpy.

    The Tufo tape just doesn't work as good.
    Mike Zanconato
    Web
    | Instagram | Twitter | Facebook | Flickr | Tumblr

  12. #12
    Join Date
    Jun 2008
    Location
    Middle of the mitten
    Posts
    2,644
    Post Thanks / Like
    Mentioned
    4 Post(s)
    Tagged
    0 Thread(s)

    Default

    Well done!

    When you pull (cut off?) a tire off that's been glued/taped, what is left behind on the rim? Does the tape tend to go with the tire or stay on the rim?
    Aiming to KICK cancer's butt this time around
    Dancing with NED, raising funds for METS research


  13. #13
    Join Date
    Jun 2008
    Location
    Sutton, MA USA
    Posts
    4,548
    Post Thanks / Like
    Mentioned
    1 Post(s)
    Tagged
    0 Thread(s)

    Default

    Quote Originally Posted by SpeedyChix View Post
    Well done!

    When you pull (cut off?) a tire off that's been glued/taped, what is left behind on the rim? Does the tape tend to go with the tire or stay on the rim?
    It depends. Quite often, the base tape comes off the tubular and is left on the rim. Then you rip that off. Most of the time, everything is smooth enough that you can glue right over what's left.

    It's a pretty nasty bond. But you won't roll the tub.
    Mike Zanconato
    Web
    | Instagram | Twitter | Facebook | Flickr | Tumblr

  14. #14
    Join Date
    Nov 2008
    Location
    Green Bay, WI
    Posts
    594
    Post Thanks / Like
    Mentioned
    0 Post(s)
    Tagged
    0 Thread(s)

    Default

    Quote Originally Posted by SpeedyChix View Post
    Well done!

    When you pull (cut off?) a tire off that's been glued/taped, what is left behind on the rim? Does the tape tend to go with the tire or stay on the rim?
    Great question. Mike, I have the same/similar question. How long do you typically leave the tire on before changing it out for a new one?

  15. #15
    Join Date
    Feb 2009
    Location
    Wicker Park, Chicago & Clark, CO
    Posts
    562
    Post Thanks / Like
    Mentioned
    0 Post(s)
    Tagged
    0 Thread(s)

    Default

    Quote Originally Posted by Jonathan View Post
    where do you buy your aquaseal. Do local stores carry the stuff?
    Fly fishing shops carry it too. Good for wader repairs.

  16. #16
    Join Date
    Jun 2008
    Location
    Sutton, MA USA
    Posts
    4,548
    Post Thanks / Like
    Mentioned
    1 Post(s)
    Tagged
    0 Thread(s)

    Default

    Quote Originally Posted by moran View Post
    Great question. Mike, I have the same/similar question. How long do you typically leave the tire on before changing it out for a new one?
    Again, your mileage may vary, but I've had to cut off flatted tires mounted this way 3 years the previous. It really does get to the point where you have to start looking at the casing/base tape bond for suspect areas after a season or two. That will often let go before the base tape/rim bond using this method.

    Also, I am in New England, which has been much drier over the past bunch of years than other areas of the country. Riders in the Pacific Northwest will need to pay much closer attention to edge bond.
    Mike Zanconato
    Web
    | Instagram | Twitter | Facebook | Flickr | Tumblr

  17. #17
    Join Date
    Jan 2009
    Posts
    339
    Post Thanks / Like
    Mentioned
    0 Post(s)
    Tagged
    0 Thread(s)

    Default

    This is an incredible tutorial. I've read how to mount tubulars, but the pictures and your added explanation are a welcome addition the years. My appreciation for the PICTURES over the TEXT probably stems from my early childhood "readings" of Playboy, right? TMI?

    Anyway, thanks for posting this Zank.

  18. #18
    Join Date
    Jun 2008
    Posts
    1,166
    Post Thanks / Like
    Mentioned
    0 Post(s)
    Tagged
    0 Thread(s)

    Default

    True Zen. The broom trick takes it out of the park. Thank you.
    Fit is directly proportional to fitness.

  19. #19
    Join Date
    May 2008
    Location
    DC
    Posts
    30,224
    Post Thanks / Like
    Mentioned
    59 Post(s)
    Tagged
    0 Thread(s)

    Default

    In-Zank-We-Trust

    Wikki'd for your mortal pleasure.

    Thank you Mike.

  20. #20
    Join Date
    Jun 2008
    Posts
    476
    Post Thanks / Like
    Mentioned
    0 Post(s)
    Tagged
    0 Thread(s)

    Default

    Quote Originally Posted by Sasha View Post
    Who'd you kill to get a set of new, never braked on Classics rims.
    they are not new... Mike's never applied the brakes during a race.

Page 1 of 8 12345678 LastLast

Tags for this Thread

Bookmarks

Bookmarks

Posting Permissions

  • You may not post new threads
  • You may not post replies
  • You may not post attachments
  • You may not edit your posts
  •