User Tag List

Page 1 of 3 123 LastLast
Results 1 to 20 of 43

Thread: the hand mitering thread

  1. #1
    Join Date
    Jun 2009
    Location
    Happy Valley, PA
    Posts
    3,403
    Post Thanks / Like
    Mentioned
    0 Post(s)
    Tagged
    0 Thread(s)

    Default the hand mitering thread

    Dave Bohm suggested another thread to discuss hand mitering. I am not a pro builder, and as long as I can do 5x better as an engineer I'm going to stay a hobbyist. My main experience was sitting at a bench at Trek back in the '70s brazing pre-mitered tubes into frames. So I have never built a ton of hand mitered frames. I built some prototypes at Trek, so I got really good at hand mitering by eye while I was there. The intervening decades have caused those skills to fade, and while I could hand miter by eye now, I use templates.

    I dykem the tubes, scribe the centerline on the bowed up side and then tape on the templates. I scribe the shape into the dykem and then slide the template to the center of the tube. Then I hand miter the tube. If I get confused, the template is still ready to go, but I don't use it as an actual guide. I always used a scribing guide, it's just that now it's printed on a computer. I see no flaw with this procedure, although it loses in any hand-mitering dick swinging contest.

    I think my procedure is far superior to sitting around not building frames because you can't afford $2k for a mill and tooling. But I'm certainly willing to learn different techniques.

    Thanks

  2. #2
    Join Date
    Oct 2010
    Location
    Shakopee, Minnesota, United States
    Posts
    2,132
    Post Thanks / Like
    Mentioned
    0 Post(s)
    Tagged
    0 Thread(s)

    Default Re: the hand mitering thread

    nice job with the dykem. I usually reserve that for marking the seats while porting cylinder heads.

    How you get to the end result doesn't really matter as long as it is the correct result. I do a similar method of finding the high spot on the tube and then mark a centerline. I use the same templates as Dave A. to get my miter lines and then mark them on the tubes. I'm working with aluminum for what it is worth, but I then remove as much material as possible with a hack saw and then come in to my desired lines with the half round files. I would love to set up a Bridgeport with one of Don's tubing fixtures, but sometimes you have to keep perspective and it really isn't all that difficult if you stay patient.

  3. #3
    Join Date
    Jul 2012
    Location
    Richmond, Virginia, United States
    Posts
    122
    Post Thanks / Like
    Mentioned
    0 Post(s)
    Tagged
    0 Thread(s)

    Default Re: the hand mitering thread

    I like hand mitering too. But I must confess that I do it both ways, or either way, depending on the tubing or my mood. I still can't figure out how to miter seat stays without doing it by hand, so I try to keep my skills and my files sharp.
    On shaped tubes, I will either do it by eye by cutting the tube long and progressively working away the parts I don't need, or when applicable, I will use a hole saw to get the angle and minor diameter established, and then proceed from there.
    I did come up with a way (i'm sure I am not the first) to alter the BikeCAD miter templates so that each set of miters shares a common line. I then cut them on my Stikka 8 vinyl cutter (great investment), and mark each tube with a center line the length of it, and where the miters intersect this line. Then it's as easy as putting stickers on a tube and cutting to the sticker. Then once the cope is close, you fit it up. Done.
    Of course this method only works for round tubes, unless you are really clever with your math.
    As a side note:
    I found this method to be helpful when teaching others the process of mitering by hand. Sure it takes a lot of the thinking out of it, but it allows the beginner to see the shape of the miter while working there way up to it. It also provides an opportunity for the student to explore the half round file, and learn how to use it to carve radii and shapes other than what are inherent in the tool at hand.

    Hh

  4. #4
    Join Date
    Jun 2009
    Location
    Happy Valley, PA
    Posts
    3,403
    Post Thanks / Like
    Mentioned
    0 Post(s)
    Tagged
    0 Thread(s)

    Default Re: the hand mitering thread

    Quote Originally Posted by Stijl Cycles View Post
    I did come up with a way (i'm sure I am not the first) to alter the BikeCAD miter templates so that each set of miters shares a common line.
    How do you do this?

  5. #5
    Join Date
    Jul 2008
    Location
    Tucson Arizona
    Posts
    429
    Post Thanks / Like
    Mentioned
    0 Post(s)
    Tagged
    0 Thread(s)

    Default Re: the hand mitering thread

    My method for hand mitering goes as such.

    1. Find bow in tube, place upwards or downwards
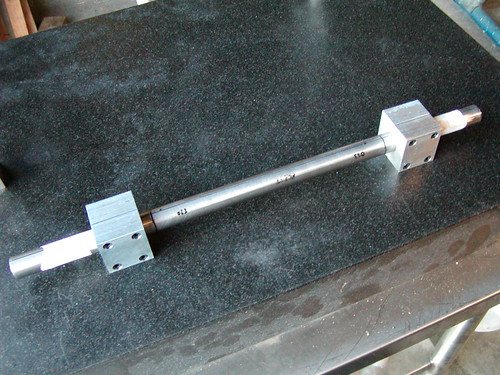
    2. place two Paragon tube blocks, one on either end. Tighten. These will remain on tube until mitering procedure is completed
    3. determine areas to remove waste and do so with hacksaw.
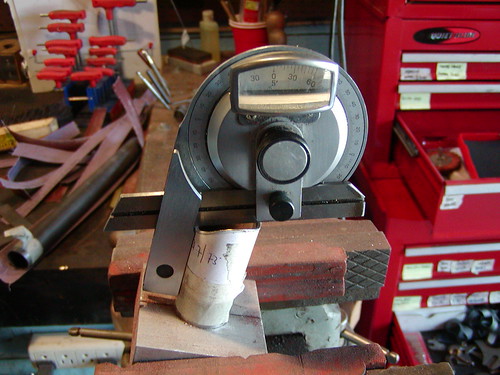
    4. Create first miter with appropriate half round file and a bevel protractor to verify cut angle
    5. Using layout fluid and a large metric caliper (chinese, costs about 180 dollars) measure length given from CAD drawing
    6. Depending on phase of tube (TT or DT) re-orient tube in bench vise the appropriate way. Since the blocks have not moved, the centerline has stayed the same. Create second miter to line using file and bevel protractor

    It is convenient to layout the tubes on the blocks initially using a relatively flat surface although not critical. This same methodology can be used to move into the arena of machine mitering without the use of sophisticated tooling. Once the blocks are placed you can clamp them in a machines vise. Using the same bevel protractor find the angle between the block and the quill of your machine. Scribe a cut line with the aforementioned caliper and miter with a simple hole saw.

    The issue for me with paper templates for normal miters is that it is easy to have them move or get damaged thus changing the phasing or relationship of your miters to one another. They take time to print and cut out and the resultant angle is not quite as accurate as using a bevel protractor that is designed for this purpose. The total cost of this procedure is the cost of two Paragon tube blocks, a bevel protractor which is a great tool to have around anyways and not particularly expensive and the most expensive piece is the caliper but the usefulness of this item is obvious. It's inexpensive, the tooling is useful for other purposes, its accurate and teaches to the muscle memory necessary to file correctly. I teach all the methods I know about including the paper template method which can be very useful at times (i.e. doing a set of seatstays without any tooling)
    All the best,

    David Bohm
    Bohemian Bicycles

    Facebook www.facebook.com/bohemianbicycles
    Framebuilding courses http://www.framebuildingschool.com
    Carbon framebuilding courses http://www.carbonframebuildingschool.com

  6. #6
    Join Date
    Sep 2011
    Location
    STL
    Posts
    61
    Post Thanks / Like
    Mentioned
    0 Post(s)
    Tagged
    0 Thread(s)

    Default Re: the hand mitering thread

    I work in a tool & die shop and design tools for a living. I own more machine tools than most “pro” builders. I am currently in the middle of my 2nd frame so I am not sure anything I have to contribute would be worth much. I have hand mitered every tube. In fact other than making tooling, my machine tools haven’t been used in the actual “frame making” process at all. Basically did the following.

    1. Find/Mark Center Line
    2. Mark the miter. Either with Paper Template or using the lug as a guide.
    3. “Rough” in with hacksaw. (even though I have a band saw)
    4. “Finish” with file. Check with protractor and square.
    5. Measure length for opposite end. I have been “Transferring” the length off of a full size drawing.
    6. Repeat steps 2,3 & 4. I leave it a bit long.
    7. Test fit in the jig and trim as needed.

    One thing I have been surprised by is how quick you can miter a tube by hand (and how fast you can almost ruin a tube by hand). When I first started I thought for sure you would need a mill (which I have), some hole saws (which are pricey for good ones) and a fancy fixture (which is expensive even if you make it yourself). For one or 2 frames a year for myself I don’t see the need to do it any other way. Heck even if you’re a “pro” builder making a dozen frames a month I’m not sure I see a need. Unless of course you just like machine tools and fancy fixtures (which I do understand cause I like them to).

    Again keep in mind I am only into my 2nd frame so please use the advice accordingly.
    Eric Brandt

    Hobby builder that just likes to make stuff.

    MJB Frameworks
    My Flickr

  7. #7
    Join Date
    Feb 2009
    Location
    Scotland
    Posts
    431
    Post Thanks / Like
    Mentioned
    1 Post(s)
    Tagged
    0 Thread(s)

    Default Re: the hand mitering thread

    One recommendation I would make if mitering by hand (if you're not too experienced) is to do a tube at a time and as much as possible get the tubes into the jig as soon as they're done and use the real world positioning of those tubes to cut the next tubes.

    So get the bb shell and the headtube in the jig, cut and miter the downtube to your length and make sure it fits up nice in the fixture. Because of the difficulty in getting the mitres in phase and the tweaking back and forward, you might end up with a tube that's a little shorter than it should be. If you need to, tweak the fixture so the downtube seats nicely with the BB and headtube (shorten the toptube length). I know this means you're no longer building to the exact spec but if you're a hobby builder, half a mil isn't going to kill anyone. Now do the seattube and get that in the fixture too. Now when you do the top tube, don't just cut it blind to the length and angle it *should* be from your drawing. Take the measurement from the fixture and cut and miter to that.

    If you cut all the tubes at once, you'll need to be sure they are all *exactly* right otherwise you're going to be fiddling back and forward getting everything to play nice.

    BTW, I built probably 70 frames hand mitering but now use a milling machine for almost all our frames.

    Cheers

    Steven
    Steven Shand
    www.willowbike.com
    Handbuilt Bicycles - Scotland, UK

  8. #8
    Join Date
    Feb 2012
    Location
    Des Moines, IA
    Posts
    14
    Post Thanks / Like
    Mentioned
    1 Post(s)
    Tagged
    0 Thread(s)

    Default Re: the hand mitering thread

    Newbie here. I've built 2 frames so far and have much to learn. In previous posts in this thread I've seen mention of finding the "bowed up side", or the "high spot" in the tubes before mitering. I'm assuming this refers to the tubes not being perfectly straight, what I'm not sure about is the reason for marking the tube centerline along this curve. My best guess is that this is done so that the curve is oriented in the vertical plane only, which makes it less visible in the finished frame. Is this correct, or are there other reasons?

    Since I'm posting, I might as well describe my amateurish mitering process:

    1) Scribe a line along the length of the tube using a piece of angle aluminum. This piece of aluminum also has a metric scale attached, so it is also used as a straightedge to measure tube length. For the top tube, the scribe line is on the top. For the DT-HT joint, the scribe line is on the bottom of the DT. For the DT-BB joint, another scribe line is made on the DT 90 degrees to original scribe line. For the ST-BB joint, the scribe line is on the right hand side of the tube.
    2) Mark rough miter outline using lug and fine tip Sharpie marker.
    3) Trim excess material from tube using hacksaw.
    4) Clamp tube to be mitered in vise using tube block. Set angle of tube so that file strokes will be horizontal. For this, I use a digital angle gauge (Wixey WR365).
    5) Complete miter using half round hand files of appropriate size for mating tube. Check progress of miter using the mating tube. The miter is complete when the mating tube rests horizontally (check with digital angle gauge), is perpendicular to vise/workbench in the horizontal plane (check visually), and there is minimal daylight between the miter and the mating tube (check visually).
    6) Repeat process for other side, with the added step of checking length of tube along scribe line during the mitering process.

  9. #9
    Join Date
    Jul 2008
    Location
    Tucson Arizona
    Posts
    429
    Post Thanks / Like
    Mentioned
    0 Post(s)
    Tagged
    0 Thread(s)

    Default Re: the hand mitering thread

    [QUOTE=ScottB;466487]My best guess is that this is done so that the curve is oriented in the vertical plane only, which makes it less visible in the finished frame. Is this correct, or are there other reasons?

    The bow is often not enough to be visible. Some tubes are not bowed at all, some are very bowed. If it is too much that would be a reason to reject the tube in favor of another. Really the main reason is that many people check the alignment of a frame using the outer surfaces of the tube with a height gauge or a scratch gauge and if you have bow and are checking this way you may get a result which would lead you to believe that the frame was off. Aligning the bow in the vertical plane reduces this tendency. There are other ways to confirm alignment but that is another discussion.

    You procedure looks good. If you are filing a 90 degree angle (ST/BB and DT/BB) cuts just set the tube vertical and practice filing level. Many beginners rock their files not creating a level cut or file to one side or another. If this is happening it is often the stance the student is using but much of it is just practice. Although I have a digital gauge I find a bevel protractor along with simple squares to do a superior job. Digitals just are not quite at the same precision or repeatability yet. Stevens comments about fitting up each tube for small adjustments as you go along are spot on. Also, using a well made lug is an excellent way of doing things but my previous comments are geared towards getting the job done even on lugless builds where the angles and tube diameters would not match a current set of lugs.
    All the best,

    David Bohm
    Bohemian Bicycles

    Facebook www.facebook.com/bohemianbicycles
    Framebuilding courses http://www.framebuildingschool.com
    Carbon framebuilding courses http://www.carbonframebuildingschool.com

  10. #10
    Join Date
    Jul 2010
    Location
    40.176726,-75.499322
    Posts
    1,014
    Post Thanks / Like
    Mentioned
    0 Post(s)
    Tagged
    0 Thread(s)

    Default Re: the hand mitering thread

    Not an expert here, but while mitering/checking, I will mark high spots on my miter with a sharpie on the cut face of the tube (the thin bit). I also use a wide sharpie as a poor man's dykem. Takes a scribe mark quite nicely.
    Pete Ruckelshaus * Teacher, Fat Guy on a Bike * Collegeville, PA

    pruckelshaus' flickr
    Framejig.wordpress.com effort to collect DIY framebuilding jig designs

  11. #11
    Join Date
    Jul 2010
    Posts
    26
    Post Thanks / Like
    Mentioned
    0 Post(s)
    Tagged
    0 Thread(s)

    Default Re: the hand mitering thread

    The only thing I can add is to try using tin snips to remove the initial material. I've found it's much faster than a hacksaw, less work and lets me get closer to the final cut line. The steel tubing used in bike frames is thin enough and you can hold the tube in one hand while trimming with the other, which saves time.

  12. #12
    Join Date
    May 2009
    Posts
    1,315
    Post Thanks / Like
    Mentioned
    0 Post(s)
    Tagged
    1 Thread(s)

    Default Re: the hand mitering thread

    Great point.

    These:
    Wiss M6R MetalMaster 1-1/4-Inch Cut Capacity 9-1/4-Inch Left and Straight Cut Offset Snip - Amazon.com

    And these:
    Wiss M7R MetalMaster 1-1/4-Inch Cut Capacity 9-1/4-Inch Right and Straight Cut Offset Cut Snip - Amazon.com

    cut to 2mm from your line, then finish with the file to fine tune and go past any gouges from the shears.

    Quote Originally Posted by tlagosh View Post
    The only thing I can add is to try using tin snips to remove the initial material. I've found it's much faster than a hacksaw, less work and lets me get closer to the final cut line. The steel tubing used in bike frames is thin enough and you can hold the tube in one hand while trimming with the other, which saves time.

  13. #13
    Join Date
    Jun 2008
    Location
    Seattle, WA.
    Posts
    263
    Post Thanks / Like
    Mentioned
    0 Post(s)
    Tagged
    0 Thread(s)

    Default Re: the hand mitering thread

    I've logged a lot of file time over the last 7 years, hand filing miters for stems, frames, racks, a ton of brazing and TIG practice joints and even a cargo trailer, so I've gotten quite comfortable with the techniques involved. It's a good skill to have. I'd say essential actually, if you want to able to "communicate with the metal" you are trying to coax into doing what you want it to do. With the right file, appropriate technique and reasonable amount of patience you can work to very high levels of accuracy. Even machine cut miters often need some touch up plus there are endless times during a build where a few swipes of the file makes something fit just so.

    I think it's natural though, if nothing else just from being curious, to eventually want to explore other ways. I'd say that people who are inclined to want to learn how to build bicycles from scratch are by their nature quite curious, and to varying degrees quite mechanically inclined. Many of us will find machine tools to be inherently fascinating devices so it seems inevitable that they will find their way into some of our shops.

    Recently, I've been mitering tubing stubs for practice TIG joints on a small benchtop mill that I bought a few months back and I have to say that it's nice just to be able to punch out the miter and be done with it in a couple of minutes, so I can spend more time on what I'm actually trying to learn (welding). My spare time is limited plus, my day job is quite a physical one so letting the machine take some of the strain is a welcome change.

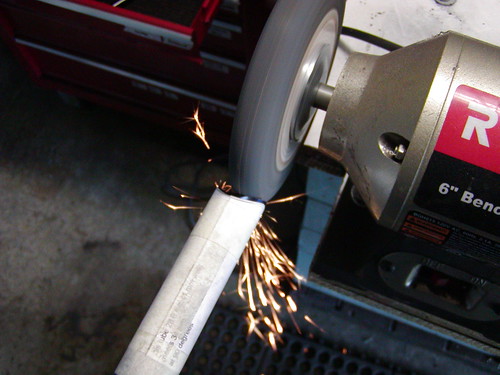
    Getting back to hand mitering, I use a hybrid combination of Dave Bohm's technique and Dave Anderson's. Tubing blocks, miter templates, hacksaw, a profiled bench grinder wheel and finished with a file.

    Alistair.


  14. #14
    Join Date
    Jul 2008
    Posts
    488
    Post Thanks / Like
    Mentioned
    0 Post(s)
    Tagged
    0 Thread(s)

    Default Re: the hand mitering thread

    I'll throw my technique up here too as I think it is a touch different then what I have read so far. I'll also add that I used paper templates for my first 3 frames or so but have since given up on them (even for seatstay miters) for the reasons Dave Bohm mentioned above.

    I miter all tubes one at a time so that everything lays nicely in the frame fixture. I inspect and mark the tubes for bow and draw centerlines with a sharpie and aluminum angle on all but the TT. I am not super anal about these centerlines as I just use them to keep track of the bow and for bottle boss placement. I have only built with lugs so far and a lugged BB shell gives a touch of freedom here. To miter I paint the tube ends with a sharpie and use a lug to scribe a line on the tube. I them rough cut with a hacksaw and file the rest of the way checking periodically with a bevel protractor and a dummy tube. The miters are finished up with some sand paper wrapped around an appropriately sized tube. For the TT I will miter the HT end first, paint it with a sharpie on top and bottom, then lay it on the alignment table with the HT installed to keep things in phase. Now I can drag my machinist square along the tube and get very accurate centerlines on the top and bottom of the TT. I then mark and miter the ST end of the TT, as described previously, and using these centerlines to keep things in phase. I picked this TT centerline marking method up from Dave Kirk.

    Anyway, cool thread idea. I like reading about different methods.
    Jason Henkle
    flickr
    instagram

  15. #15
    Join Date
    Nov 2009
    Location
    Brisbane, Qld. Australia
    Posts
    2,268
    Post Thanks / Like
    Mentioned
    0 Post(s)
    Tagged
    0 Thread(s)

    Default Re: the hand mitering thread

    Still doing my first frame. I used scribed center lines with paper template and sharpie, hacksaw and half rounds. Getting the miters tight I found relatively easy but had trouble getting the phasing on the TT to the level of fit I wanted. Was always just a little out and lost probably a mm in length trying to correct it. That's fine as I can take that up in the ST angle. I was surprised at how quickly I got the first one done. Nervous and exciting cutting into that first tube.
    __________________________________________

    "Even my farts smell like steel!" - Diel

    "Make something with your hands. Not with your money." - Dario

    Sean Doyle

    www.devlincc.com

    https://www.instagram.com/devlincustomcycles/

    https://www.flickr.com/photos/139142779@N05/

  16. #16
    Join Date
    May 2009
    Posts
    1,315
    Post Thanks / Like
    Mentioned
    0 Post(s)
    Tagged
    1 Thread(s)

    Default Re: the hand mitering thread

    How are those using a bench grinder shaping the wheel?

  17. #17
    Join Date
    Jun 2008
    Location
    Seattle, WA.
    Posts
    263
    Post Thanks / Like
    Mentioned
    0 Post(s)
    Tagged
    0 Thread(s)

    Default Re: the hand mitering thread

    Quote Originally Posted by dbohemian View Post
    5. Using layout fluid and a large metric caliper (chinese, costs about 180 dollars) measure length given from CAD drawing

    Dave, do you have a recommended source for that caliper?

    Thanks,

    Alistair.

  18. #18
    Join Date
    Jun 2008
    Location
    Seattle, WA.
    Posts
    263
    Post Thanks / Like
    Mentioned
    0 Post(s)
    Tagged
    0 Thread(s)

    Default Re: the hand mitering thread

    Quote Originally Posted by echelon_john View Post
    How are those using a bench grinder shaping the wheel?

    I use a star wheel dresser

    Alistair.

  19. #19
    Join Date
    Jul 2008
    Location
    Tucson Arizona
    Posts
    429
    Post Thanks / Like
    Mentioned
    0 Post(s)
    Tagged
    0 Thread(s)

    Default Re: the hand mitering thread

    Quote Originally Posted by Alistair View Post
    Dave, do you have a recommended source for that caliper?

    Thanks,

    Alistair.
    Something like this:

    shars.com - 40quot Heavy Duty Vernier Caliper

    Keep an eye out in the monthly special catalogs put out by Enco, MSC etc. They often have them in there. If you can pile on a 20% off coupon or a free shipping coupon, all the better.
    All the best,

    David Bohm
    Bohemian Bicycles

    Facebook www.facebook.com/bohemianbicycles
    Framebuilding courses http://www.framebuildingschool.com
    Carbon framebuilding courses http://www.carbonframebuildingschool.com

  20. #20
    Join Date
    Jun 2008
    Location
    Seattle, WA.
    Posts
    263
    Post Thanks / Like
    Mentioned
    0 Post(s)
    Tagged
    0 Thread(s)

    Default Re: the hand mitering thread

    Quote Originally Posted by dbohemian View Post
    Something like this:

    shars.com - 40quot Heavy Duty Vernier Caliper

    Keep an eye out in the monthly special catalogs put out by Enco, MSC etc. They often have them in there. If you can pile on a 20% off coupon or a free shipping coupon, all the better.

    Thanks Dave. Do you scribe a line directly with the jaws of the caliper, or do you use an actual scriber? I know it's not proper practice to use caliper jaws as scribers, but with cheapo calipers I do it anyway. I'm wondering if those squared off jaws actually let you make a scribe line in the layout fluid?

    Alistair.

Page 1 of 3 123 LastLast

Similar Threads

  1. Seatstay Mitering Fixture on a drill press?
    By echelon_john in forum The Frame Forum@VSalon
    Replies: 7
    Last Post: 10-21-2012, 12:10 PM
  2. Photos of main tube mitering fixtures for bridgeport
    By Adam Eldridge in forum The Frame Forum@VSalon
    Replies: 24
    Last Post: 10-05-2012, 09:30 PM
  3. FS: Home made main tube mitering system
    By RCP FAB in forum The Frame Forum@VSalon
    Replies: 4
    Last Post: 07-30-2012, 06:50 PM

Bookmarks

Bookmarks

Posting Permissions

  • You may not post new threads
  • You may not post replies
  • You may not post attachments
  • You may not edit your posts
  •